Import or export MS Excel files
by Intuit• Updated 3 weeks ago
Learn how to import and export QuickBooks data with MS Excel files.
You can import and export various list and transaction types to and from QuickBooks Desktop using different file formats.
Import Excel files
You can import Customer, Supplier, Items, and Chart of Accounts from an Excel spreadsheet. There are several options available when importing Excel files from QuickBooks.
This option allows you to add and edit multiple customers, suppliers, and items. This is for list information (name, description, etc.) and cannot be used to import transactions (invoices, bills, etc…).
- From the Lists menu, select Add/Edit Multiple List Entries.
- Select the List dropdown and choose the list you want to work with.
- Filter the list to see a particular record.
- (Optional) Select the Customise Columns button to choose which columns you want to see in the Add/Edit Multiple List Entries window. This way, you can easily work on the columns you need. Select the Default button to return to the preset columns for the list.
- To add: from the left pane, select a column and select Add.
- To remove: from the right pane, select a column and select Remove.
- To rearrange the column order: from the right pane, select the column and select Move Up or Move Down.
- Select Ok.
Note: Columns such as customer or supplier name are required and cannot be removed. You can only change their order.
- Add or edit the entries by clicking the appropriate fields. Note that you can copy (Ctrl+C) data from Excel and paste (Ctrl+V) it into this window. You can also Copy down and Duplicate rows (highlight any field and select Copy Down and Duplicate Row)
- Select Save Changes.
After saving your changes, you will receive a warning telling you the number of records saved. QuickBooks will also tell you if there are errors that need to be fixed.
To fix the errors:
- Click or hover your mouse in any field to see what the error is.
- Update the record to fix the errors.
- Select Save Changes and repeat the process until all errors are fixed. Note that if you don’t want to fix an error, you can save the changes you’ve made so far and select Close without making further changes. QuickBooks will not save changes that contain errors.
Step 1: Turn on stock preferences
Step 2: Set up accounts in your data file
Step 3: Create your data with the following for each item:
Step 4: Create the spreadsheet
Step 5: Prepare to import
Step 6: Import the spreadsheet
For customers, suppliers, and other lists data
Export Excel files
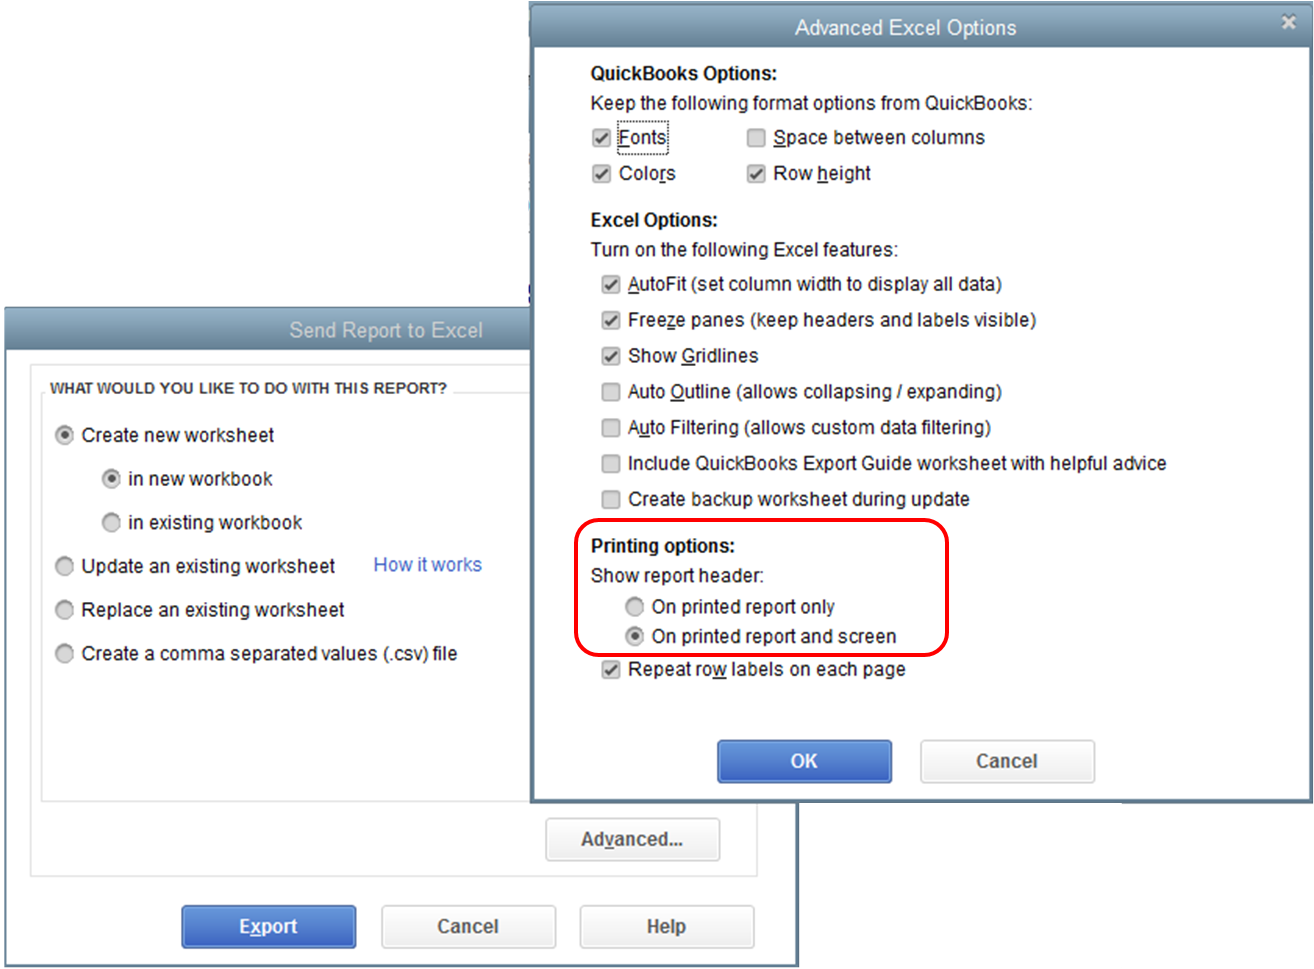
You can export Customer, Supplier, Payroll lists and transactions, as well as Items list into an Excel spreadsheet. If you need to change a report’s appearance or contents in ways that are not available in QuickBooks, you can also export reports and customise it in Excel without affecting your QuickBooks data.
Sign in now for personalized help
See articles customized for your product and join our large community of QuickBooks users.
More like this
- Export your reports to Excel from QuickBooks Onlineby QuickBooks•71•Updated 2 weeks ago
- Export customer data to Excelby QuickBooks•39•Updated 1 week ago
- Format CSV files in Excel to get bank transactions into QuickBooks Onlineby QuickBooks•440•Updated 4 weeks ago
- Which contact fields are imported from Excel?by QuickBooks•40•Updated 1 day ago
- Import multiple invoices at once in QuickBooks Onlineby QuickBooks•158•Updated 7 days ago