Learn what Errors H202 and H505 are and what to do if you see them in QuickBooks Desktop.
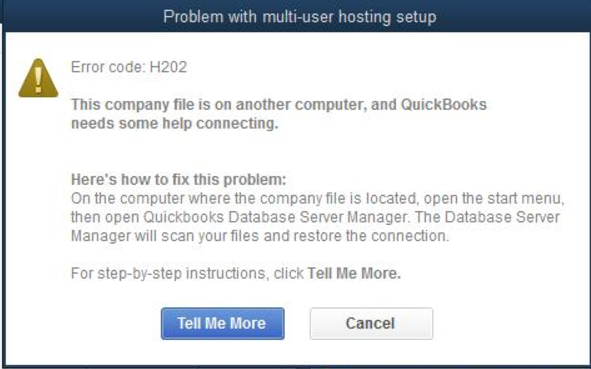
If you see Error H202 or H505 (or H101 and H103) when you switch to multi-user mode, we’re here to help. These errors mean something is blocking the multi-user connection to your server. We'll show you how to fix the issue.
Using another hosting solution
If you use another solution like Enterprise Hosting through Right Networks, or one of our affiliated Intuit Hosting Providers, contact them directly. You’ll need to work with them as you troubleshoot.
| Important: The QuickBooks Database Server Manager doesn't support devices like Network Attached Storage (NAS). |
Host your own network with Windows Server 2012 Essentials R2
Follow these steps if you use Windows Server 2012 Essentials R2, to host your network.
Fix Error H202
How you host your company files
Host your own network
If you haven’t already, follow the steps to install QuickBooks Database Server Manager on your server for each version of QuickBooks you use. Your server is the computer that hosts your company files. After you install Database Server Manager:
There are two ways to set up QuickBooks Database Server Manager:
- The Full Program option: You install the full version of QuickBooks Desktop and Database Server Manager on your server computer.
- The Server Only option: You only install Database Server Manager on your server computer.
Run the QuickBooks Database Server Manager on your server with the QuickBooks Tool Hub
Step 1: Download and install the QuickBooks Tools Hub on your server
The QuickBooks Tool Hub helps fix common errors. You'll need to close QuickBooks to use the tool hub. For the best experience, we recommend you use Tool Hub on Windows 10, 64-bit.
- Close QuickBooks.
- Download the most recent version (1.6.0.3) of the QuickBooks Tool Hub. Save the file somewhere you can easily find it (like your Downloads folder or your Windows desktop). Note: If you've installed Tool Hub before, you can find out which version you have. Select the Home tab. The version will be on the bottom.
- Open the file you downloaded (QuickBooksToolHub.exe).
- Follow the on-screen steps to install and agree to the terms and conditions.
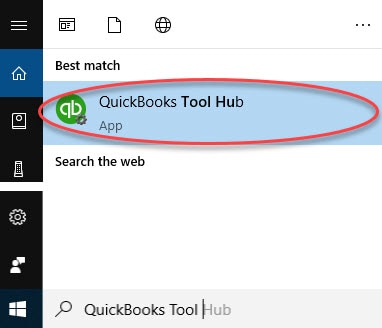
- When the install finishes, double-click the icon on your Windows desktop to open the tool hub.

Note: If you can't find the icon, do a search in Windows for QuickBooks Tool Hub and select the program.
Step 2: From the Tool Hub, run the QuickBooks Database Server Manager on your server
Your server computer is the one that stores your QuickBooks company file(s). Your other computers connected to your network are your workstations.
- From the QuickBooks Tools Hub, select Network Issues.
- Select QuickBooks Database Server Manager. If QuickBooks isn’t on your server, it'll prompt you to install it.
- Inside the QuickBooks Database Server Manager, select Start Scan if you see your company file folder(s). If you don't, Browse to the location of your company file and then select Start Scan.
- QuickBooks Database Server Manager repairs your firewall permissions automatically. When the scan finishes, select Close.
- Open QuickBooks on each workstation where you see Error H202. Select File, then Switch to Multi-user Mode. If you use your server computer as a workstation, be sure to check it too.
Step 3: From the Tool Hub, run the File Doctor
- From the tool hub, select Company File Issues.
- Select Run QuickBooks File Doctor. It can take a minute for it to open. Note: If the QuickBooks File Doctor doesn't open, search for QuickBooks Desktop File Doc and open it manually.
- In QuickBooks File Doctor, select your company file from the dropdown menu. If you don’t see your file, select Browse and search for your file.
- Select Check your file and Network (top option) and then Continue.
- Enter your QuickBooks admin password and then select Next.
If your workstations can go into multi-user mode without any issues, everything is fixed.
If you still see Error H202, continue to our other solutions.
Fix Error H202 manually
Solution 1: Check the services on your server
Important for the Full Program option: If you use the full version of QuickBooks on your server computer, first turn on multi-user hosting.
|
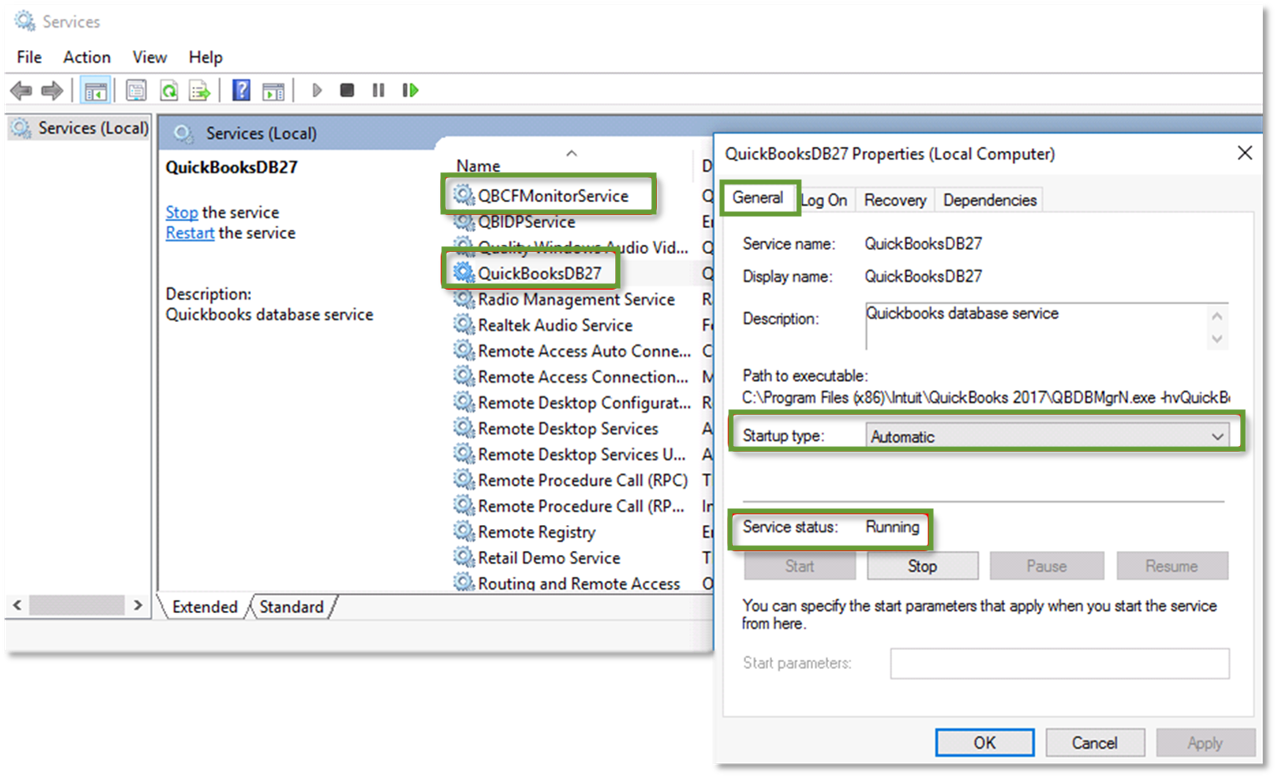
Make sure QuickBooks services are running on your server computer. Follow these steps to check QuickbooksDBXX. Then repeat them for QBCFMonitorService.
- Open the Windows Start Menu on your server computer.
- Enter “Run” into the search and open Run.
- Enter “services.msc” into the Run window, then press Enter.
- Find and double-click QuickBooksDBXX on the list. XX notes your version of QuickBooks plus 10. Example: QuickBooks 2023 is QuickBooksDB33.
- Select Automatic for the Startup Type.
- Make sure the Service status is either Running or Started. If it’s neither, select Start.
- Select the Recovery tab.
- Select Restart the Service from each of these dropdown menus: First failure, Second failure, and Subsequent failures.
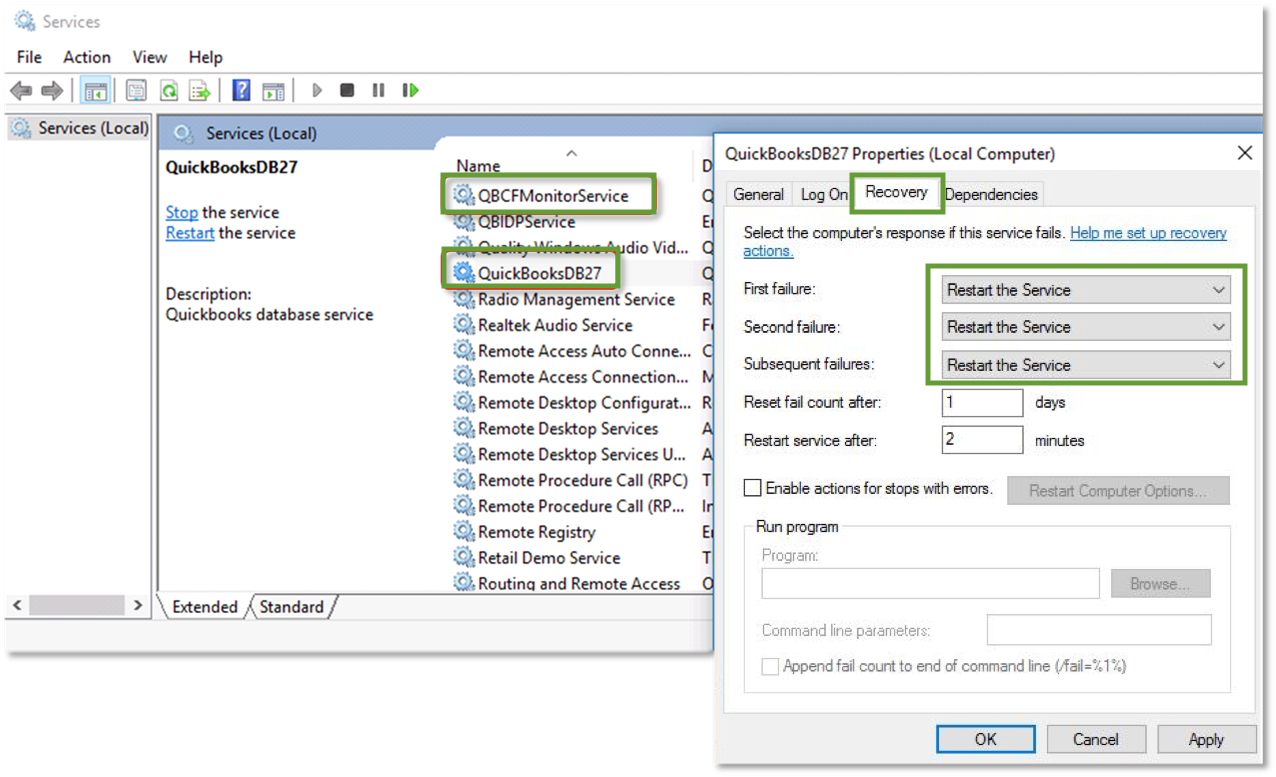
- Select Apply and then select OK to save the changes.
- Repeat these steps for QBCFMonitorService.
When you’re done, open QuickBooks on each workstation. Go to the File menu and select Switch to Multi-user Mode. If everything opens correctly, the problem is fixed.
If you still see Error H202, move on to Solution 2.
Solution 4: Ping your server from a workstation
Ping your server from a workstation to check the connection. Ping your server from each workstation getting Error H202.
To start, turn on Network Discovery on your server computer and any workstations with Error H202:
- Open the Windows Start menu on your server and workstations.
- Enter “Network” into the search and open Network and Sharing Centre.
- Select Change advanced sharing settings.
- Make sure Turn on network discovery is selected in the Network Discovery and File and Printer sharing sections.
Next, get your server name from your server:
- Open the Windows Start menu on your server computer.
- Enter “Run” into the search and open Run.
- Enter “CMD” into the Run window, then press Enter.
- Enter “ipconfig/all” into the CMD window, then press Enter.
- Find the Host Name in the Windows IP Configuration section. Your server name is on the right.
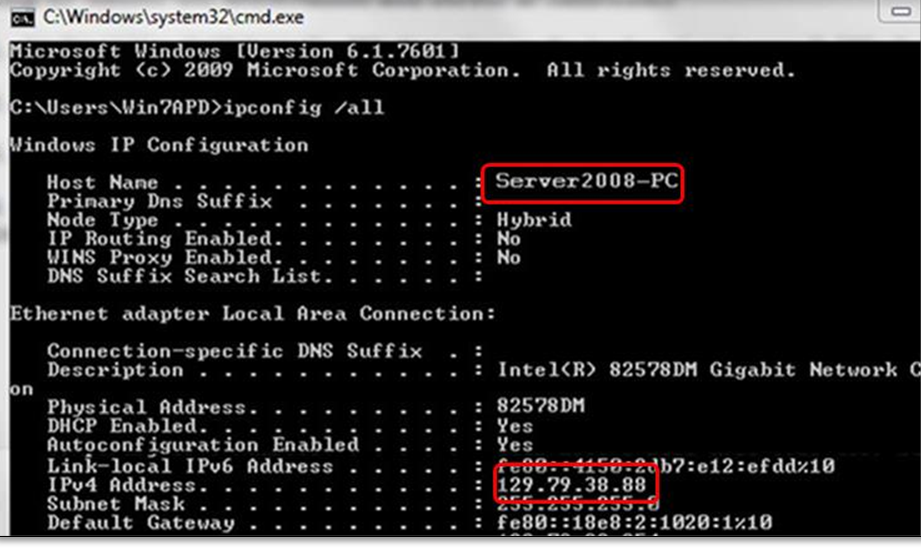
- Write down the host name, or copy it to a word document so you can access it quickly.
Go back to your workstation to test the server. These steps can get complex, so you may want to reach out to an IT professional for help.
- Open the Windows Start menu from a workstation.
- Enter “Run” into the search and open Run.
- Enter “CMD” into the Run window, and then press Enter.
- Enter “ping [your server name],” and then press Enter. Don’t include the brackets around your server name.

- Repeat these steps for each workstation that gets Error H202.
If you get a reply for each packet with no loss, your server is working fine. Move on to Solution 5.
If there’s packet loss or a very slow reply, stop. Reach out to an IT professional for help with your network.
Fix Error H101, H303, and H505
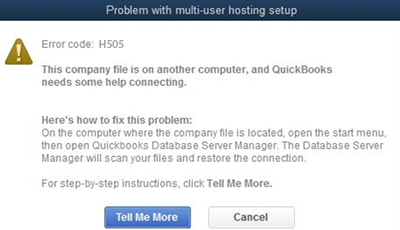
If you see Error H101, H303, or H505, one or more of your workstations is set to be the server for QuickBooks. Your server (the computer that hosts your company files) should be the only computer set to host multi-user mode.
The Host Multi-User Access option should be turned off on your workstations. These are the computers on your network that don’t host your company files. Your server computer should be the only one hosting.
| Note: You can do these steps before opening a company file. |
- Open QuickBooks on any workstation where you see H101, H303, or H505.
- Don't open your company file. Instead, select File, then Utilities.
- If you see the Host Multi-User Access option, don’t select it. Move on to the next workstation. This one isn’t causing the problem.
- If Stop Hosting Multi-User Access is an option, select it.
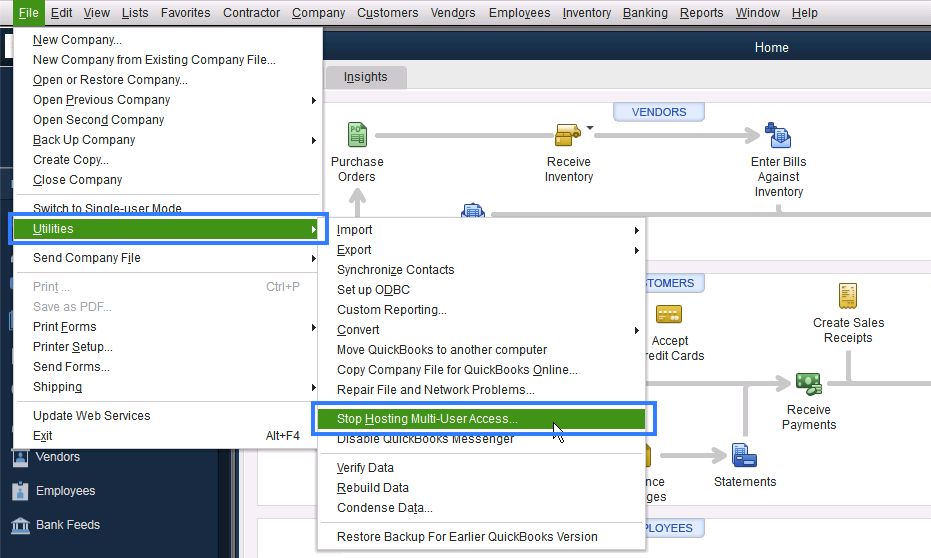
- Repeat these steps on all workstations where you see Error H101, H303, or H505.
After you check your workstations, move on to your server computer. This is the computer that normally hosts your company files.
- Open QuickBooks on your server computer.
- Select File, then Utilities.
- If Host Multi-User Access is an option, select it. If Stop Hosting Multi-User Access is an option, don’t select it.