While scrolling through the invoices, it is easy to overlook those that are past their payment dates. Showing a “Past Due” stamp helps you identify these invoices so you can take action and minimize delayed collection of dues.
You can also email and print these invoices with the stamp to send to your customers.
|
This feature is available in QuickBooks Desktop for Windows 2018 and later, and QuickBooks Desktop for Mac 2019. |
QuickBooks Desktop for Windows
Add the Past Due stamp on invoices
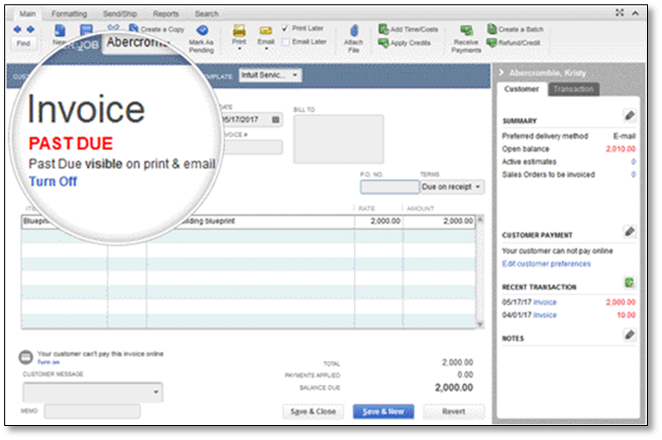
Important: The "Past Due" stamp can only be turned on or off on a template level setting.
Add the Past Due stamp from the Templates list
- Go to Lists > Templates.
- From the list, find and edit the invoice template you use for collections.
- From the "Company & Transaction Information" section, select Print Past Due Stamp.
- Select OK.
- Open an invoice that is past its due date. The PAST DUE stamp shows on the invoice.
- You may print the invoice or send it through email.
Add the Past Due stamp directly from the invoice
- Open an invoice past its due.
- Select Formatting, then choose Manage Templates.
- Select the invoice template you want to use and select OK.
- From the "Company & Transaction Information" section, select Print Past Due Stamp.
- Select OK.
- You may print the invoice or send through email with the PAST DUE stamp.
Turn off the Past Due stamp
- If you are on the "Basic Customization" window, uncheck the Print Past Due Stamp box.
- If you have the past due invoice open, simply select the Turn Off link to remove the "Past Due" stamp.
QuickBooks Desktop for Mac
Add the Past Due stamp on invoices
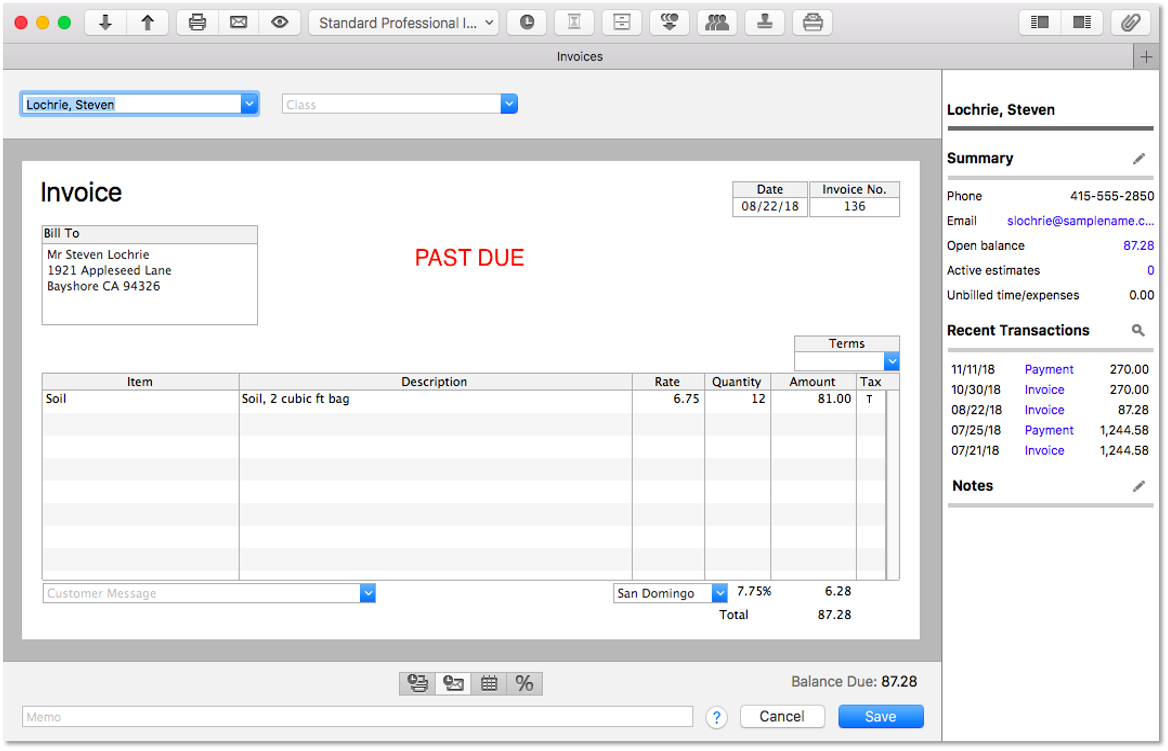
Important: The "Past Due" stamp can only be turned on or off on a template level setting.
- Open an invoice past its due.
- At the top, select the templates drop-down, then Edit Current Template.
- In the Layout Designer, select Fields.
- Select the Print tab.
- Choose the size of the PAST DUE stamp.
- Exit out of the Layout Designer, then select Save.
- You may print the invoice or send through email with the PAST DUE stamp.