Turn on Import Bills
- Select the Gear icon and choose QuickBooks Labs.
- On the right side of Import Bills, select On.
- Select Done at the bottom right of the page.
- Select the Gear Icon, under Tools select Import Data, then Import Bills.
Note: Once Import Bills is turned on, you can also access this tool by selecting Expenses tab, Expenses then Import Bills.
What can I import into QuickBooks?
- Bills can be imported with multiple line items OR as a total value for each bill.
- When Bills have multiple line items please ensure each line entry specifies the Bill Number, Supplier, Bill Date etc, as seen in the example CSV file.
- The process also allows you to import and auto create new suppliers that don't exist in QuickBooks. Note, the article Import customer, supplier, or supplier contacts from Outlook, Excel or Gmail should be used if importing a large number of new suppliers.
Note: We recommend that no more than 100 Bills are imported at any one time.
Capabilities & limitations
- Bills require at least one line item.
- Multi-currency is not supported at this time, meaning companies with multi-currency switched on will not be able to access this tool yet.
- Adjustment notes and negative amounts in general are not supported.
- Line [item] Accounts will need to be present in QuickBooks before importing.
- Notes for GST:
- If GST is not applicable/set up in QuickBooks then GST codes and GST amounts are not required
- If GST is applicable then GST coding will be required
- QuickBooks will calculate GST based on the GST code IF no GST amount is specified
- When a GST amount is specified, the amount will override any calculation that would normally be made by QuickBooks. This allows for any rounding differences between QuickBooks and other 3rd party applications.
- To retain Bill numbering in your csv file, please ensure Custom Transaction Numbers is switched ON
- Select the Gear icon at the top, then Account and Settings (or Company Settings).
- Select Sales tab, navigate to the Sales Form Content
- Click on the edit icon and change Custom Transaction Numbers from Off to On using the checkbox and select Save
Importing Your Bills
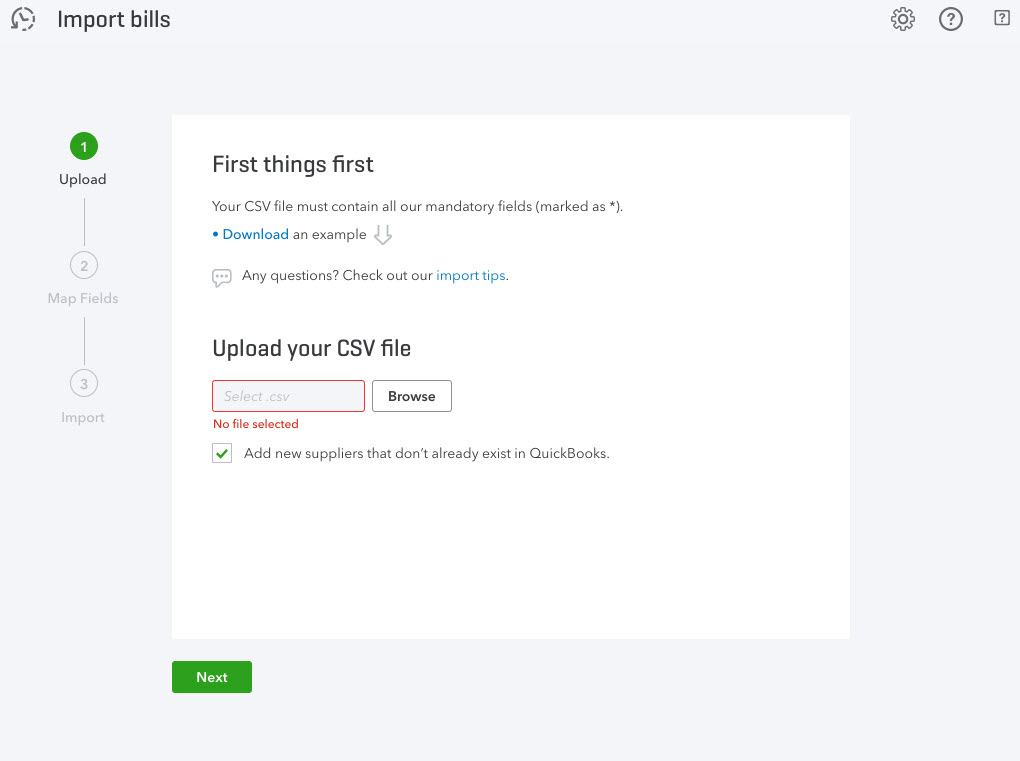
Step 1: Upload Your CSV File
- Please Preview what's required to import bills. There is also an example data file available .
- Once you're happy you have all the mandatory fields, please Browse & select your .csv file.
- Note: you are required to populate the Line Account field even if you are only in importing bill totals.
- Next you have the option to auto create any new suppliers that are not in QuickBooks Online. If you would like to auto create suppliers then please tick the checkbox and select Next.
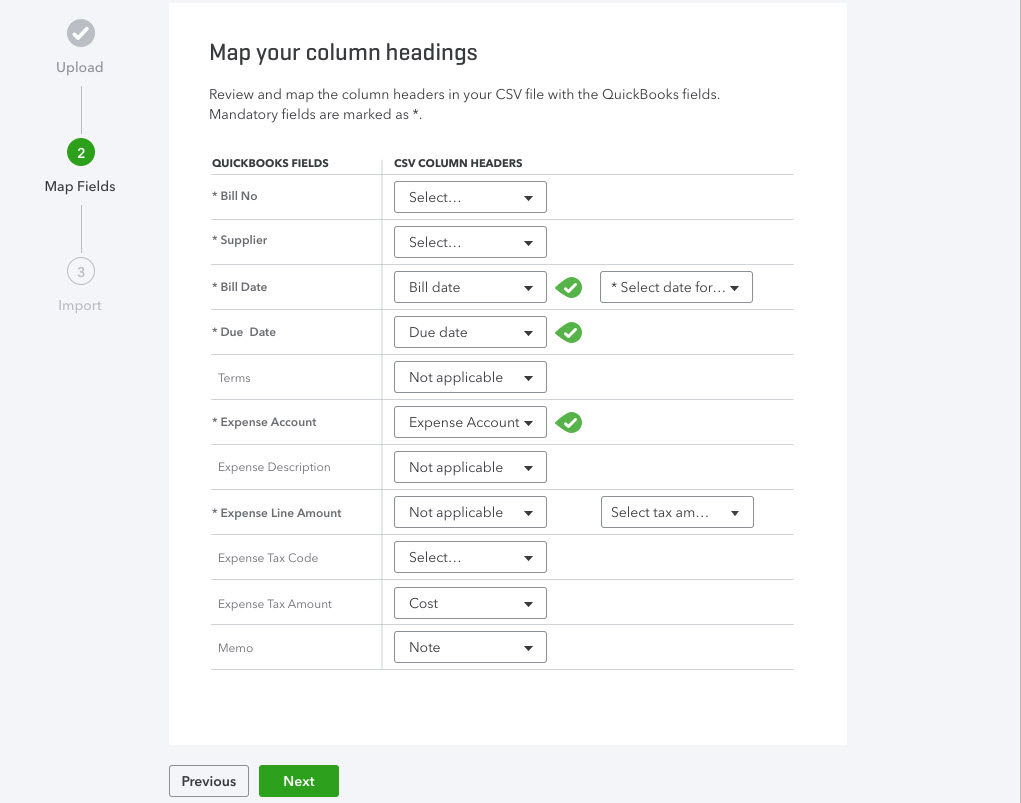
Step 2: Map Column Headings
- Note mandatory fields are marked as *.
- Select the date format you have used, e.g. DD/MM/YYYY
- Select your GST option if applicable; Exclusive or Inclusive (option not available if GST is not set up in QuickBooks)
- On the final mapping page please map your GST codes to those of QuickBooks, then select Next.
- At this stage any mapping issues will be highlighted so you can go back and resolve them.
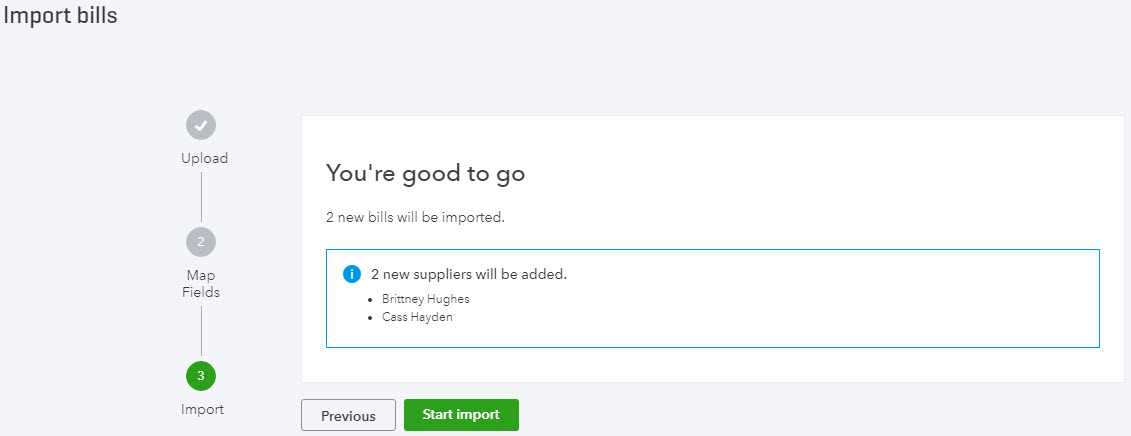
Step 3: Import Bills
- Mapping completed, you will see a summary of your import as shown below. Select Start Import and the import process will begin.
- Once completed, an import summary will be displayed. Note any bills that didn't import and why, then select Done and you'll be greeted with a final completion summary, select OK to finish.