Learn how to remove your customer’s card information in QuickBooks Payments.
In QuickBooks Payments, you can’t delete your customer’s credit card information—you can only edit them. If the customer is no longer doing business with you and would like you to stop charging the card, you have 2 options to avoid charging your customer’s card:
Replace with a non-transacting card number
- Go to Customers & leads, then select Customers (Take me there).
- Select the customer name, then Edit.
- Go to the Payments section.
- Select the credit card number under the Preferred payment method field.
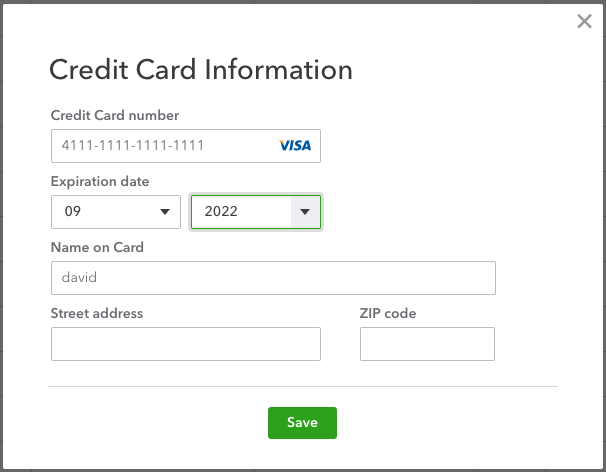
- On the Credit Card Information window, select Add.
- Change the following:
- Credit card number: 4111-1111-1111-1111. This is a non-transacting test card number.
- Expiration date: Any date in the future.
This overwrites your customer's saved credit card info.
Merge with a customer account without credit card info
- Create a new customer account.
- Go to Customers & leads, then select Customers (Take me there).
- At the upper right, select New customer.
- Enter the same information as the original customer account except the Payment and billing info.
- Add 1 to the name in the Display name as field.
- Original customer account - John Doe
- New customer account - John Doe1
- Select Save.
- Rename and merge the original customer account with the new one.
- Go to Customers & leads, then select Customers (Take me there).
- Select the original customer account, then Edit.
- Add 1 to the name in the Display name as field.
- Select Save.
- On the Please Confirm window, select Yes to merge the accounts.
This deletes the original customer account with the credit card info which appears in the list of deleted customers.
- Rename the merged account to the original name.
- Go to Customers & leads, then select Customers (Take me there).
- Select the new customer account, then Edit.
- Remove 1 from the name in the Display name as field.
- Select Save.