QuickBooksHelp
Intuit

Customize reports in QuickBooks Online

Learn how to get the most out of your financial reports.

Financial reports in QuickBooks give you tons of great info about your business. There are many ways to customize your reports. Filter them to show specific accounts or customers, or format the layout so the right data shows up in the right place. Here's how to customize reports and focus on the details that matter the most to you.

To watch more how-to videos, visit our video section.

Step 1: Run a report

  1. Go to Business overview then select Reports (Take me there), or go to Reports (Take me there).
  2. Find and open a report. Tip: If you have QuickBooks Online Essentials, Plus, or Advanced, you can also run "Detail" versions of standard reports.
  3. Use the basic filters on the report to adjust things like the report dates.
  4. Select Customize.

This opens the customization window.

Step 2: Customize a report

You can apply multiple filters to customize your report. Most reports have the same set of filters. Some filters are only available on certain reports.

Here's an overview of what you can customize:

  • General section: Change things like the accounting method, reporting period, and number format.
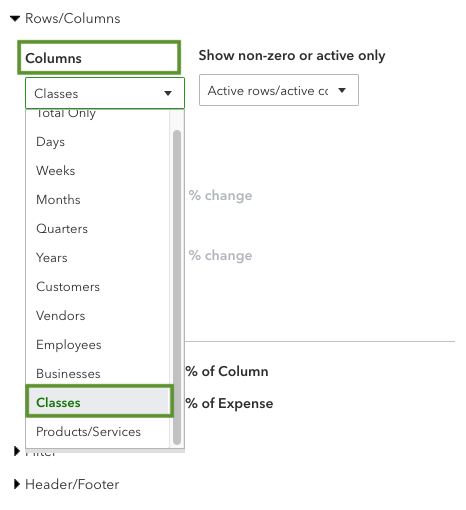
  • Rows/Columns section: Choose which rows and columns appear on the report.
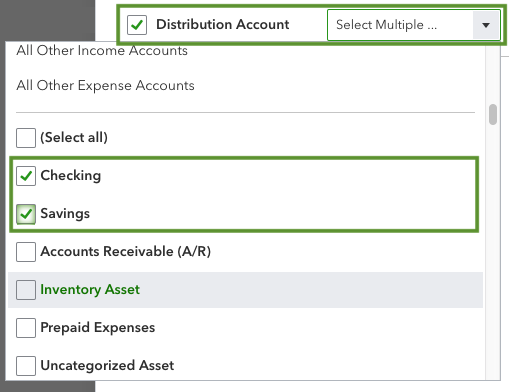
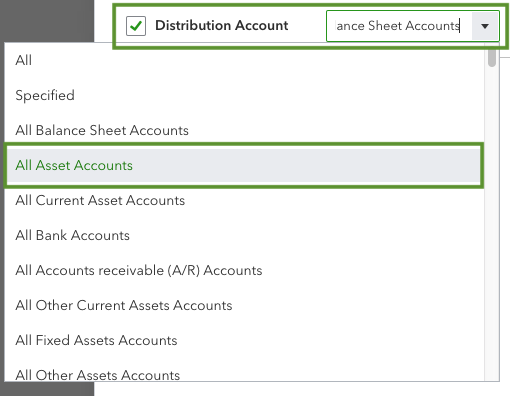
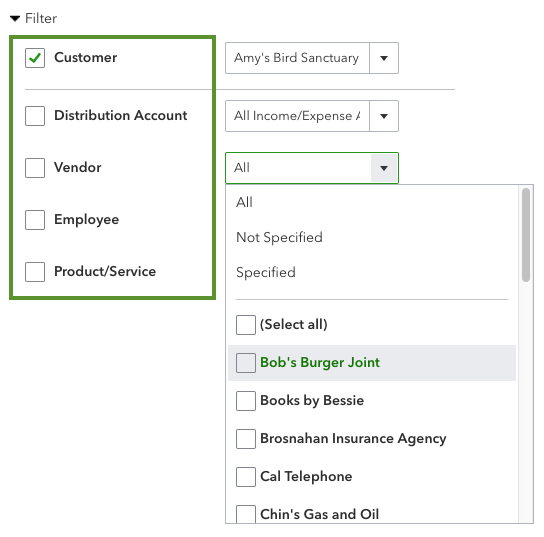
  • Filter section: Select which customers, distribution account, vendors, accounts, and products appear on the report.
  • Header/Footer section: Decide what appears in the header and footer.

Save custom reports

Once you have the perfect set of filters, save them so you can run the same report in the future.

  1. After you customize a report, select Save customization.
  2. Give your report a name.
  3. Select Save.

Step 3: Manage and automate custom report

See all of your custom reports

  1. Go to Business overview then select Reports (Take me there), or go to Reports (Take me there).
  2. Select the Custom reports tab.
  3. Find and open a report.

Automate custom reports

If you want to get custom reports on a regular basis, schedule them to run automatically:

  1. Go to Business overview then select Reports (Take me there), or go to Reports (Take me there). Then select the Custom reports tab.
  2. Find your custom report on the list.
  3. Select Edit from the Action column.
  4. Select Set email schedule to turn it on.
  5. Add the email addresses of who you want to send the report to.
  6. Fill out the form and set the schedule.
  7. Select Save and close.

Show custom reports to specific groups

You can also add reports to a group so only certain people can view it.

  1. After you create a custom report, select Save customization.
  2. From the Add this report to a group dropdown menu, select a group.
  3. Select Save to add the report to the group.
  4. Go to the Reports menu. Then select the Custom reports tab.
  5. Find the group on the list.
  6. Select Edit from the Action column.
  7. Select the Set email schedule option to turn it on.
  8. Add the email addresses of who you want to send the report to.
  9. Fill out the form and set the schedule.
  10. Select Save and close.

Delete a custom report from a group

You can also delete reports from a group.

  1. Go to Business overview then select Reports (Take me there), or go to Reports (Take me there). Then select the Custom reports tab.
  2. Find the group on the list.
  3. Select Edit from the Action column for the report you want to delete.
  4. Select Delete and Yes.

Note: This feature is not available on QuickBooks Online Simple Start. 

Export a custom report in Excel or PDF format 

You can export a custom report in Excel or PDF format.

  1. Go to Business overview then select Reports (Take me there), or go to Reports (Take me there). Then select the Custom reports tab.
  2. Find the custom report on the list.
  3. Select Edit from the Action column for the report you want to export.
  4. Select Export As PDF or Export As Excel.

The report is exported in the pdf or excel format.

Step 4: Share custom reports

You can quickly share PDFs of reports over email. This is the easiest way to share with your team:

  1. On an open report, select the email icon.
    This shows the icons available at the top of a report. Select the email icon to send the report as a pdf in an email.
  2. Select Email.
  3. Fill out the form.
  4. Edit the body message so recipients know what to expect.
  5. When you're ready, select Send.

The reports can be shared in excel format. 

Share edit access with team members

If you want to give other file users full access to edit custom reports:

  1. On an open report, select Save customization.
  2. Select a user from the Share with dropdown menu.
  3. When you're ready, select Save.

Important: Only share reports once. If you share the same report multiple times with users who already have access, you may create duplicate reports.

Next steps: Do more with custom reports

Learn how to get more info out of your custom reports in QuickBooks Online.

Connect with our community of experts to learn how others customize their reports.