If your employees have issues seeing or opening your emails:
- Mark as New
- Bookmark
- Subscribe
- Permalink
- Report Inappropriate Content
Email pay stubs from QuickBooks Desktop
Save time by emailing pay stubs to your employees.
Instead of sending paper pay stubs, you can send your employees digital copies. QuickBooks Desktop delivers each pay stub as a PDF to your employee’s email address. And it's password protected.
There’s no need to print out anything, worry about printer cartridges, or wait for the mail. You and your employees can keep all your records digital. As an alternative, you can let your employees access their pay stubs and W-2s through the web.
Step 1: Update QuickBooks
Make sure QuickBooks is updated to the latest release.
Also check if you have the latest version of Adobe Acrobat Reader. QuickBooks uses Adobe to convert pay stubs into PDFs
Step 2: Check your email settings
This pay stub feature isn't turned on by default. You'll need to turn it on before you can email pay stubs.
- In QuickBooks, go to the Edit menu and select Preferences.
- Select the Send Forms menu and then the My Preferences tab.
- In the Send email using section, select one of the options:
- If you use Gmail, Yahoo, or similar email services, select Web Mail.
- If you use Microsoft Outlook, select Outlook. If you don't see the Outlook option, here's how to set it up.
- If you want to use the QuickBooks email service, select QuickBooks Email. If you haven't already, here's how to set up your email service.
- When you're done, select OK.
Step 3: Email pay stubs
- To start, go to the File menu and select Switch to Single-user Mode. If you see "Switch to Multi-user Mode," don't select it. You're already in Single-user Mode.
- Go to the File menu again and hover over Print Forms. Then select Pay Stubs.
- Select the Bank Account you use for payroll.
- Set the date range for the pay stubs you want to email.
- Select the employees you want to email pay stub to. You can also select and remove the checkmark next to an employee's name if you don't want to include them.
Important: Make sure there are no parentheses or brackets in your employee's last name. If there are, they won't be able to open the email. - Select Preview to review each pay stub before you send them. Then select Email.
- QuickBooks automatically generates a password for each employee and email. Take note of the passwords so you can give them to the recipients. Select OK twice to confirm.
- Enter each employee's email address one at a time. You'll have a chance to review them again at the end.
- Review the email in the Send Forms window. You can edit the To and From fields, subject line, and the email body. You can also select one of your email templates.
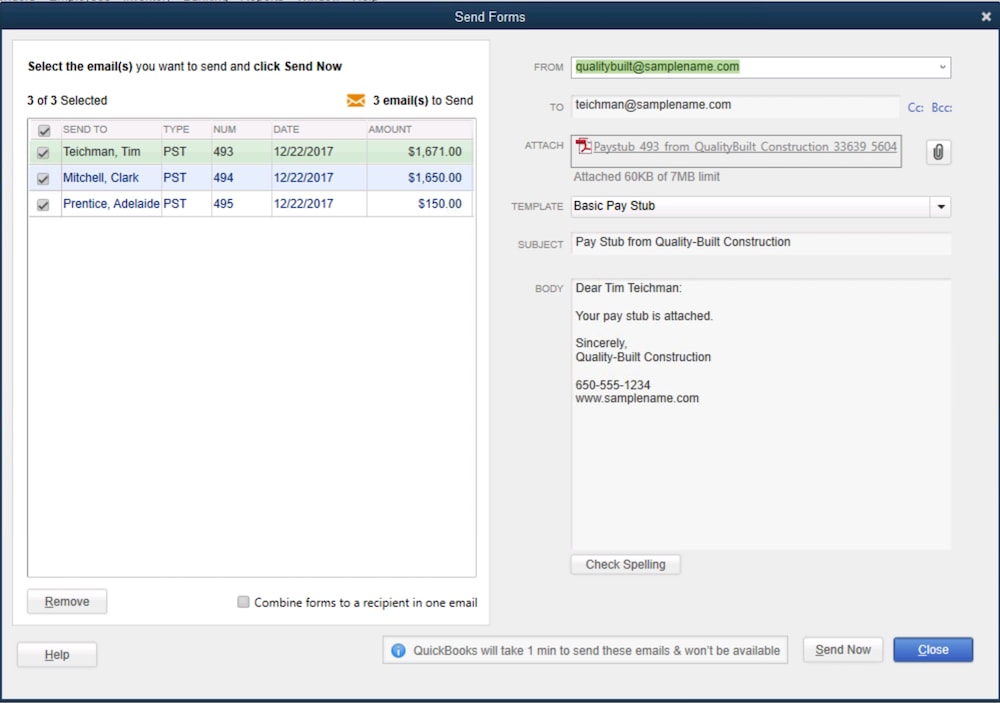
- When you're ready, select Send Now.
If your employees don't get their pay stubs
- Send test emails to yourself. This tells you if there's a problem with your email service.
- Ask your employees to check their email spam folders and filters that might block emails.
- Make sure employees enter the correct password. If they still can't open the email, here's how to fix your webmail password.
