Sometimes invitations can get misplaced. First, have the user check their junk folder. If the invitation is not in their junk folder, get them to add Intuit's service email addresses in their email's list of accepted senders.
- Mark as New
- Bookmark
- Subscribe
- Permalink
- Report Inappropriate Content
Add and manage users in QuickBooks Online
Learn how to add, manage, or delete user profiles.
QuickBooks Online lets you add users who help with your company's bookkeeping. You can give each user certain permissions to do specific tasks. Your subscription level determines how many users you can add. Here's how to add or edit users in QuickBooks.
Tip: To give an accountant access to review your QuickBooks company, you can invite them as a firm user.
Add a QuickBooks Online user
Step 1: Invite your new user
- Select Settings ⚙, then Manage users. If you can’t select this, you don’t have permission to manage other users. Contact an admin user for help.
- Select Add user.
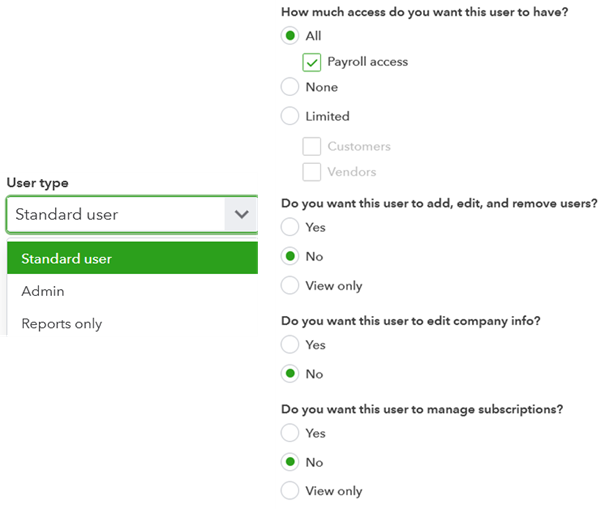
- Select the user type you want to create. More options will appear on the screen depending on the user type you select.
- Enter your new user’s name and email address, then select Save.
Seeing a user limit?
If you see a user limit message, it’s because QuickBooks Online has a maximum number of users depending on your subscription. Learn about limits and what you can do to add a user.
Step 2: Have your user accept the invite
Your new user will quickly get an email from quickbooks-email@intuit.com. It has your business’s name and a message that includes “Ready to get started? Let's go!"
Have your new user select the "Let’s go!" link in the email, which takes them to a sign in or account creation page. They need to sign in or enter info to create a new account.
Note:If your user sees a sign-in page and isn't sure why, it’s because their email address is already used with an Intuit account. This could be for a different product. It’s fine for them to sign in with that email address if it’s theirs. If they’re not sure how, they can select I forgot my user ID or password at the bottom of the screen.
Manage user role or permissions
- Select Settings ⚙.
- Select Manage users.
- Find the user you want to edit. Then select Edit in the Action column.
- You can change the User type ▼.
- Select the user settings you want to manage (if applicable).
- Select Save.
- Ask the user to sign out and sign in again into QuickBooks Online to see the updates.
You can't edit the Time tracking only roles. Instead, delete them, then add them again with the correct role.
Delete a user
When you delete a user it’s permanent. But you can still view their history in the audit log.
- Select Settings ⚙.
- Select Manage users.
- Find the user you want to delete. Then select the arrow icon ▼ in the Action column.
- Select Delete.
- In the confirmation window, select Delete again.
Note: If the user you are trying to delete is an Admin user, ensure you have also removed their payroll access.
FAQs
Frequently asked questions about adding, deleting, and changing user access.
How many users am I allowed to have?
It depends on your subscription. For more information on user limits, see How many users can I set up?
Does the invitation to my new user expire?
Yes, invitations expire after 48 hours.
My user did not accept the invitation within 48 hours, what should I do?
We can fix this! Do not resend the invitation if it has expired. Instead, delete the user and add them again. When you add the user again, a new invitation will be sent.
Follow the steps above to delete and add a user.
I am seeing an error message when I try to add a user
QuickBooks Online uses browser cache and cookies to run faster. But sometimes these can also block web pages from loading. If you're experiencing issues when you add a user, clear your cache and cookies.
Labels:
