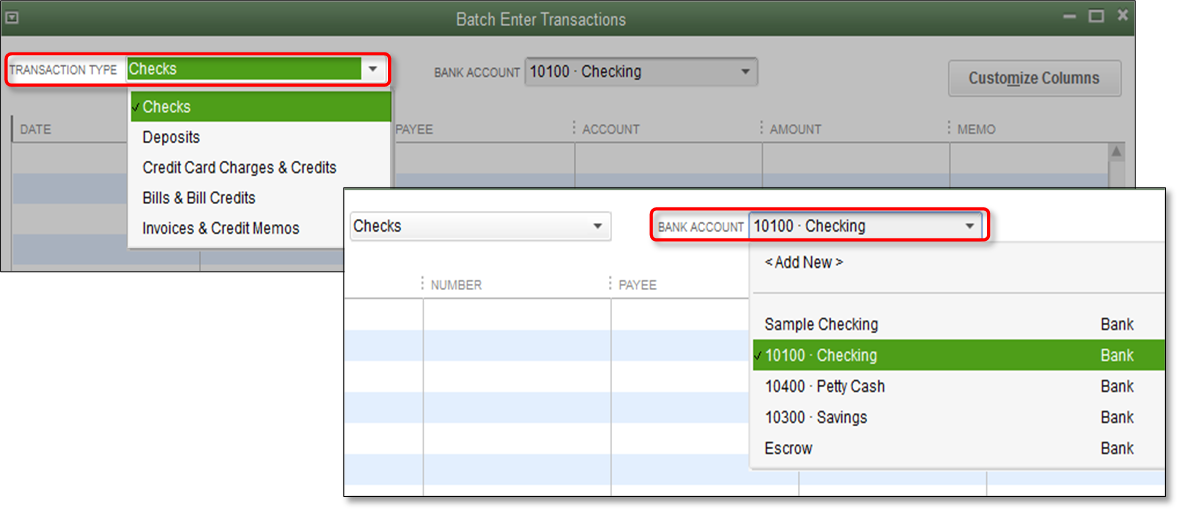
- From the Accountant menu > Batch Enter Transactions.
- Select the appropriate Transaction Type and Account.
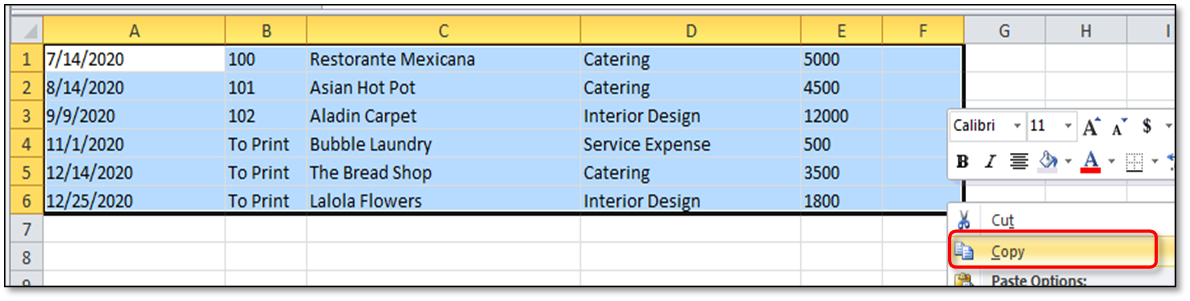
- Open the spreadsheet containing the transactions you need to record in QuickBooks Desktop. Arrange the columns in your spreadsheet to match the order of the columns in the Batch Enter Transactions window.
- Highlight the information, right-click, then select Copy.
- On the Batch Enter Transactions window, right-click the first date field, and select Paste.
Note: Details will turn red if they are currently not listed in the company file. Select the detail in red and select Quick Add or Set Up.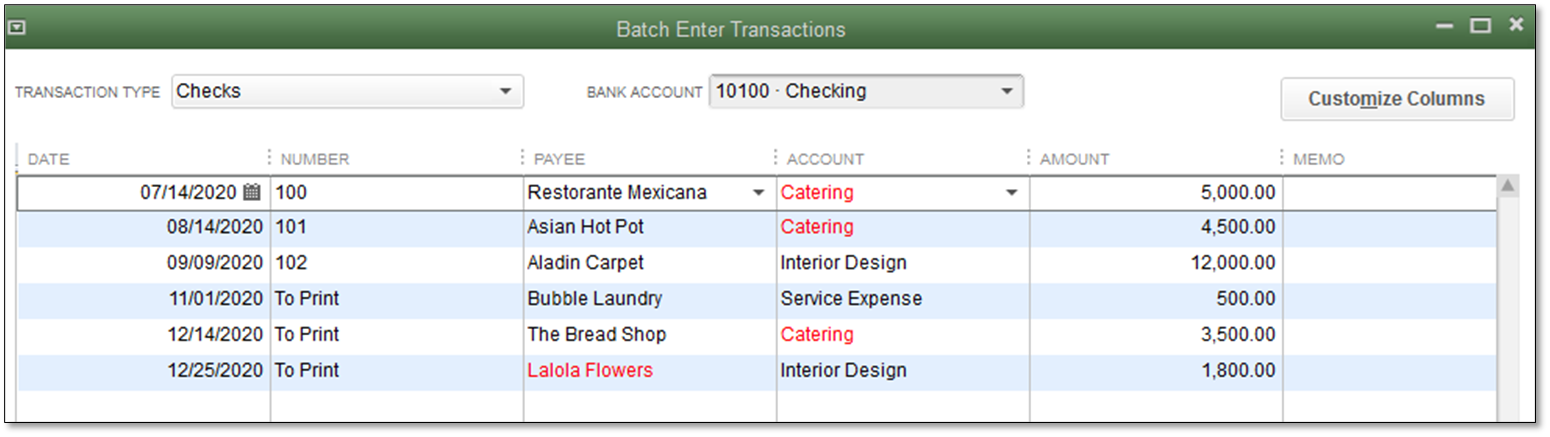
I want to add multiple split lines on my transaction
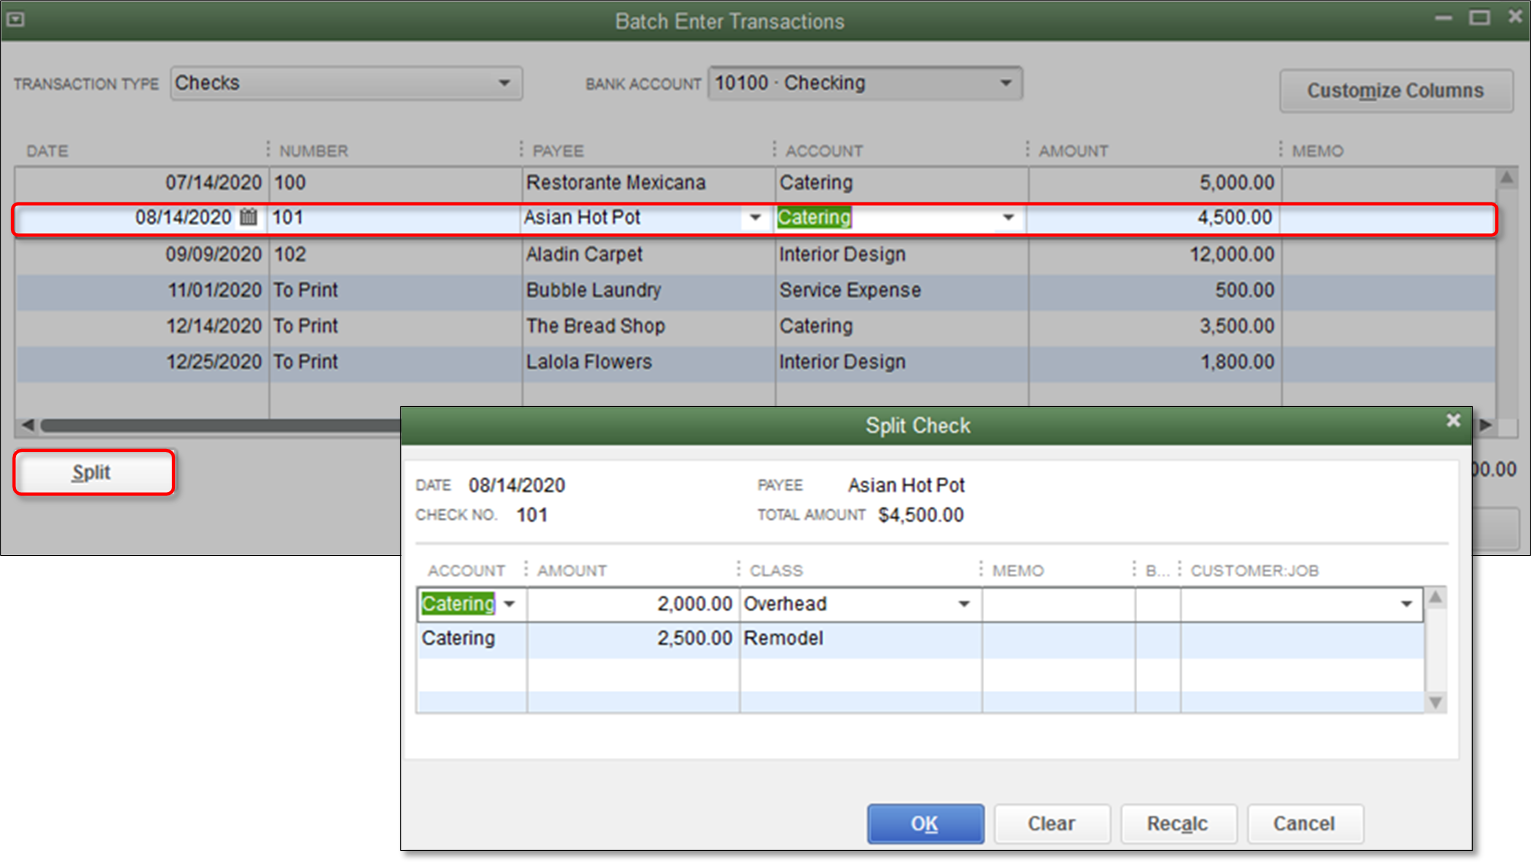
Split transactions allows you to add a single or more additional split lines to a transaction.
- Highlight the transaction that you want to add split lines to.
- Select the Split button.
- Enter the required information for each split in a separate line.
- Select OK to return to the Batch Enter Transactions window.
- Repeat steps a-d for each transaction with multiple split lines.
 Note: Alternatively, you can separate one transaction into two or more separate transactions by entering them with the same transaction number on the original spreadsheet. This will help avoid manual data entry.
I want to use Class
You can customize your columns to add "Class" in the Enter Batch Transactions screen. In order for the "Class" to remain associated with an item on a transaction, the item must be selected prior to selecting the class. This applies to all forms and transaction entries. If a "Class" is selected prior to an Item, the "Class" will be removed when the Item is selected. 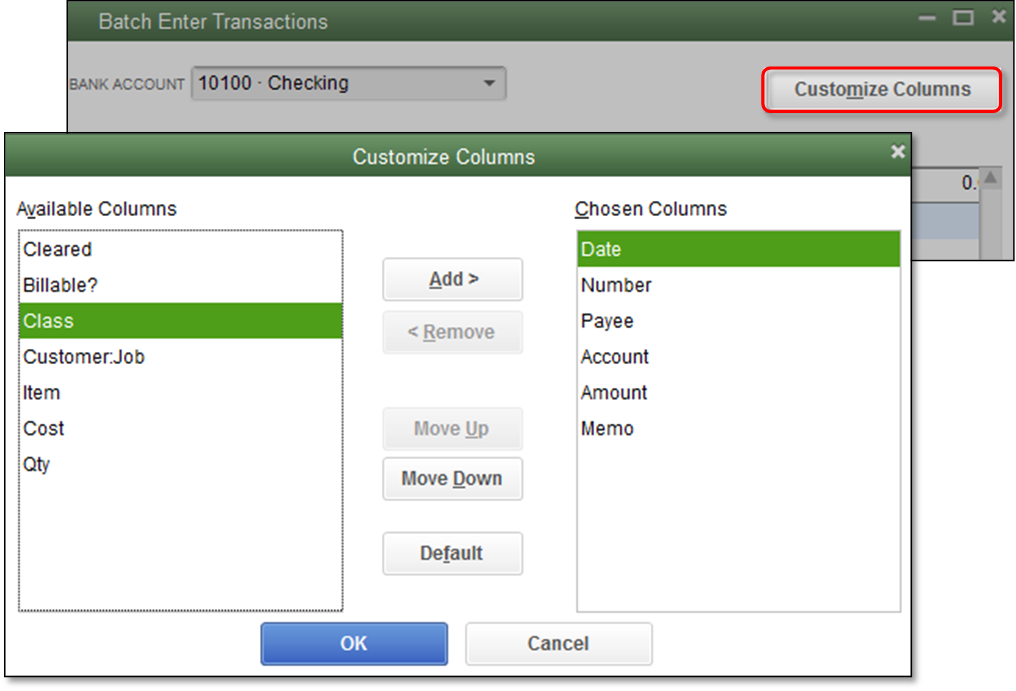
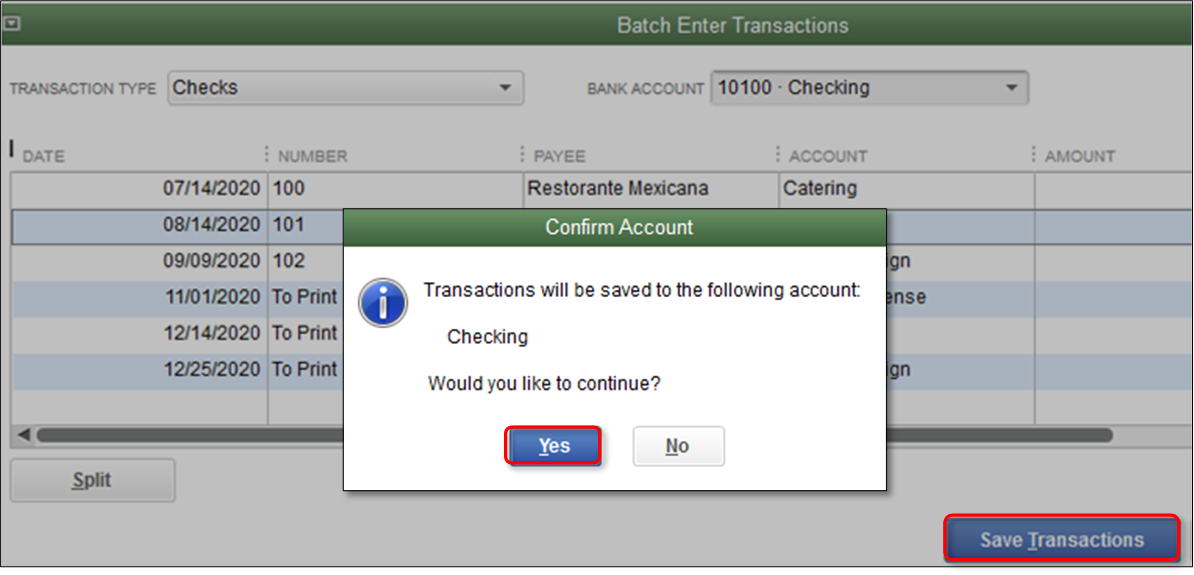
- Select Save Transactions then Yes on the Confirm Account screen.
- Mark as New
- Bookmark
- Subscribe
- Permalink
- Report Inappropriate Content
Enter transactions by batch in QuickBooks Desktop
IMPORTANT
- If you want to export transactions from another company file, see Copy multiple transactions from one company file to another.
- Before following the steps outlined in this article, make sure to back up your company file.
To enter batch invoices
- Go to Customers > Create Batch Invoices.
- Ensure your terms, sales tax rate and send method are up to date for all customers you are sending batch invoices to by selecting each customer:
- Double-click on the customer (or right click and select Edit Customer),
- Open the Additional Info tab and change the necessary information.
- Identify your desired customers by searching or select/create a Billing Group (a billing group is a list of customers for creating a batch of invoices), then select Next.
- Select the desired line items and template.
- Enter a customer message if desired, then select Next.
- Review the list of invoices to be created, then select Create Invoices.
- Print or email as appropriate, then select Close.
To enter transactions by batch
To delete transactions by batch
Only QuickBooks Desktop Premier Accountant 2018, Enterprise Solutions 18.0, Enterprise Accountant 2018, and later versions have the ability to delete transactions by batch. Here are some workarounds that you can use for other versions of QuickBooks Desktop:
- While on a current transaction, press Ctrl+D to delete it.
Note: You can uncheck Warn when deleting a transaction or unused list item to remove the warning message when pressing Ctrl+D (Edit > Preferences > General > My Preferences). - Visit the Intuit Markeplace for a third party application that can remove your unwanted transactions at once. If you are trying to remove all your transactions, see Remove all transactions using Condense Data Utility for detailed instructions.
