- Mark as New
- Bookmark
- Subscribe
- Highlight
- Report Inappropriate Content
What to do after you move from QuickBooks Desktop for Windows to QuickBooks Online
Learn more about steps you should take after you move your QuickBooks Desktop file to QuickBooks Online to make sure your data is ready to go.
Make sure you keep track of your books in QuickBooks Desktop and QuickBooks Online until you are sure QuickBooks Online is right for your business.
Step 1: Compare your financial reports
Compare these reports in QuickBooks Online and QuickBooks Desktop to make sure your data copied successfully:
- Profit and Loss standard
- Balance Sheet standard
When you run your reports, make sure:
- The date is set to All Dates in both products.
- Your accounting method is set to accrual.
- To check the balance of each of your Accounts Receivable (A/R) and Undeposited Funds accounts.
Learn what doesn’t come over from QuickBooks Desktop to Online.
Report discrepancies you can expect:
- Cash basis — QuickBooks Desktop and QuickBooks Online don't track transactions as paid the same way. Reports may not match using cash basis.
- Stock — Reports might not match because QuickBooks Online and QuickBooks Desktop calculate stock differently.
- Multi-currency — Transactions with 3 different types of currencies don't convert to QuickBooks Online.
Step 2: Review your accounts' detail types
When you move your data to QuickBooks Online, the process assigns detail types to accounts. Example, Undeposited Funds. However, for most accounts it’s not clear what the detail type should be. QuickBooks Online assigns a generic detail type, such as Other Miscellaneous Income to these accounts. You can change this later.
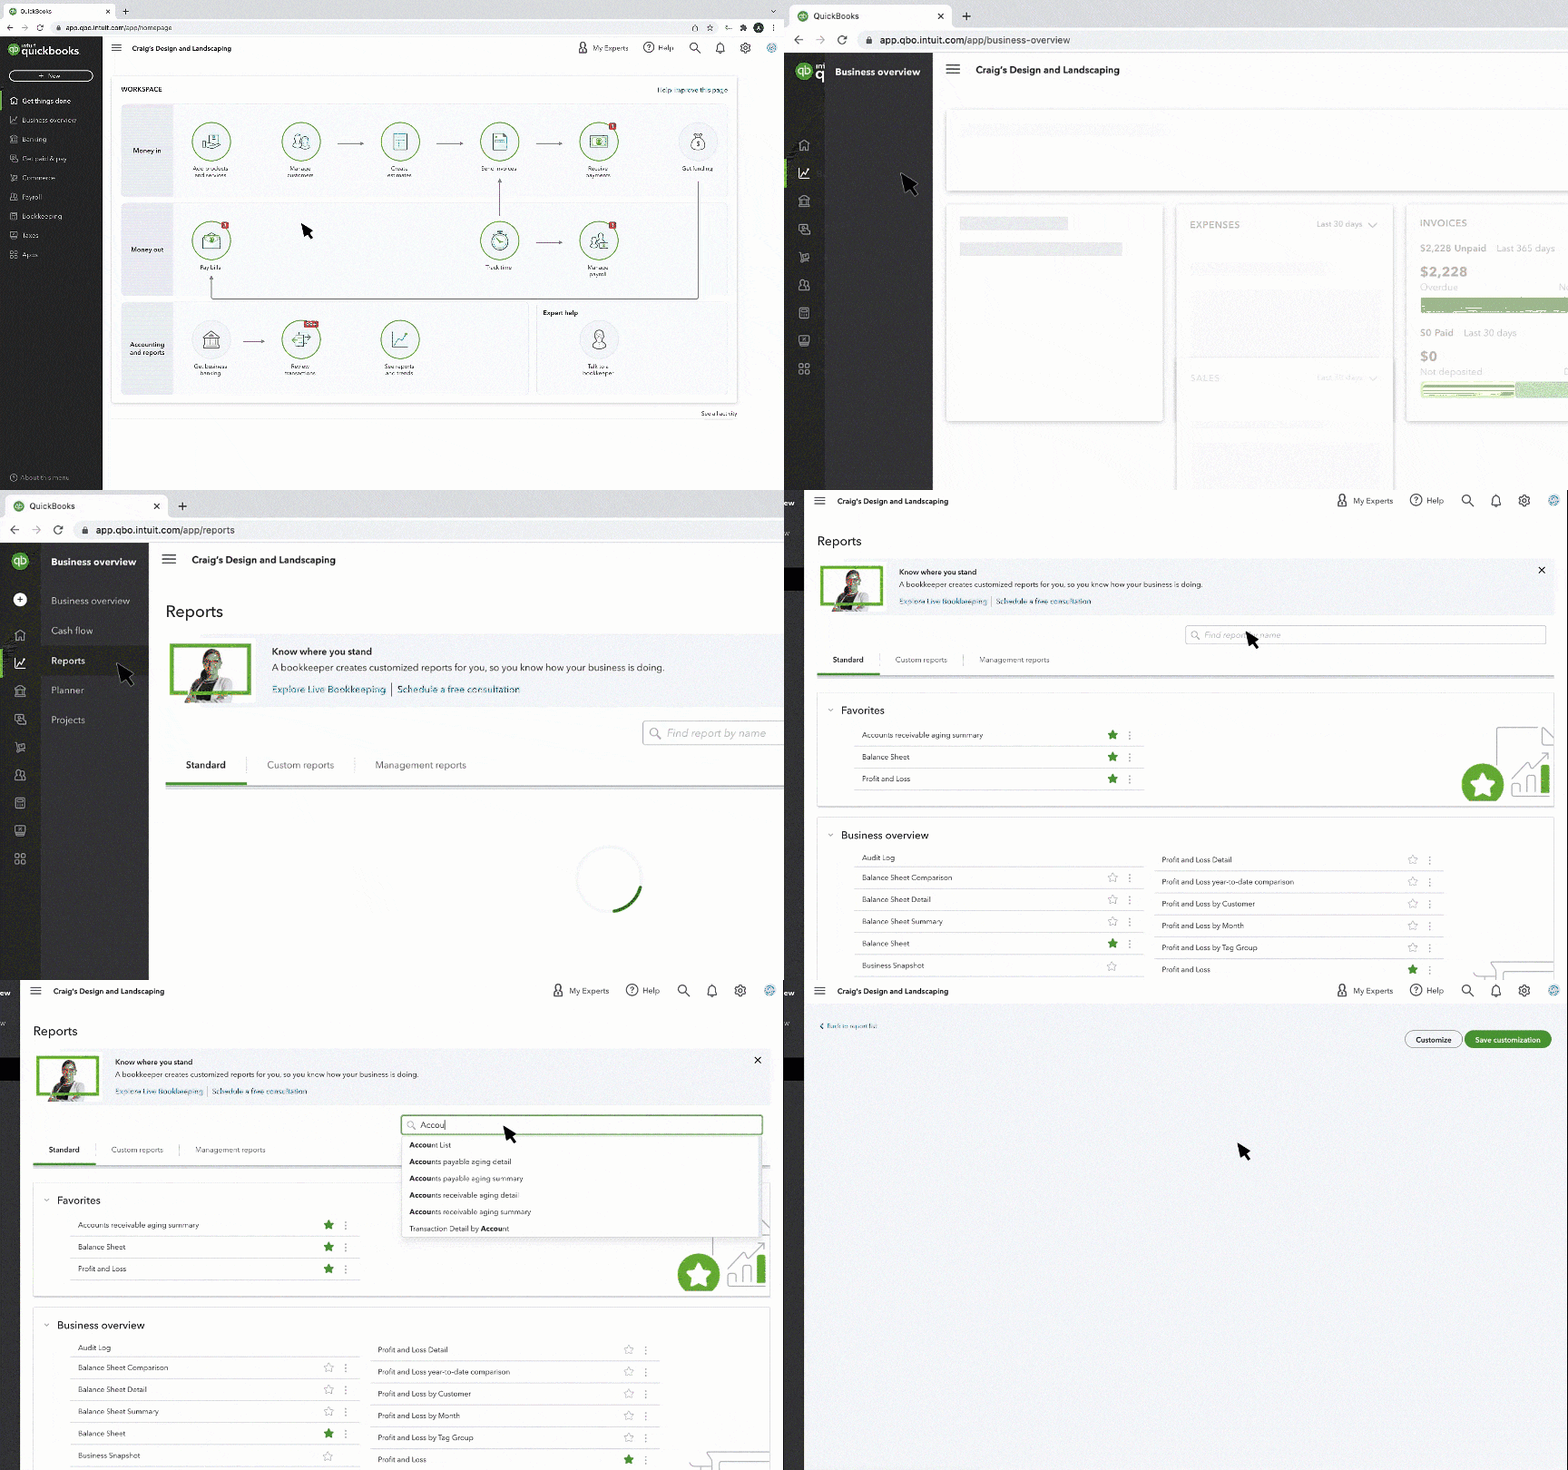
Here is how you can use the Account List report to review and edit the detail types of your accounts.
- Go to Business overview, and select Reports (Take me there).
- Search for and open the Account List report.
- Review your accounts.
- To edit an account's detail type, select the account name.
- From the Detail Type field, choose the correct detail type.
- Select Save and Close.

Step 3: Complete your Payroll setup
Your payroll transactions and accounts will move to QuickBooks Online. The details behind these transactions (like payroll item breakdowns and employee year-to-date numbers) won't copy.
You'll need to setup your payroll (payroll items, employee year-to-date info, and subscription) in QuickBooks Online. To do this, select Payroll in QuickBooks Online and complete the tasks in Action Required and To Do.
Step 4: Get to know FIFO (if you imported stock)
You can learn more about how QuickBooks Online uses FIFO (first-in-first-out) to calculate stock.
