Integrate Super Payments with a Pay Run
by Intuit•29• Updated 7 months ago
Functionality has been added to the pay schedule settings, including the option to automatically create a super payment when finalising the pay run. This ensures that superannuation contributions from each pay run are batched together, and saves admins from having to do this as a completely separate process in the reporting section.
Before you start
- This feature is only available to full admin users.
- For users with Beam integration enabled, super payments created from the pay run will automatically be created as a Beam super payment by default.
- For users who do not have Beam integration enabled, super payments created from the pay run will automatically be created as a manual super payment by default.
Enable super payments within your Pay Schedule settings
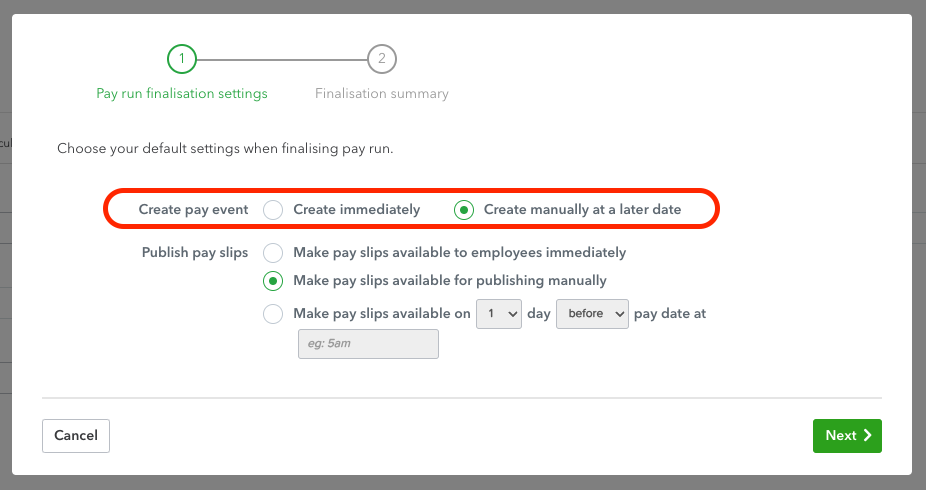
As part of the pay run finalisation process, users can now select to create a super payment immediately, or manually at a later date.
- Select Payroll from the left-hand navigation menu.
- Select Payroll Settings.
- Select Pay Schedules.
- Select an existing Pay Schedule to edit it.
- Select the hyperlinked word, here, under the Pay run finalisation settings heading.
- A window will pop up and you can tick the box to create super payment immediately or manually at a later date.
- To save your changes, select Next, then Complete.

- If you selected immediately, and the pay run is finalised, you can select Review super payment to automatically navigate to the Manage Super Batch payment screen where the super contributions for the pay run will be populated.
- If you selected manually at a later date, and the pay run is finalised, you can create a super payment by selecting Create super payment on the pay run actions menu. Then, you will be navigated to the Manage Super Batch Payment screen where the super contributions for the pay run will be populated.
Check your super's status on the pay runs page
You can check the status of your super payment on the pay runs page by hovering over the super icon located next to the date paid column.
- Grey: when the icon is grey, the super payment hasn’t been submitted (Beam super payments) or marked as paid (Manual super payments).
- Yellow: when the icon is yellow, the super payment has been submitted, this icon will only appear for users with Beam integration enabled.
- Green: when the icon is green, the super payment has been received (Beam super payments) or marked as paid (Manual super payments).
- Red: when the icon is red, the super payment has failed, or there may be an error or return to your super payment, this icon will only appear for users with Beam integration enabled.
More like this