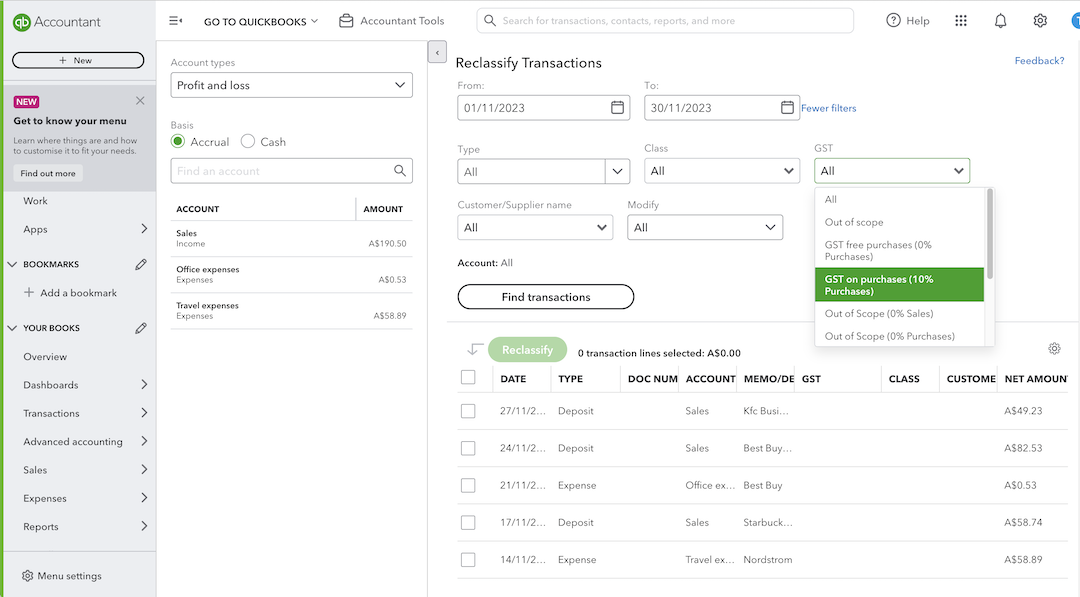
Reclassify or move multiple transactions
by Intuit•6• Updated 1 week ago
This video shows the QuickBooks Online Advanced experience, but is useful for the Accountant view experience. Find the specific steps for your account below.
Prerequisites
First, make sure you know which transactions you want to reclassify. There are a few reports you can use to find this information, like the Profit and Loss report.
Follow this link to complete the steps in product
If you want to change the location of your transactions, set up locations for your account.
Reclassify and move transactions
Follow this link to complete the steps in product
- Go to Settings ⚙ and select Reclassify transactions.
- Select Account types ▼ dropdown.
- Select Profit and loss to see income and expense accounts.
- Select Balance sheet to see your asset, liability, and equity accounts.
- Select Find transactions.
- Tick the box next to each transaction you want to change.
- Select Reclassify.
- For the transactions you’re changing, select a new account, class, or location.
Important: Before you move transactions to Accounts Receivable (A/R) or Accounts Payable (A/P), make sure there's a customer or supplier. Don’t leave these fields blank. - When you’re ready, select Apply.
Related links
More like this
- Bulk reclassify GST Codes on transactionsby QuickBooks
- Create and send multiple invoices in QuickBooks Online Advancedby QuickBooks
- Request more information on a transactionby QuickBooks
- Create multiple bills or expensesby QuickBooks
