Learn how to move the items from your system to QuickBooks Online through QuickBooks Connector (OneSaas).
Handle product integration
When you use QuickBooks Connector with your system, you need to enter the services and products you have into QuickBooks Online so the transactions can sync. There are two ways you can do this.
Manually enter products
You can manually enter all products and services from the source system (eCommerce) to QuickBooks Online. This gives you great control over how you enter products in your QuickBooks Online account.
Automatically enter products
You can set QuickBooks Connector to automatically create items you don’t have. This is more convenient, however, all the products created have the same set of default settings.
Item push options
If you want to assign a different income or expense account for different products, then you need to change it within QuickBooks Online after the items are created by the app. Here's a quick explanation of each of these options: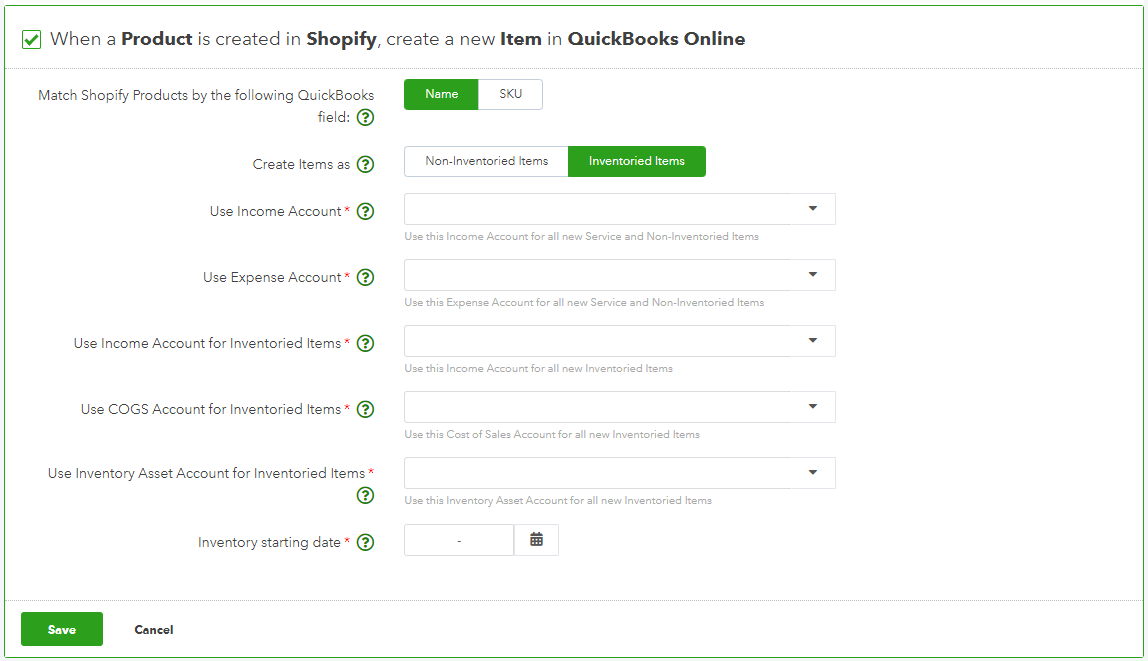
- Non-Inventoried Items / Inventoried Items: If you don’t plan to track inventory within QuickBooks Online, then you can specify the app to create items as Non-Inventoried Items within your QuickBooks Online. Alternatively, if you do want to track stock levels, you can select the Inventoried Items option.
Note: If you choose to have products created as Inventoried Items, you need to go into QuickBooks Online and manually set up the initial stock levels for each item. - Income Account / Expense Account / COGS Account / Inventory Asset Account: These are all basic accounts that QuickBooks Online requires when you create a new item. If you’re not sure which accounts to use, contact your accountant.
Note: QuickBooks Connector can only assign the COGS account for the products upon creation but we don’t sync the COGS price of products. - Inventory Starting Date: If you want to track inventory in QuickBooks Online, you need to specify a starting date for when inventory starts. Make sure you specify a historical date so that historical sales can be generated against items created by the integration.
Example: If you are looking to integrate sales from 1st February, then you should set an Inventory Starting date that's dated 31st January, or earlier. If you're not sure what accounts to configure, talk to your bookkeeper as they'll know your business's accounting practices best.
How can I assign different accounts to specific products?
If you want to assign a different income or expense account for different products, then you need to change it within QuickBooks Online.
QuickBooks Connector will not override account settings for any product in your QuickBooks Online account. The options available for you to select in the configuration settings are simple so we can add new products.
If you have a product that already exists in your accounting system, QuickBooks Connector will simply match up with the product and respect the configured income or expense accounts.
If we push a product to your QuickBooks Online account, then you edit the product and change a configured account. We won't override the change.