Types of options packages
There are three types of options packages in Profile: Individual, Shared, or Custom.
- Individual options packages save on an individual computer and are loaded when ProFile launches.
- Shared options packages save to a network/shared server where one or more individual computers have access to the package. This is the ideal option if you are using a network environment, Client Server, or Terminal Server environment.
- Custom option packages allow the same ProFile options to be utilized even if an individual computer is disconnected from a network/server/terminal server. A Profile user creates custom options packages in different locations and instructs ProFile which to use.
Create a new options package
1. Start ProFile.
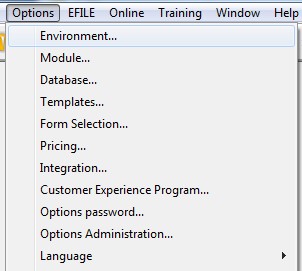
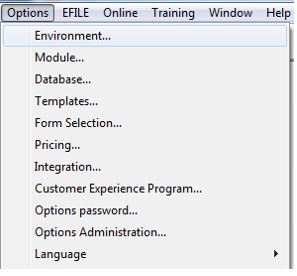
2. Select the Options menu in the top toolbar. A list of options displays.
- Set the necessary options for the package; these selections will become the settings in the new options package.
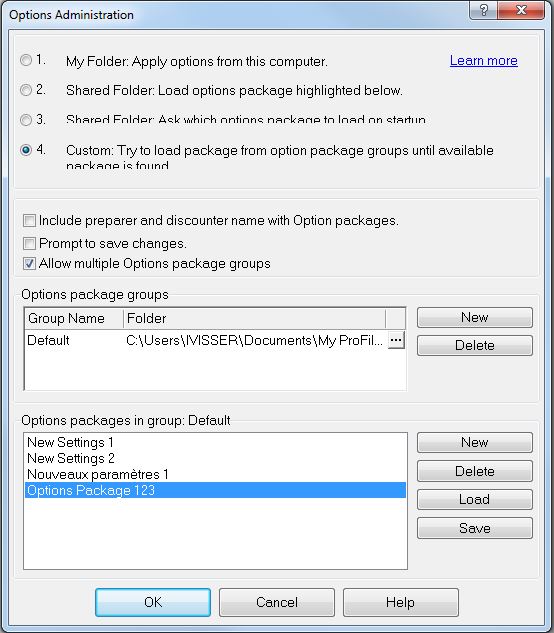
- Select Options Administration… from the Options menu.
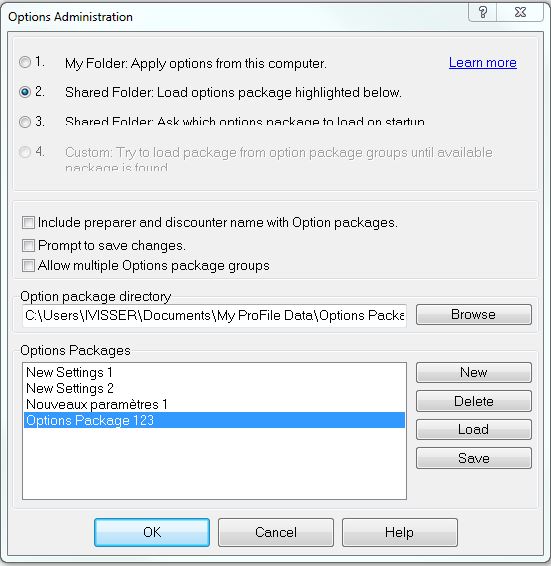
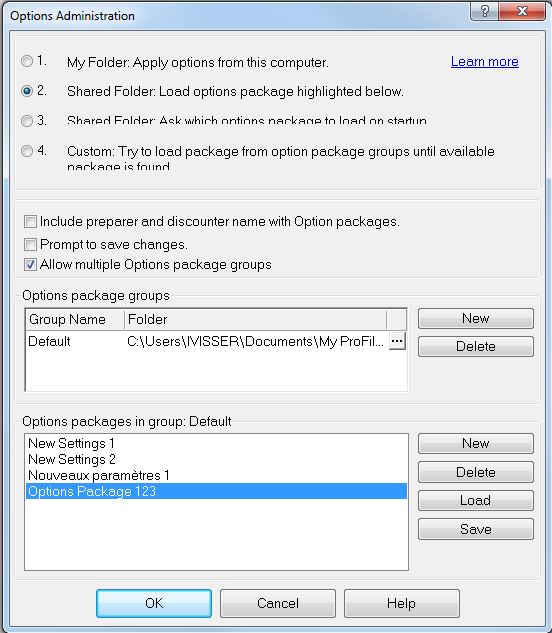
- Select the options package type (1, 2, 3, or 4).
- Check the option Include preparer and discounter name with Option packages., if applicable.
- Check the option Prompt to save changes, if applicable. This feature applies only to package types 2, 3, and 4 and selecting the option prompts the user to save any changes made to an options package when closing ProFile.
Note: Any changes made to an options package prior to ProFile being closed are not saved if the Prompt to save changes feature is not activated. Users must explicitly use the Save function to save any changes or they will be lost when closing Profile.
- Select the New button. The New Settings window displays.
- Enter the name of the new options package.
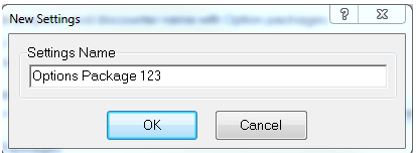
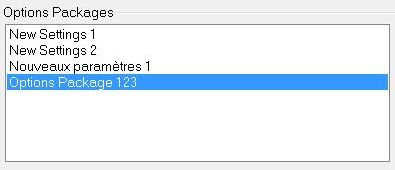
- Select the OK button. The new options package file saves to the designated location and displays in the Options Packages list.
Load an existing options package
1. Start ProFile.
2. Select Options Administration… from the Options menu.
3. Select the options package to be loaded in the Options Packages section.
4. Select the OK button. The selected options package loads.
Update an existing options package
1. Open ProFile.
2. Select Options Administration… from the Options menu.
3. Select an existing options package in the Options Packages section.
4. Select the Load button; the options package loads.
5. Select the Options menu in the top toolbar. A list of options displays.
6. Set the necessary options for the package.
7. Select Options Administration… from the Options menu.
8. Select the Save button; the changes made to the options package settings save.
Delete an options package
Note: Only someone with administrator privileges or the creator of the options package can delete an options package.
1. Open ProFile.
2. Select Options Administration… from the Options menu.
3. Select an existing options package in the Options Packages section.
- Click the Delete button. The Confirm window displays.
- Click the OK button to confirm the deletion. The options packages deletes from the Options Packages list.
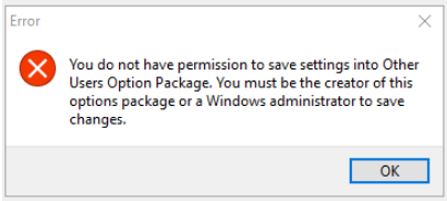
If an error message displays, the user lacks sufficient privileges to delete the options package or it is password-protected.
Transfer an existing options package
It may be necessary to copy an options package to an individual computer that will not have access to the network/server/terminal server at a future date. For example, a preparer is travelling to visit a client, but still requires the same options package shared amongst preparers connected to that office network.
There are three options for transferring an existing options package:
- USB key or other external media device
- From a network’s shared folder
Transfer via USB key/external media device
- Open ProFile.
- Select Options Administration… from the Options menu.
- Identify the options package being transferred in the Options Package section.
- Click the Browse button in the Options package directory section. The Option Package Directory navigation window displays.
- Identify the location of the options package being transferred.
- Close the Option Package Directory window.
- Navigate to the option package directory in Windows Explorer.
- Select and copy the options package being transferred.
- Insert a USB key or other external media device into the network/server/terminal server computer and paste the copied options package to the key/media device.
- Remove the key/media device and insert it into the non-network computer.
- Create a directory location on the non-network computer matching that of the directory the options package file was copied from.
- Paste the copied option package file to the new directory on the non-network computer.
Transfer via email
- Open ProFile.
- Select Options Administration… from the Options menu.
- Identify the options package being transferred in the Options Package section.
- Click the Browse button in the Options package directory section. The Option Package Directory navigation window displays.
- Identify the location of the options package being transferred.
- Close the Option Package Directory window.
- Navigate to the option package directory in Windows Explorer.
- Select and copy the options package being transferred.
- Create a new email; address the email to yourself and compose the email with the options package file included as an attachment.
- Send the email.
- Create a directory location on the non-network computer matching that of the directory the options package file was copied from.
- Copy and paste the emailed options package file to the new directory on the non-network computer.
Transfer via a network’s shared folder
- Open ProFile.
- Select Options Administration… from the Options menu.
- Identify the options package being transferred in the Options Package section.
- Click the Browse button in the Options package directory section. The Option Package Directory navigation window displays.
- Identify the network’s shared folder location for the options package being transferred.
- Close the Option Package Directory window.
- Navigate to the network’s option package shared folder in Windows Explorer.
- Select and copy the options package being transferred.
- Create a folder location on the non-network computer matching that of the shared folder that the options package file was copied from.
- Copy and paste the options package file to the new folder on the non-network computer.
Using multiple, or custom, options packages
A computer that is utilizing an options package on a network/server/terminal server will lose access to it if the computer disconnects from that location.
However, ProFile can be set to access an alternate local options package (or packages) on the individual computer’s hard drive as a substitute to the network/server/terminal server options package. ProFile will first search for the designated options package in the original location; if that options package is not available ProFile will search for the next options package on the list.
Note: ProFile does not synchronize changes between options packages. Any changes to a local options package while disconnected from the network location are not saved in theat options package server options package.
Manage files in multiple option packages
When the laptop is connected to a network/server/terminal server, users should use the options package stored there. When the laptop is disconnected from that location, you can specify an options package stored locally on the laptop itself.
However, be aware that by having two different sets of options you are using two different databases. Files created or changed when you are disconnected from the network/server/terminal server will not be listed in the database stored there.
Create and assign multiple option packages
If you will disconnect at some future time from a network/server/terminal server and continue working, you will want to create at least 2 options packages: one for connected network/server/terminal server use and one for when disconnected from that location. This allows the disconnected workstation to use the same options package settings as that on the network/server/terminal server.
1. Open ProFile.
2. Select Options Administration… from the Options menu.
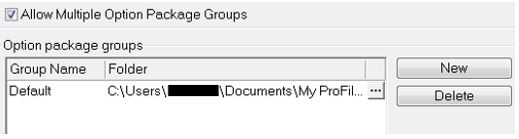
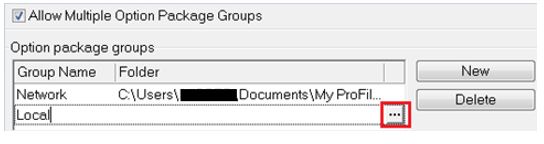
3. Select the Allow Multiple Option Package Groups option. The Option package groups section expands.
Note: The path set in the Option package directory field is the default path for the options packages.
- Select option 4. Custom: Try to load package from option package groups until available package is found in the top of the Options Administration window.
5. Click the Default entry under the Group Name column.
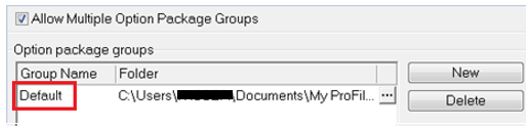
6. Enter a descriptive name for the group.

7. Click on the file path listed under the Folder column.
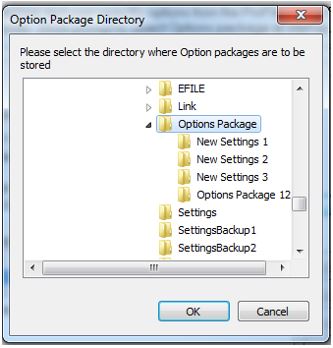
8. Select the [...] button.

The Option Package Directory navigation window displays.

- Identify the location of the options package and select the folder.
- Select the OK button; the Option Package Directory navigation window closes. The options package is created.
- Select the New button.
- Enter a descriptive name for the new group.
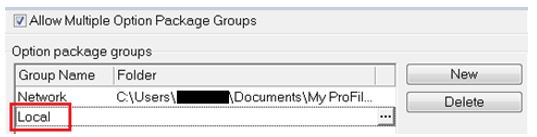
13. Click on the blank path under the Folder column.
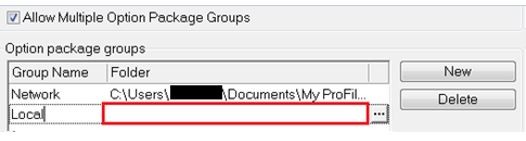
14. Select the [...] button.
15. The Option Package Directory navigation window displays.
16. Identify the location of the options packages and select the folder.
17. Select the OK button; the Option Package Directory navigation window closes.
You have created both a network/server/terminal server options package and a local options package in ProFile.
Order multiple option packages
ProFile will search for option packages first on the network/server/terminal server and then on the local computer when starting.
It is critical to arrange the options packages in the correct order in order to preserve ProFile’s search-and-select process. For example, if the options package Local incorrectly lists before Network, ProFile will load and use the Local options package first, even if connected to the network/server/terminal server.
In the following example, the Local options package is incorrectly listed prior to the Network options package:

Click and hold the Network options package; drag the Network options package above the Local entry and drop:

The Network options package correctly orders prior to the Local options package.