Learn how to connect your Square account to QuickBooks Online so you can easily import your sales transactions.
Do you use Square to process payments? With the Connect to Square app, you can bring your sales transactions into QuickBooks automatically. QuickBooks then categorizes and matches them to your bank records. All you need to do is review and approve the work.
Here’s how to set up Connect to Square and start importing your transactions.
In this article, you'll learn how to:
- Set up QuickBooks
- Set up the Connect to Square app
- Download transactions from Square
- Review your Square transactions
- Manage your settings or disconnect the app
- Common questions about the Connect to Square app
Step 1: Set up QuickBooks
Before you get Connect to Square up and running, here are a couple things you can do to make QuickBooks handle your Square transactions exactly how you want it to.
Connect your bank account to QuickBooks
If you haven't already, connect the bank account Square uses to deposit money from your sales. QuickBooks can then download your bank transactions and match them to your Square transactions.
Import Square products and services
By default, the Connect to Square app enters “Square item” for product and service names in imported transactions. You just need to manually change a product or service name once, and the app remembers and uses it for the same item in future transactions. However, you can avoid this work altogether by importing your product and service items from Square:
- Open Square and export your products and services as a CSV file.
- Open QuickBooks and follow the steps to import products and services from your CSV file.
This ensures the product and service names in QuickBooks match up exactly with what you have in Square.
Step 2: Set up the Connect to Square app
Once QuickBooks is set up the way you want, you’re ready to connect it to your Square account.
- Sign in to your QuickBooks Online account.
- Visit the Connect to Square page in the QuickBooks Online app store.
- Select Get App Now.
- Select Get started.
- You’ll need to grant permission for QuickBooks and Square to share product details. Select Give permission.
- In the new tab that opens, enter your Square account login credentials, then select Sign in.
- Select the Square locations you want to sync with QuickBooks. Then, use the dropdown menu to select the bank account where you want to deposit that location’s sales. Select Next.
- Use the dropdown menu to select a starting date for the transactions you want to bring in. Later, you’ll be able to choose which transactions you want to add into QuickBooks.
- Select Finish.
Once you finish setting up the Connect to Square app, it begins downloading your Square transactions to QuickBooks. Depending on how many transactions you have, the first import may take up to 30 minutes.
Going forward, the app checks your Square account several times a day for the latest transactions.
Note: Summary view is not yet available outside the United States.
Step 3: Download transactions from Square
Once a company is connected to Square using the Connect to Square app, transactions begin downloading into QuickBooks. Transactions are downloaded individually.
Monitor downloaded transactions
- Select the App transactions (Take me there) option under Transactions.
Users can review the date, source, description, category or match, and the amount received.
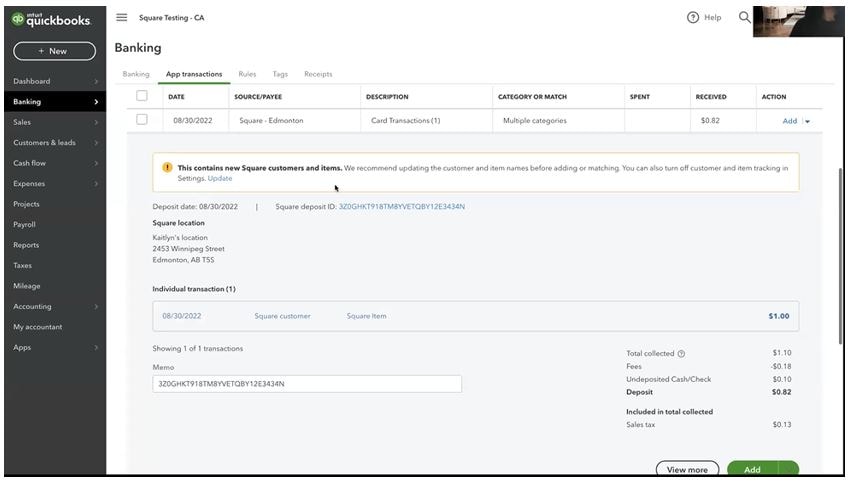
- Click the transaction link under the Individual transaction section to review the details of transactions downloaded into Quickbooks from Square.
Note: You will be prompted to log into your Square account to review individual transaction details.
The default customer and product description for each transaction is Square customer and Square Item, respectively.
Map to existing customers and products
Users are given the ability to map transactions to existing customers or products.
- Select the App transactions (Take me there) option under Transactions.
- Select the Update option in the message bar.
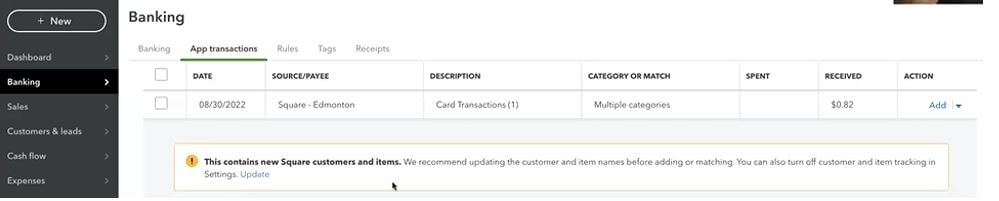
The details window displays.
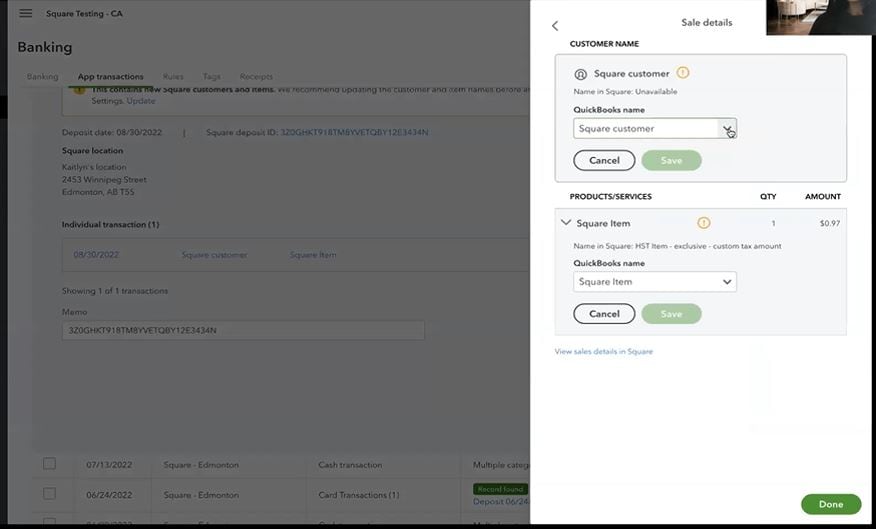
If a customer is available in Square and has already been mapped to a customer in QuickBooks for a transaction, you can find the customer under the drop-down menu in the Square customer section. If a Square item has already been mapped to an item in QuickBooks for a transaction, you can find the item under the drop-down menu in the Square Item section.
Select the existing customer or item and select the Save button. Future transactions from that customer or item will now be mapped to that customer or item in QuickBooks.
Review downloaded transactions
Downloaded transactions can be reviewed for accuracy and approved.
- Select the App transactions (Take me there) option under Transactions.
- Select the For review tab. The list of transactions for review displays.
- Review the transaction details.
- Select the Add option under the ACTION column if all transaction details are accurate.
The transaction moves under the Reviewed tab.
Confirm matched transactions and deposits
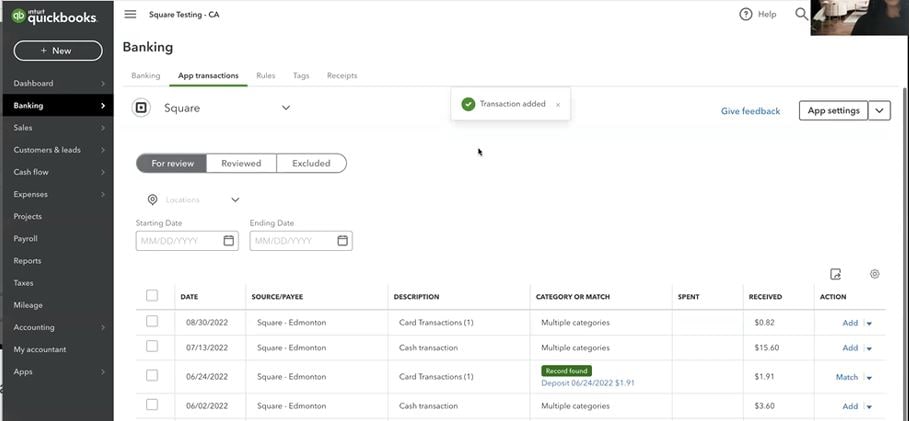
- Select the App transactions (Take me there) option under Transactions.
A list of app transactions displays.
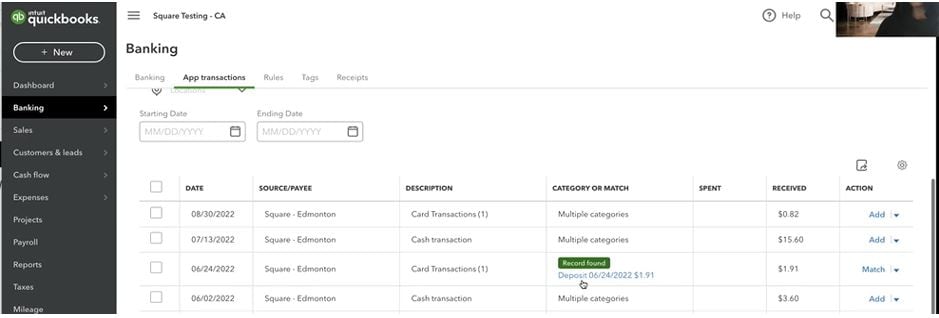
When QuickBooks finds a transaction with a matching deposit, a Record found notification displays and a link to the deposit it matched with is provided.
- Review the transaction details for accuracy.
- Select the Match option under the ACTION drop-down menu.
The transaction moves under the Reviewed tab once item is matched. A link to the sales receipt is created.
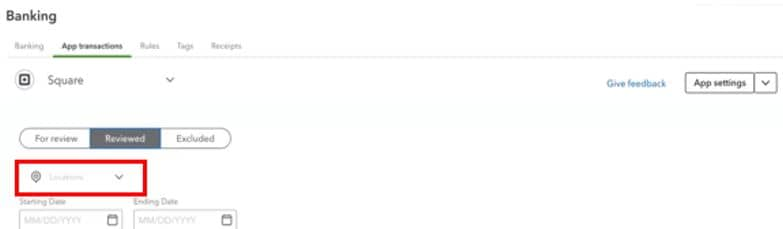
Transactions can be tracked by location using the Location filter located above the date selection fields.
To exclude a transaction from QuickBooks, toggle the transaction’s check box and select the Exclude selected button under the date range selectors.
Manage app settings
Note: We recommend consulting your accountant to ensure accurate settings to avoid mismatching transactions.
- Select the App transactions (Take me there) option under App transactions (Take me there).
- Select the option Square under the App settings drop-down menu in the top-right corner of the program.

The App settings menu displays.
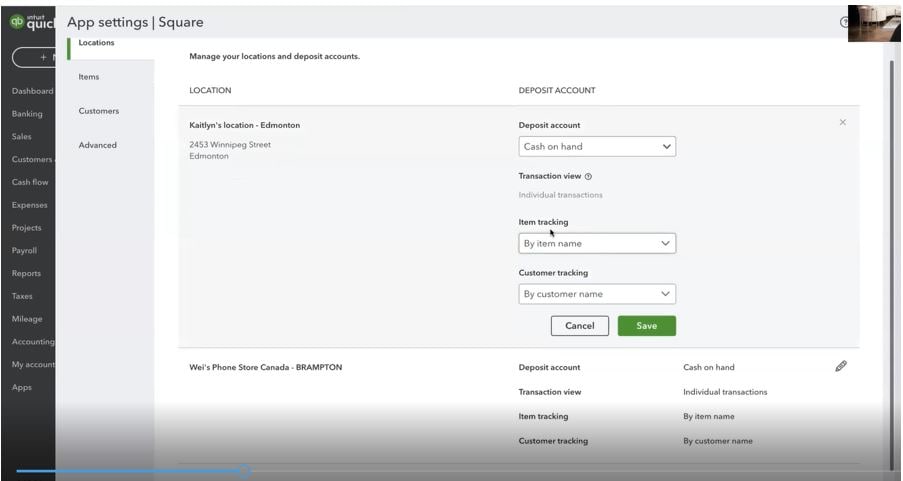
On the left-side menu are four options: Locations, Items, Customers, and Advanced.
| Menu Option | Available Actions |
| Locations | Select the pencil icon to set defaults for the deposit account as well as item and customer tracking. |
| Items | Change the default names for items of the unmatched transactions coming from the Square app. The default setting is Square item. |
| Customers | Change the default names for customers of the unmatched transactions coming from the Square app. The default setting is Square customer. |
| Advanced | Map each of the Chart of Accounts originating from Square to the equivalent in QuickBooks . |
Note: If you connect an app with a high volume of daily transactions, QuickBooks Online may freeze. To fix or prevent this from happening, you must change the sync options in the app to allow it to bring over a daily summary instead of individual transactions.
Post timing and sales tax
When transactions are added or matched, a sales receipt along with the associated Bank deposit is created and matched. Each sales receipt creates a balancing entry in the Undeposited funds account, and the associated deposit clears those funds from the Undeposited funds account. Sales are backdated to the date of the transaction.
In most cases, owed sales taxes are accrued on the date the sale is made. Depending on the timing of calculating sales tax liability for a period, it may be understated.
Since the sales are not posted until a bank deposit is matched, the sale liability for a period would be understated by the amount of sales tax related to the sales made in the period, without a matched bank transaction.
We recommend consulting your accountant to understand if the above examples would affect you.
Step 4: Review your Square transactions
When your Square transactions appear in QuickBooks, you’re ready to review and add them to your books.
- Go to Transactions, then select App transactions (Take me there).
- Select For review. Your Square transactions appear in the list, with details like product description, quantity, purchase price, and fee breakdowns.
- For each transaction, select an action, depending on the status:
- Add or Match: This transaction is ready to add to your books. If QuickBooks is connected to the bank account you use to deposit Square payments, you can match it to a specific transaction that’s already in your books. Note: To ensure all your sales data from Square gets added to QuickBooks, we recommend you add transactions from the App transactions tab and then match them from the Bank transactions tab.
- Review: There are multiple transactions in the books that could be the same as the transaction from Square. Confirm which transaction it matches.
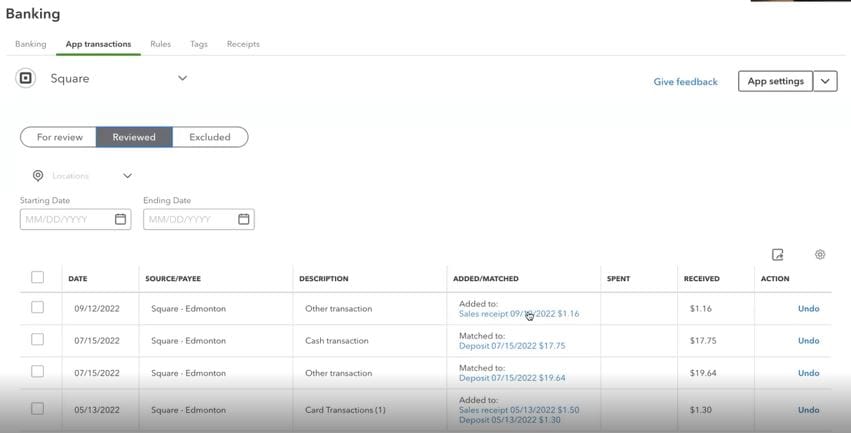
- Once you’ve added transactions, you can review them by going to the Reviewed tab, then select the sales receipt or deposit under the Added/Matched column.
Manage your settings or disconnect the app
You can change the location, item, and customer settings for the Connect to Square app by going to the app settings. Here you’ll also find advanced settings, and where to go to disconnect the app.
- Go to Transactions, then select App transactions (Take me there).
- Select App settings, then Square.
- Select the tab for the type of setting you want to change. To disconnect the app, select Disconnect Square.
- Select Done.
Change the income account for the default Square Item
By default, all imported sales transactions are added as “Square Item” in QuickBooks. This product or service item maps to a specific income account in your chart of accounts. To change the account the Square Item maps to:
- Go to Sales and select Products & services (Take me there).
- In the Find products and services field, search for “Square Item".
- Under the Action column, select Edit.
- In the Income account dropdown menu, select the income account you want Square sales to record to.
- Select Save and close.