What to know about editing templates
- Templates should always be RTF files (Rich Text Document) format created by WordPad, the default Windows word processor
- Contents should always be copied and pasted from Notepad, never directly from an email or a word processor application
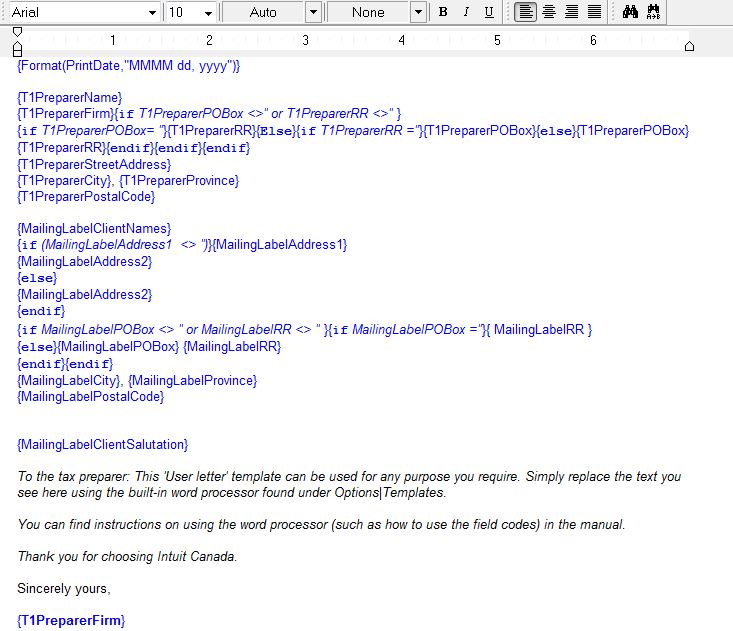
- Coding locations should not be shifted or broken (blue text); however, any text in black can be altered as desired
- Logos, signature graphics, etc. can be added to templates; however, they should not exceed 400kb. This is an estimate. Larger files can cause ProFile to become unstable
- All images must be .bmp or .wmf formats
- Headers and footers are not supported by ProFile
If working in a local environment
1. Select the Templates... option under the Options drop-down menu in the top toolbar.
2. The Template Editor window displays.
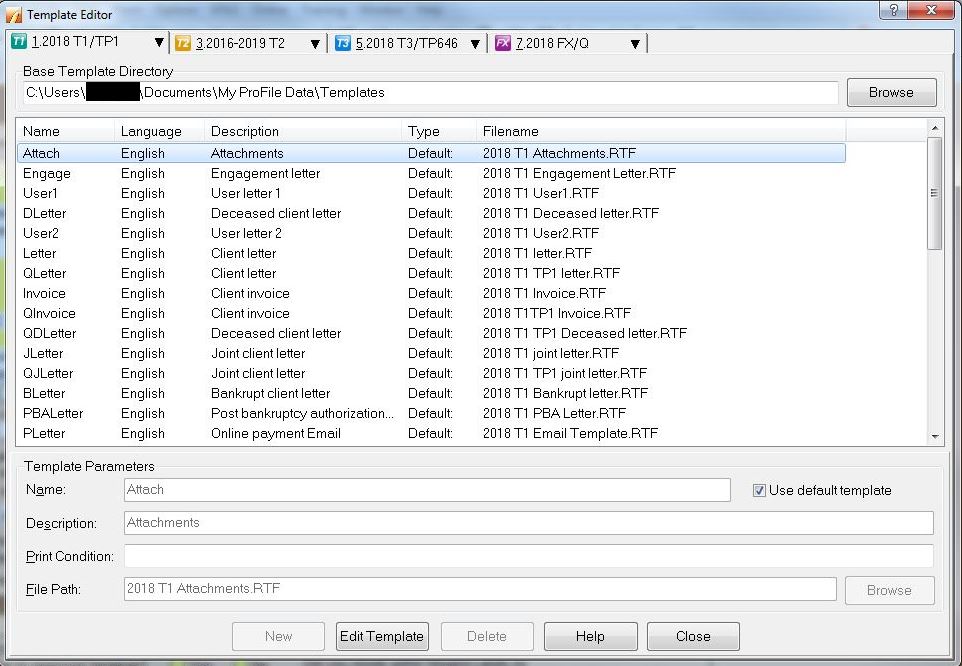
3. Select a year and module from the tab menu (for example, 2018 T1/TP1).
4. Select the individual template to modify.
5. Select the Edit Template button.
6. Edit the template as required.
7. Select the Save icon in the menu toolbar. The Save As window displays.
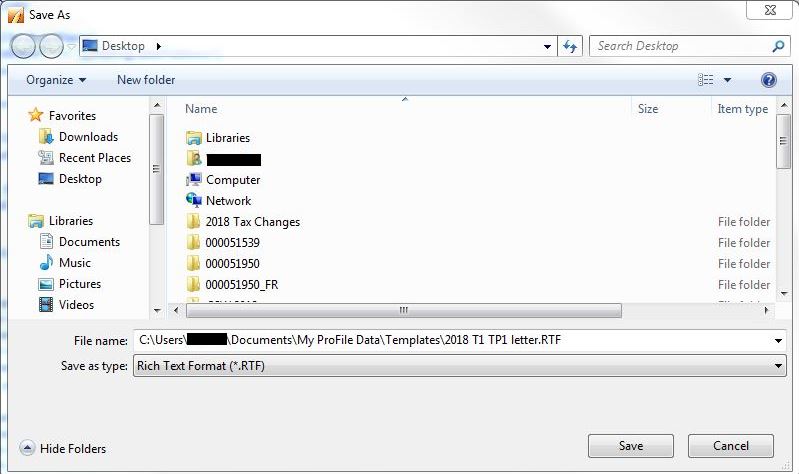
8. Navigate to the location to save the revised template and save using an appropriate file name.
9. Select the Save button; the revised template saves.
Note: Click the Use default template button to revert back to the default template.
If working in a network environment
If working in a network environment:
- Use the Browse button in the Base Template Directory to select a location to store customize template.
- Use the Browse button in the File Path field to select a customized template.
Note: The Use default template option must be unchecked.
Insert a graphic in a template
1. Open the template.
2. Select the Graphic option from the Insert menu:
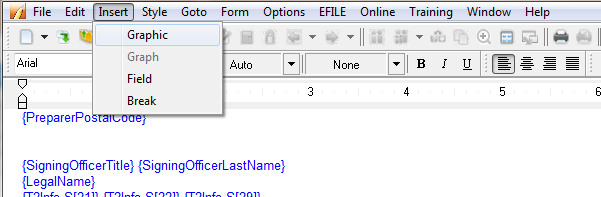
3. Select the location and individual graphic to insert.
Note: All inserted images must be .bmp or .wmf formats.
4. Select the Open button. The image inserts in the template.
5. Select the Save button in the toolbar.
Personalize a template
Personalizing a template changes the content on the letter without modifying any of the coding.
1. Open the return.
2. Press the key; the Form Explorer displays.
3. Enter letter in the Form field and press ; the letter displays.
4. Right-click in the letter and select the Personalize option.

5. Make the necessary changes.
6. Select the Save button in the toolbar.
7. Save the personalized letter with the appropriate file name in the preferred directory.
Note: If any changes are done to the coding, Edit Template, will not appear on a modified, personalized template. Confirm that Personalized is not selected if no changes occur after editing a template.