Note: The following instructions apply to customers using ProFile release 2019.3.0 and later.
Submit a Business Consent (T1)
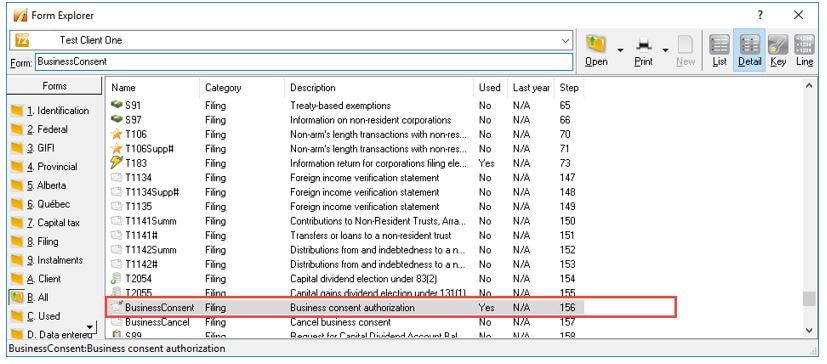
1. Open the Form Explorer in ProFile.
2. Search in the Form: field for the term BusinessConsent and double-click the BusinessConsent option presented in the results list:
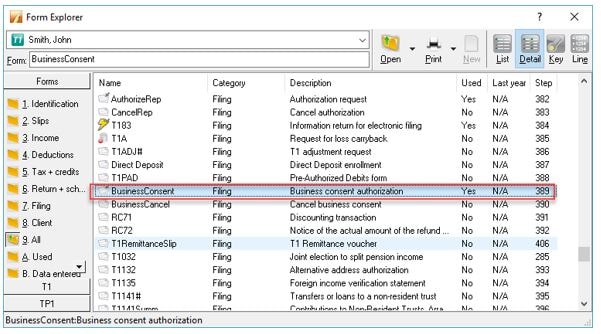
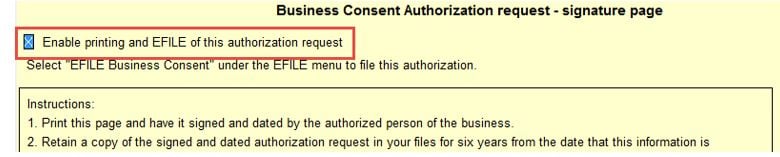
The Business Consent Authorization request – signature page opens.
3. Click and select the Enable printing and EFILE of this authorization request checkbox.

4. Fill out the business information.
Representative information populates from information already entered on the Preparer tab in the Options Environment menu:
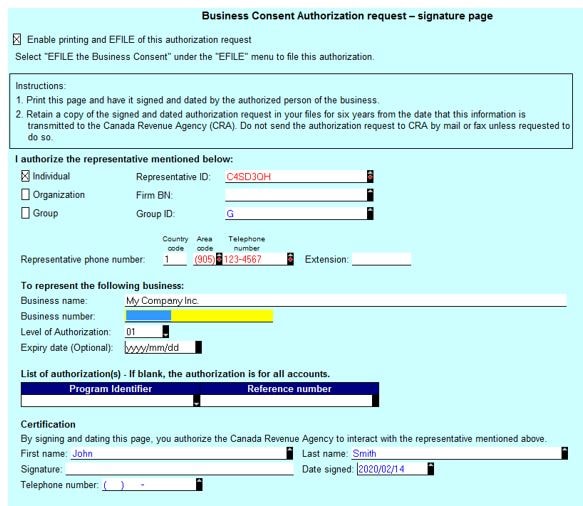
5. Acquire the taxpayer signature on the form; retain the signed form for your records.
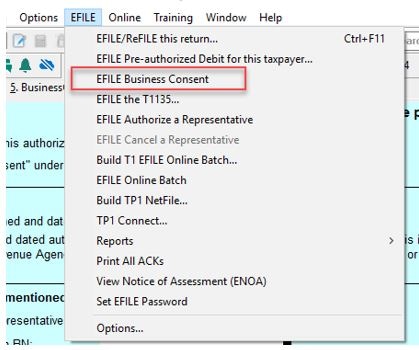
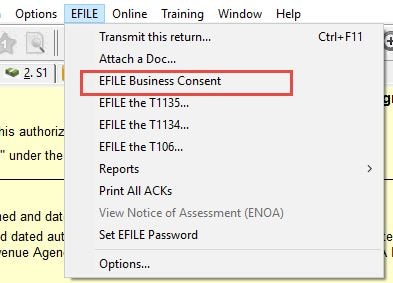
6. Select the EFILE Business Consent option from the EFILE drop-down menu in the top toolbar.
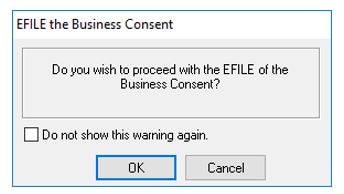
The EFILE confirmation window displays:
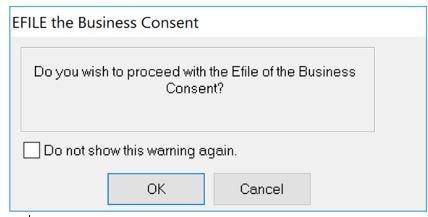
7. Select OK to proceed with the EFILE of the consent.
Cancel a Business Consent (T1)
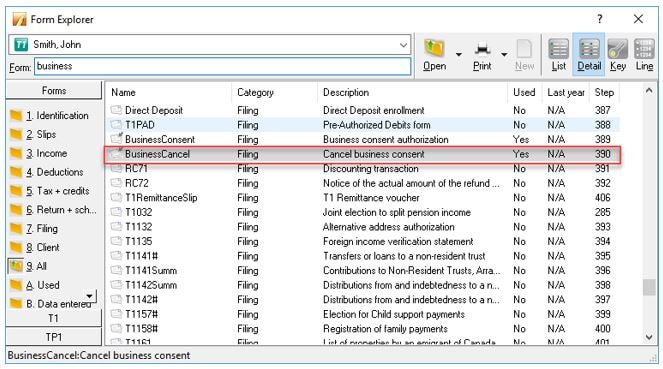
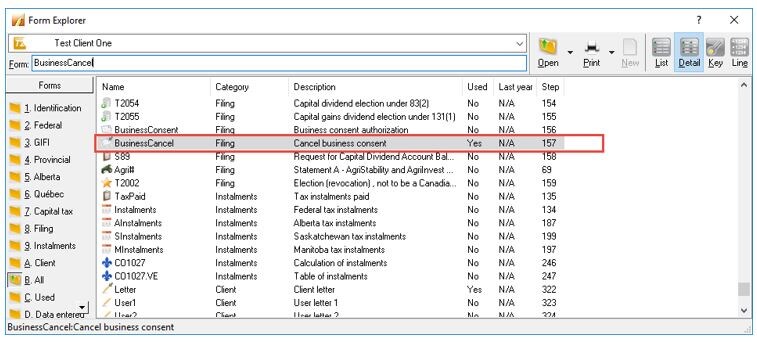
1. Open the Form Explorer in ProFile.
2. Search in the Form: field for the term business and double-click the BusinessCancel option presented in the results list:
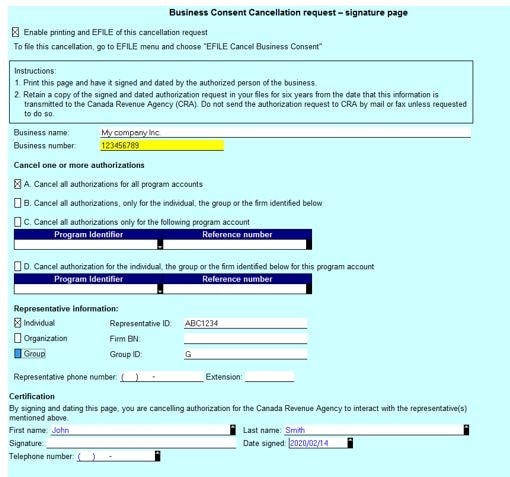
The Business Consent Cancellation request – signature page opens.
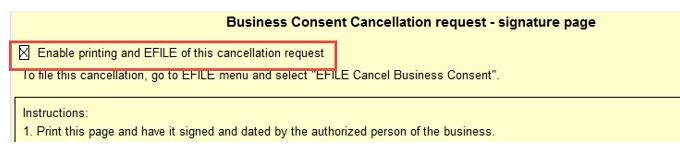
3. Click and select the Enable printing and EFILE of this cancellation request checkbox:

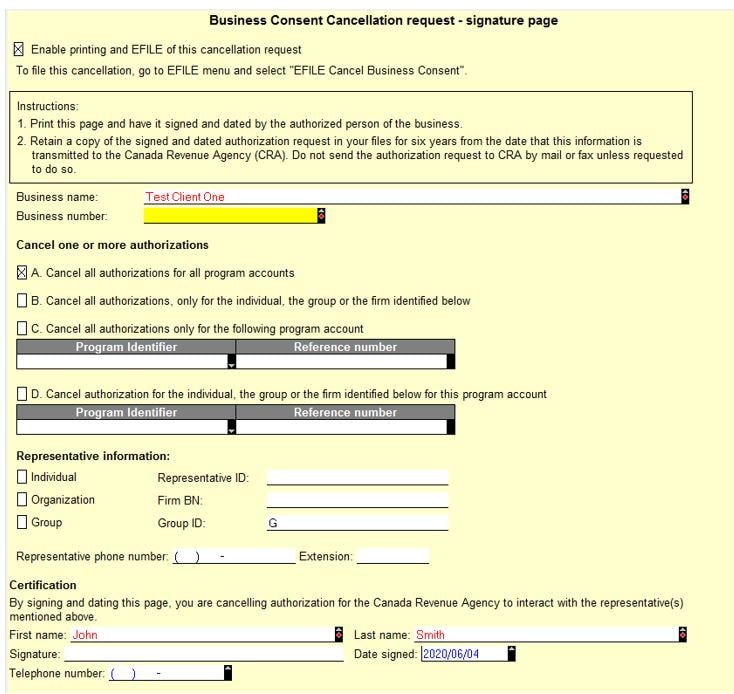
4. Complete the signature page:
5. Acquire the taxpayer signature on the form; retain the signed form for your records.
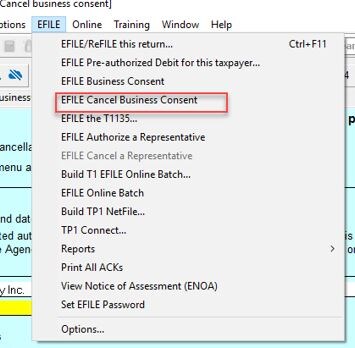
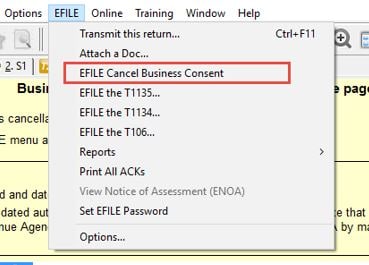
6. Select the EFILE Cancel Business Consent option from the EFILE drop-down menu in the top toolbar.
The EFILE confirmation window displays:
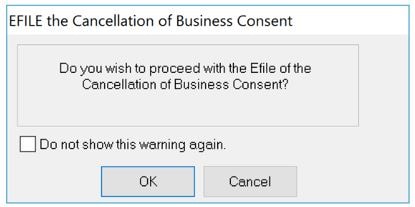
7. Select the OK button to proceed with the EFILE of the cancellation.
Submit a Business Consent (T2)
1. Open the Form Explorer in ProFile.
2. Search in the Form: field for the term BusinessConsent and double-click the BusinessConsent option presented in the results list:
The Business Consent Authorization request – signature page opens.
3. Click and select the Enable printing and EFILE of this authorization request checkbox:
4. Fill out the business information.
Representative information populates from information already entered on the Preparer tab in the Options Environment menu:

5. Acquire the taxpayer signature on the form; retain the signed form for your records.
6. Select the EFILE Business Consent option from the EFILE drop-down menu in the top toolbar:
The EFILE confirmation window displays:
7. Select OK to proceed with the EFILE of the consent.
Cancel a Business Consent (T2)
1. Open the Form Explorer in ProFile.
2. Search in the Form: field for the term business and double-click the BusinessCancel option presented in the results list:
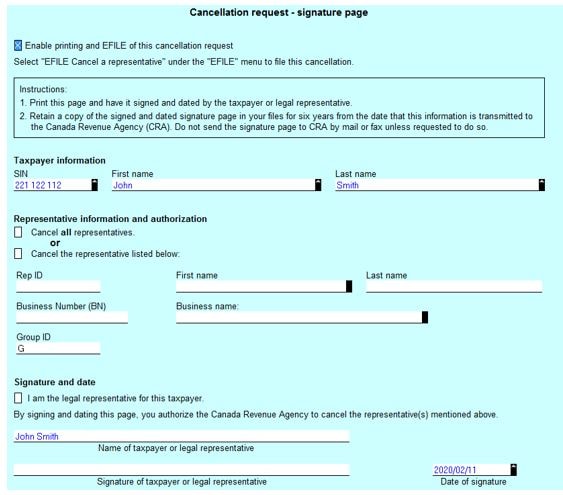
The Business Consent Cancellation request – signature page opens.
3. Select the Enable printing and EFILE of this cancellation request checkbox:
4. Complete the signature page:
5. Acquire the taxpayer signature on the form; retain the signed form for your records.
6. Select the EFILE Cancel Business Consent option from the EFILE drop-down menu in the top toolbar:
The EFILE confirmation window displays:

7. Select OK to proceed with the EFILE of the cancellation.