Depending on what type of work you are doing, you may prefer to display your client files in a different manner. Fortunately, you do not have to select filters and view options within the Client Explorer each and every time you open the Client Explorer. You can create and save a view to re-use later using the Save View button.
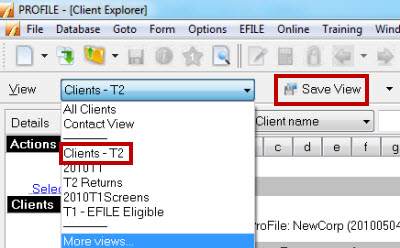
ProFile is shipped with certain default views installed. These views are listed in the View drop-down list at the top left of the Client Explorer window. To activate a view in the drop-down list, simply select the name of the view from the list.
You can start with one of the default views and modify your options to create a personalized view, or you can create a new view from scratch.
Set your filters, whether or not to display details, and other view settings. For example, if you wish to display all your ProFile T2 clients, deselect the T1, T3 and FX tabs, click on the T2 tab and select all year-ends, keep all the file status filters active, and make sure there is no checkmark in the Show competitor files box (unless you wish to display these files as well as your ProFile files).
Follow these steps to save that view:
- Click the Save View button at the top of the Client Explorer window.
- Enter a name for the current view. Be sure to choose a descriptive name so that you can remember what the view does.
- Click OK. The new view will appear in the View drop-down list.