What is a query?
Use the query function to narrow the list to select files for batch printing or to include particular files on a report. Queries can help select data to export, or select files that require mailing labels.
In a query, conditions are set for any field in the client file.
For example: Selecting all clients who have birthdates before January 1, 1934 but after December 31, 1932 (these are the clients who turned 69 during 2002). Or clients who have RRSP contributions of less than 10% of their earned income could be selected (those who are not maximizing their RRSP contributions).
All this requires is a comparison of fields, and ProFile will filter the client list to display the matching client files.
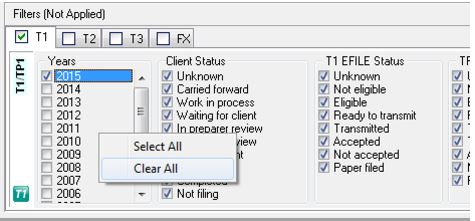
Note: The query applies only to returns of a single type (e.g., 2015 T1 Returns). To display only the files matching the query criteria, clear the other modules checkboxes to remove those client files from the list. The prior years should also be cleared.
Hint: Right-clicking the module and then selecting Clear All allows all years to be cleared, facilitating the selection of a single year.
Create an advanced query in the Client Explorer
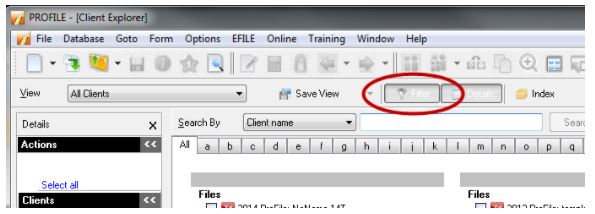
1. Open the Client Explorer.
2. Click the Filter button to display the filter pane in the Client Explorer.
3. Select the tab or module and filter the specific year for the query you would like to run.

4. Click the Advanced button on the filter pane.

5. In the Query drop-down list, select New Query. The Add button for query conditions becomes active, allowing the terms of the query to be defined.

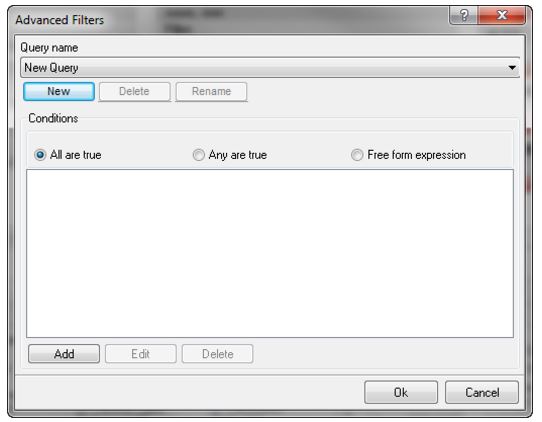
6. From the Query name list, you can also select a query you created and saved previously to run that query again.
7. To delete or rename a query, first select it from the drop-down list, and then click Delete or Rename.
Set the conditions of a query
1. Select New query from the Query name drop-down list.
2. Click the Add button.
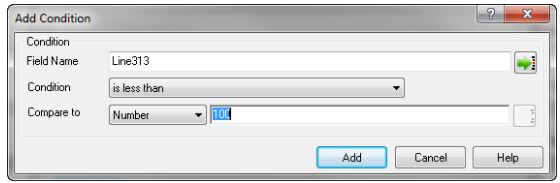
3. In the Add Condition dialogue box, enter a field name, or click the Pick button next to the field to choose from a list of fields.
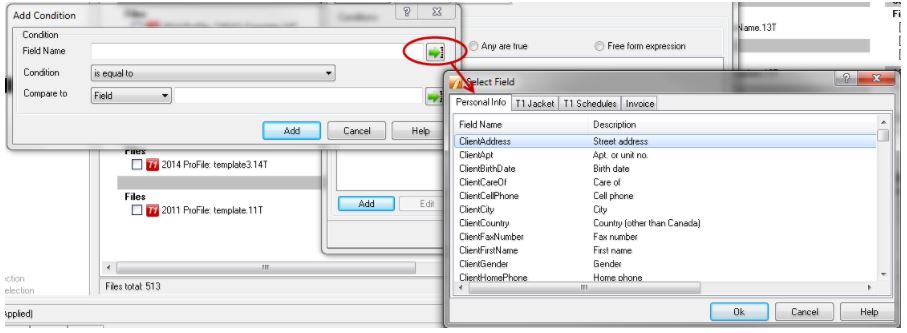
4. Select a condition from the drop-down list. For example, select Is less than if the files that are to be selected have a value lower than a specified amount.
5. Set the data to which to be compared in the return by selecting an option from the Compare to drop-down menu. In the first field, select the type of data.
Field: Compare the value of the field selected above (Field name) to the value that appears in another field. Use the Pick button to select from common fields or enter a field code. Upon applying the filter, the client list will display all files in which the two fields match.
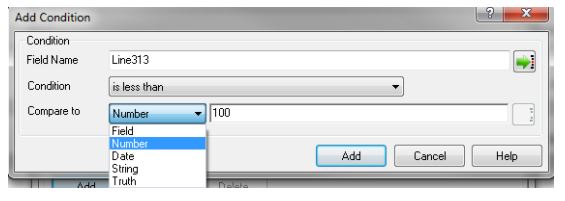
Number: Compare the field value to a fixed amount. Upon applying the filter, the client list will display all files in which the selected field matches this amount.
Date: Compare to a date in the format YYYY/MM/DD. Upon applying the filter, the client list will display all files for which the selected field matches this date.
String: Compare to a string (a combination of letters or letters and numbers). Upon applying the filter, the client list will display all files in which the selected field matches this string.
Truth: Compare to the status of True or False. Upon applying the filter, the client list will display all files that have a True (yes) response to a yes/no question, or all the files having a False (no) response to the question
6. Click Add to add the query. It will appear in the Advanced filters dialogue box.
7. More conditions can be added by following steps 2 to 6. Any number of conditions can be added to the query to refine the filter.
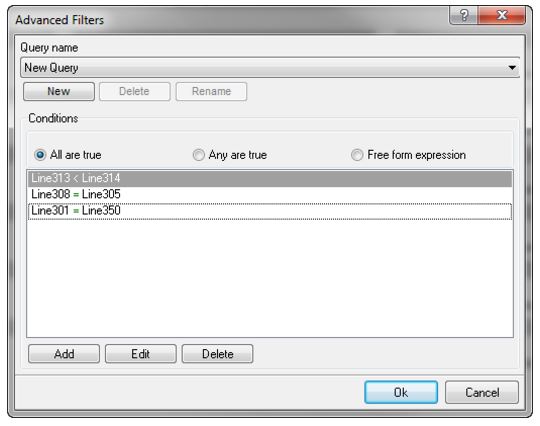
8. Choose one of the three options to set ProFile to apply the query conditions.
All are true, Any are true, or Free-form expression.
Note: Free-form expression allows for more complex conditions. Use this option to design more sophisticated conditions using and/or syntax.
9. Click OK to save the query. The query automatically stores in the same folder that is configured to save the Client Explorer Views. These Client Explorer files can be saved locally or on a shared server.
10. Go to the Options menu and click on Database.
11. Select the Use Client Explorer radial button, click on Advanced, then click on Browse under Customized Views Storage Directory to set the path to save the queries and the Database Views.
Run the query
Click Apply filters on the Filter panel.

Existing filter options can also be selected from this pane, and ProFile will display only the client files that match ALL the criteria of the selected checkbox filters and the query. For a single file type, a query narrows the list of files that appear in the client list.