Note: Ensure that you print the transmission confirmation from the CRA page at the end of the process. ProFile does not keep a record or report of slips that have been transmitted.
Select the type of filing you are undertaking:
Internet file original slips (Pre-2021)
- Open the FX return in ProFile.
- Navigate to the information (Info) form of the return.
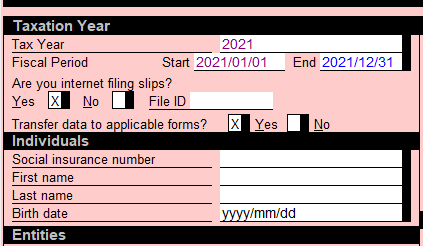
- Select Yes to the question Are you magnetic media or internet filing slips?:
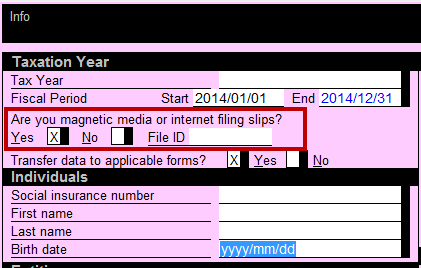
Note: The option to Internet file slips will not appear unless this option is set to Yes.
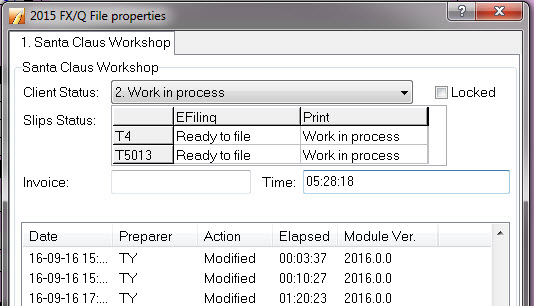
- Select the Properties option from the File dropdown menu in the top toolbar.
- Review the Slips Status section under the EFiling column. Set the slip status to Ready to file:
- Enter all Transmitter information under the EFILE menu.
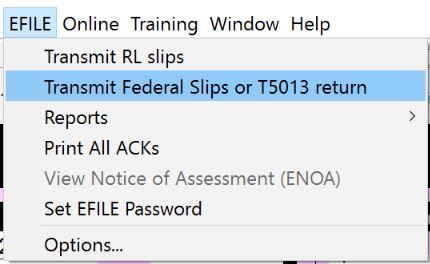
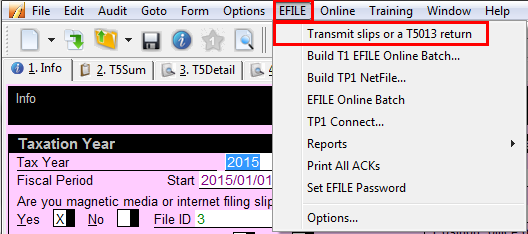
- Select the Transmit slips or a T5013 return option from the EFILE dropdown menu in the top toolbar:
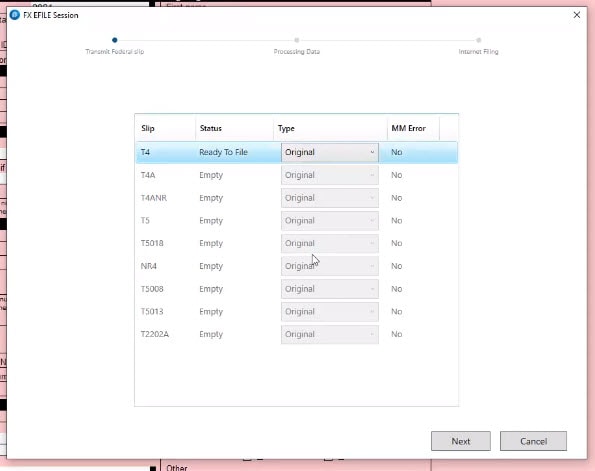
- Select the slip that is set with the Ready to File value:
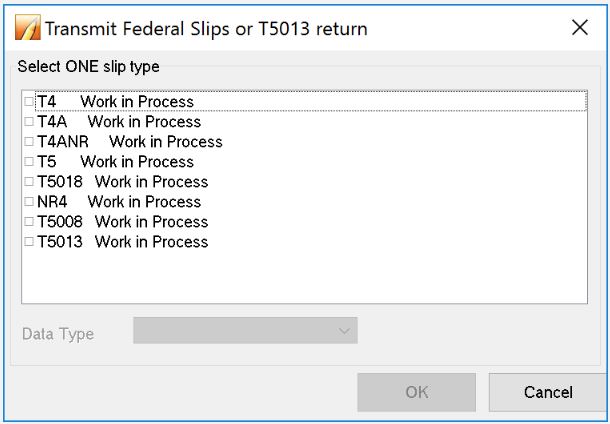
- Select the OK button. The XML file builds and a green checkmark displays:
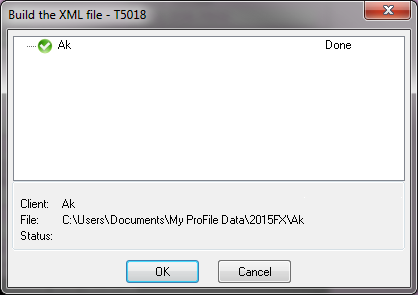
The CRA transmission window automatically displays:
![]()
- Select the button to proceed. The Internet file transfer (XML) window displays:
![]()
- Enter the Account number and Web access code. Select the Next button.
The XML file transmits to the CRA.
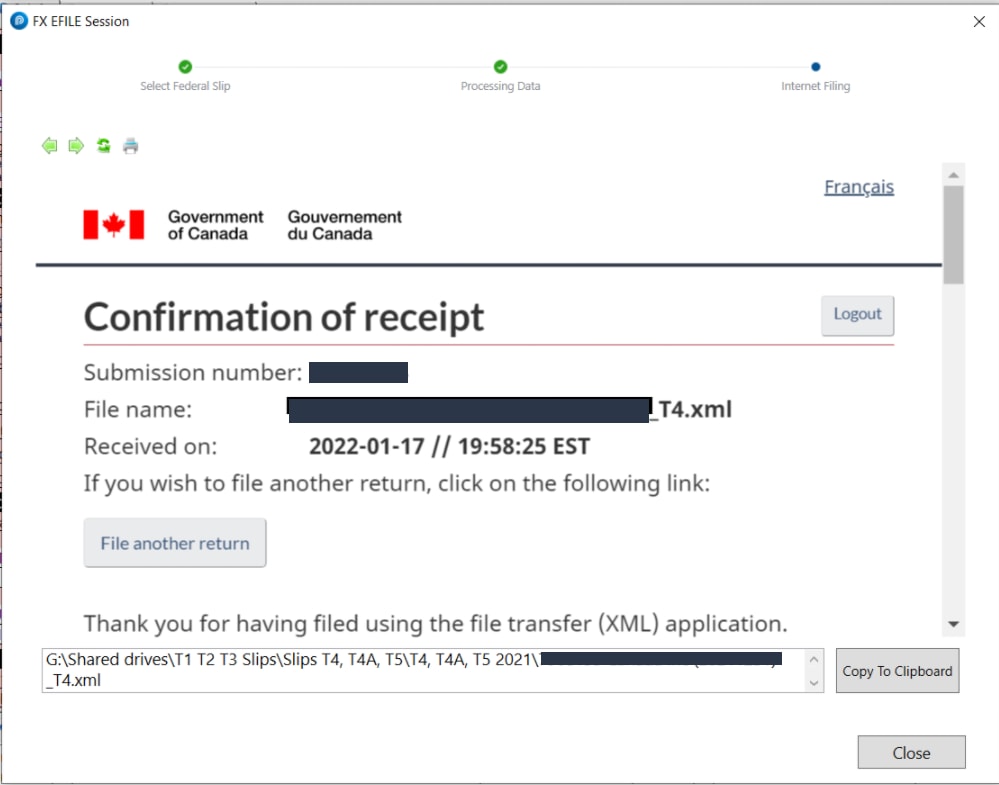
- Select the printer icon to print the confirmation of the transmission:
![]()
Internet file original slips (2021 and later)
- Open the FX return in ProFile.
- Navigate to the information (Info) form of the return.
- Select Yes to the question Are you internet filing slips?:
Note: The option to Internet file slips will not appear unless this option is set to Yes.
- Select the Properties option from the File dropdown menu in the top toolbar.
- Review the Slips Status section under the EFiling column. Set the slip status to Ready to file:
- Enter all Transmitter information under the EFILE menu.
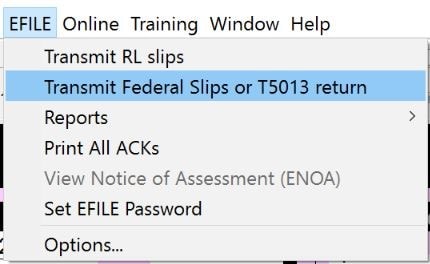
- Select the Transmit slips or a T5013 return option from the EFILE dropdown menu in the top toolbar:
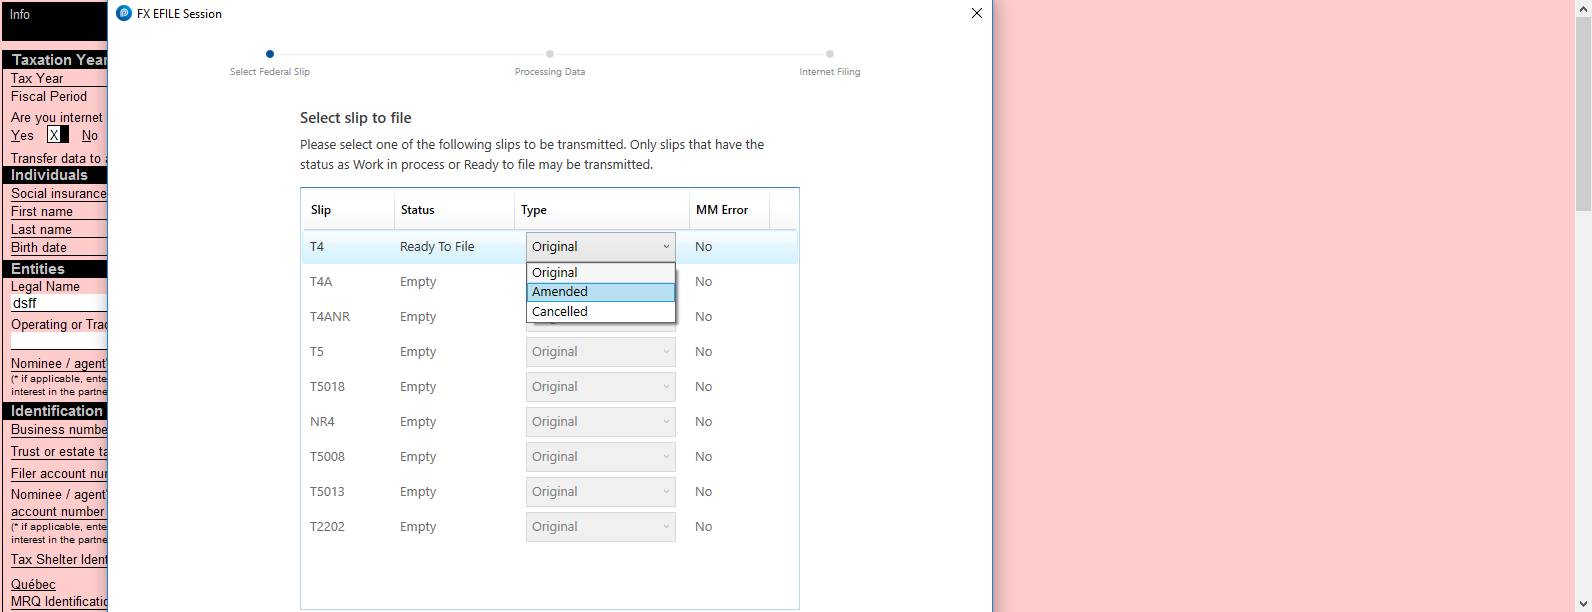
- Select the slip that is set with the Ready to File value:
- Select the Next button. The XML file builds.
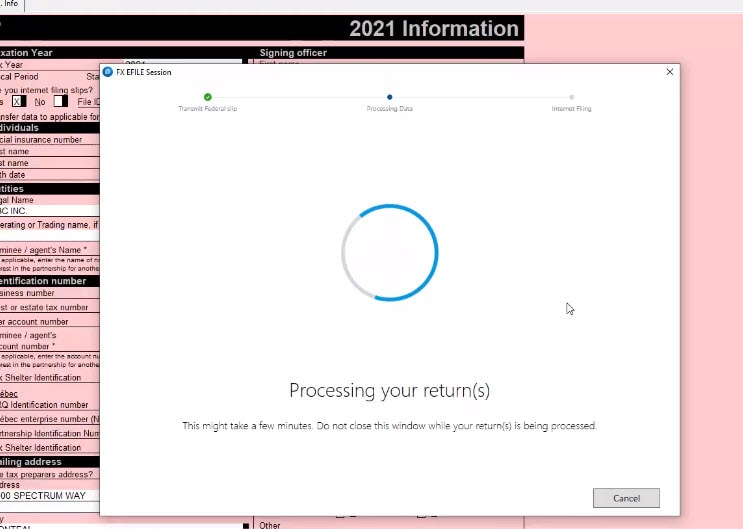
The CRA transmission window automatically displays:
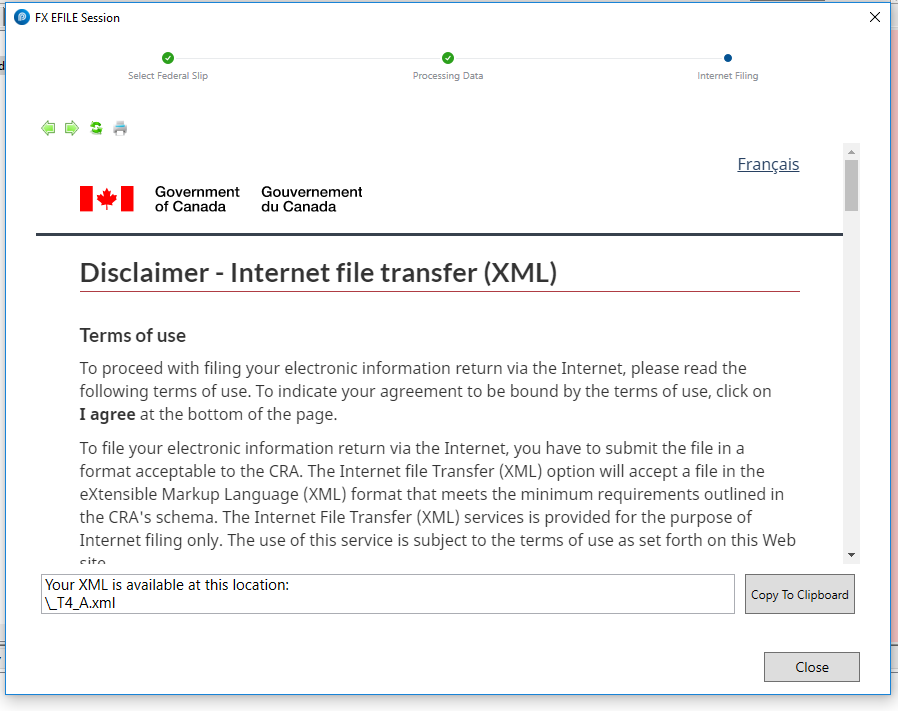
- Locate the XML file at the designated folder displayed, or click Copy to Clipboard to copy the XML location to the Clipboard.
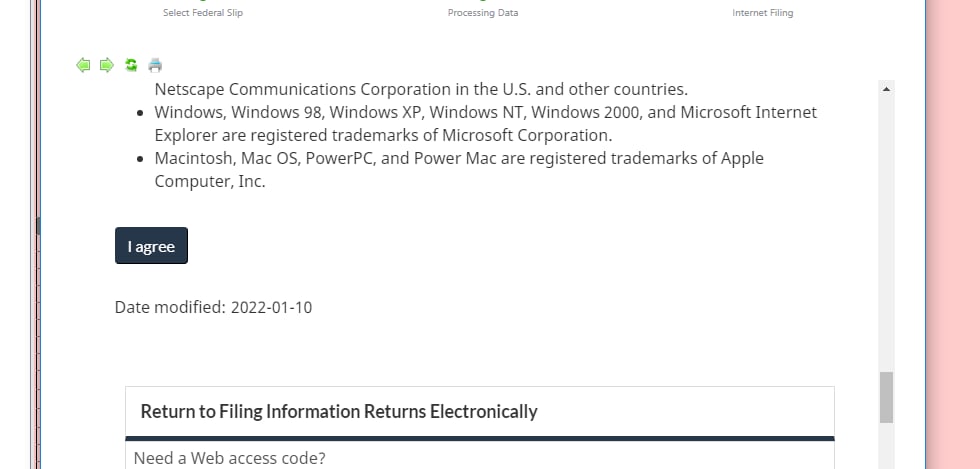
- Read the disclaimer and click the I agree button at the end to give consent for the XML transmission.
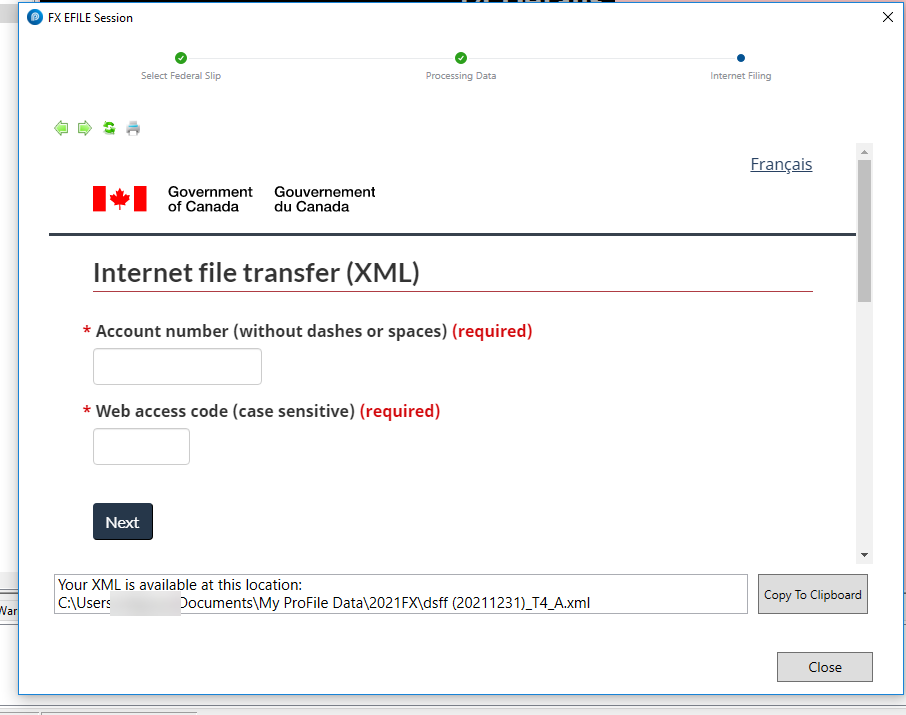
12. Enter the Account number and Web access code. Select the Next button.
Note: Due to changes in CRA requirements, the account number must be manually entered. It can be copied from the Identification number section on the Info page. The XML file transmits to CRA.
13. Select the printer icon to print the confirmation of the transmission:
Internet file amended slips (Pre-2021)
- Open the FX return in ProFile.
- Navigate to the information (Info) form of the return.
- Make the necessary amendments to the slip.
- Select Yes to the question Are you magnetic media or internet filing slips?:
- Select the Properties option from the File dropdown menu in the top toolbar.
- Review the Slips Status section under the EFiling column. Set the slip status to Ready to file:
- Select the Transmit slips or a T5013 return option from the EFILE dropdown menu in the top toolbar:
- Select the slip that is set with the Ready to File value:

- Set the value in the Data Type dropdown menu to Amended.
- Select the OK button or Next button, depending on your view. The XML file builds and a green checkmark displays for pre-2021 files:
The CRA transmission window automatically displays:
![]()
- Select the button to proceed. The Internet file transfer (XML) window displays:
![]()
- Enter the Account number and Web access code. Select the Next button.
The XML file transmits to CRA.
- Select the printer icon to print the confirmation of the transmission:
![]()
Internet file amended slips (2021 and later)
- Open the FX return in ProFile.
- Navigate to the information (Info) form of the return.
- Make the necessary amendments to the slip.
- Select Yes to the question Are you internet filing slips?:
- Select the Properties option from the File dropdown menu in the top toolbar.
- Review the Slips Status section under the EFiling column. Set the slip status to Ready to file:
- Select the Transmit slips or a T5013 return option from the EFILE dropdown menu in the top toolbar:
- Select the slip that is set with the Ready to File.
- Set the value in the Data Type dropdown menu to Amended.
- Select the OK button. The XML file builds.
The CRA transmission window automatically displays:
11. Locate the XML file at the designated folder, or click Copy to Clipboard to copy the location to the the Clipboard.
12. Read the disclaimer and click I agree at the bottom to give consent for the XML file transfer:
Note: Due to changes in CRA requirements, the account number must be manually entered. It can be copied from the Identification number section on the Info page.
The XML file transmits to the CRA.
Store and manage XML files
XML files are stored in the same default location where FX files are stored.
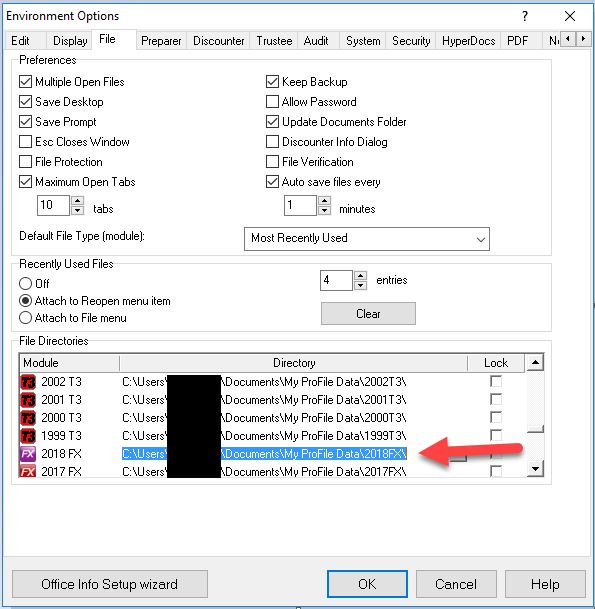
- Select Environment... from the Options dropdown menu in the top toolbar. The Environment Options window displays.
- Select the File tab.
The default location for XML files is listed under the File Directories section:
Changing the location of all generated XML files
- Select Options... from the EFILE dropdown menu in the top toolbar. The Electronic Filing Options window displays.
- Select the T3/FX option from the left-side menu.
The current location for XML files is listed under the XML Directory section:
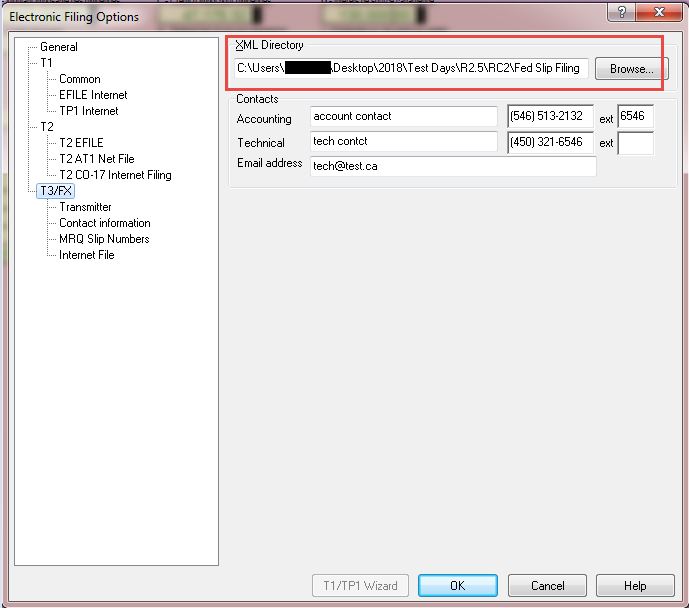
- Select the Browse button and navigate to the new location for XML file storage.
- Select the OK button.
The new location is saved.