Learn how to enter historical tax payments in QuickBooks Desktop Payroll.
In QuickBooks Desktop Payroll, you can enter historical tax payments that you made during the current or previous years before using the payroll service.
QuickBooks Desktop uses this information to determine how much you still owe to federal and provincial agencies, and to help ensure that your future tax deposits and filings are accurate.
Enter historical tax payments outside the Payroll Setup window
If you are trying to enter historical tax payments for the current or previous years, you can use the backdoor process.
- Select Next until you reach the Enter prior payments section.
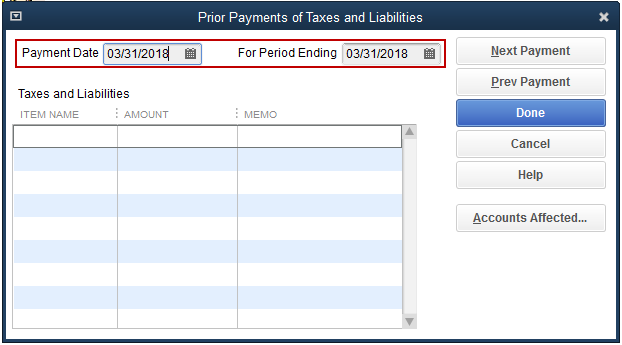
- In the Enter Prior Payments window, select Create Payment to enter all prior payroll tax and non-tax payroll liability payments you have made during the current or previous years.
- Enter the Payment Date and For Period Ending date accordingly. In many cases, these dates will be the same.
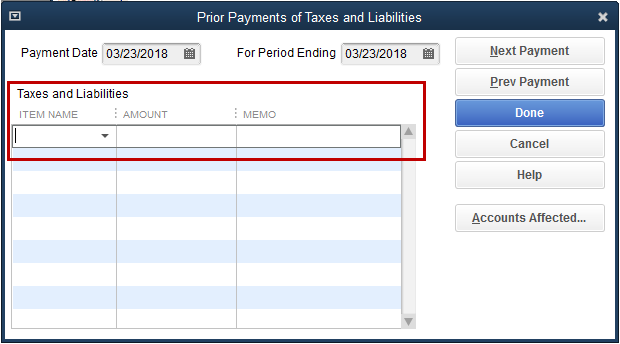
Note: If there is already an item with an amount selected under Taxes and Liabilities, select Next Payment. This may be a prior payment that you have already entered. - In the Taxes and Liabilities field, choose the payroll tax item that you've already paid and want to record in QuickBooks Desktop. Enter the amount. You can add a memo to remind yourself what the payment is for.
- Payments for prior quarters are entered as lump sums, and current quarter payments are entered per payroll.
- Payments for prior quarters are entered as lump sums, and current quarter payments are entered per payroll.
- Select the Accounts Affected... button. This displays options for how you want the payment to affect your Chart of Accounts.
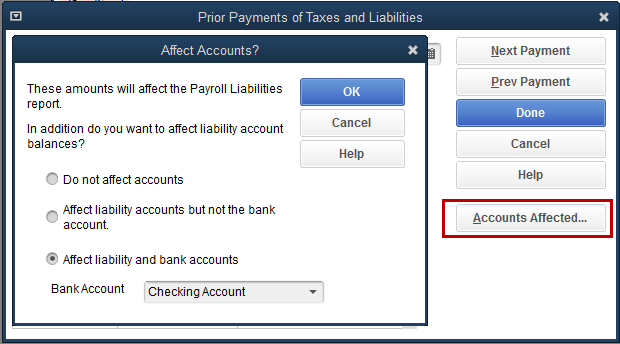
- Do not affect accounts: Use this option if your QuickBooks accounts have correct balances. Selecting this option will cause the prior payment to not show up in the bank register.
- Affect liability accounts but not the bank account: Use this option if your checking account has the correct balance. Selecting this option will cause the prior payment to not show up in the bank register.
- Affect liability and bank accounts: Use this option if none of the account balances are correct. Selecting this option will cause the prior payment to show up in the bank register.
- After you have completed your first payment, continue to the next by selecting Next Payment. Continue this process until you have completed all payments. Then select Done to save your work.
- Select Finish to close the window.