Add older bank transactions to QuickBooks Self-Employed
by Intuit•1• Updated 2 years ago
When you connect your banks and credit cards accounts to QuickBooks Self-Employed, it downloads the recent 30 to 90 days of transactions, sometimes even up to a year. Every time you sign in, QuickBooks automatically fetches new transactions from your connected accounts.
If you need to bring in older transactions, you can do so in just a few steps. Here’s how.
Step 1: Review your bank transactions
Note: It’s best to follow these steps on a laptop or desktop computer, not a mobile device or tablet.
Before you begin, check which transactions are already in QuickBooks so you don’t add duplicates.

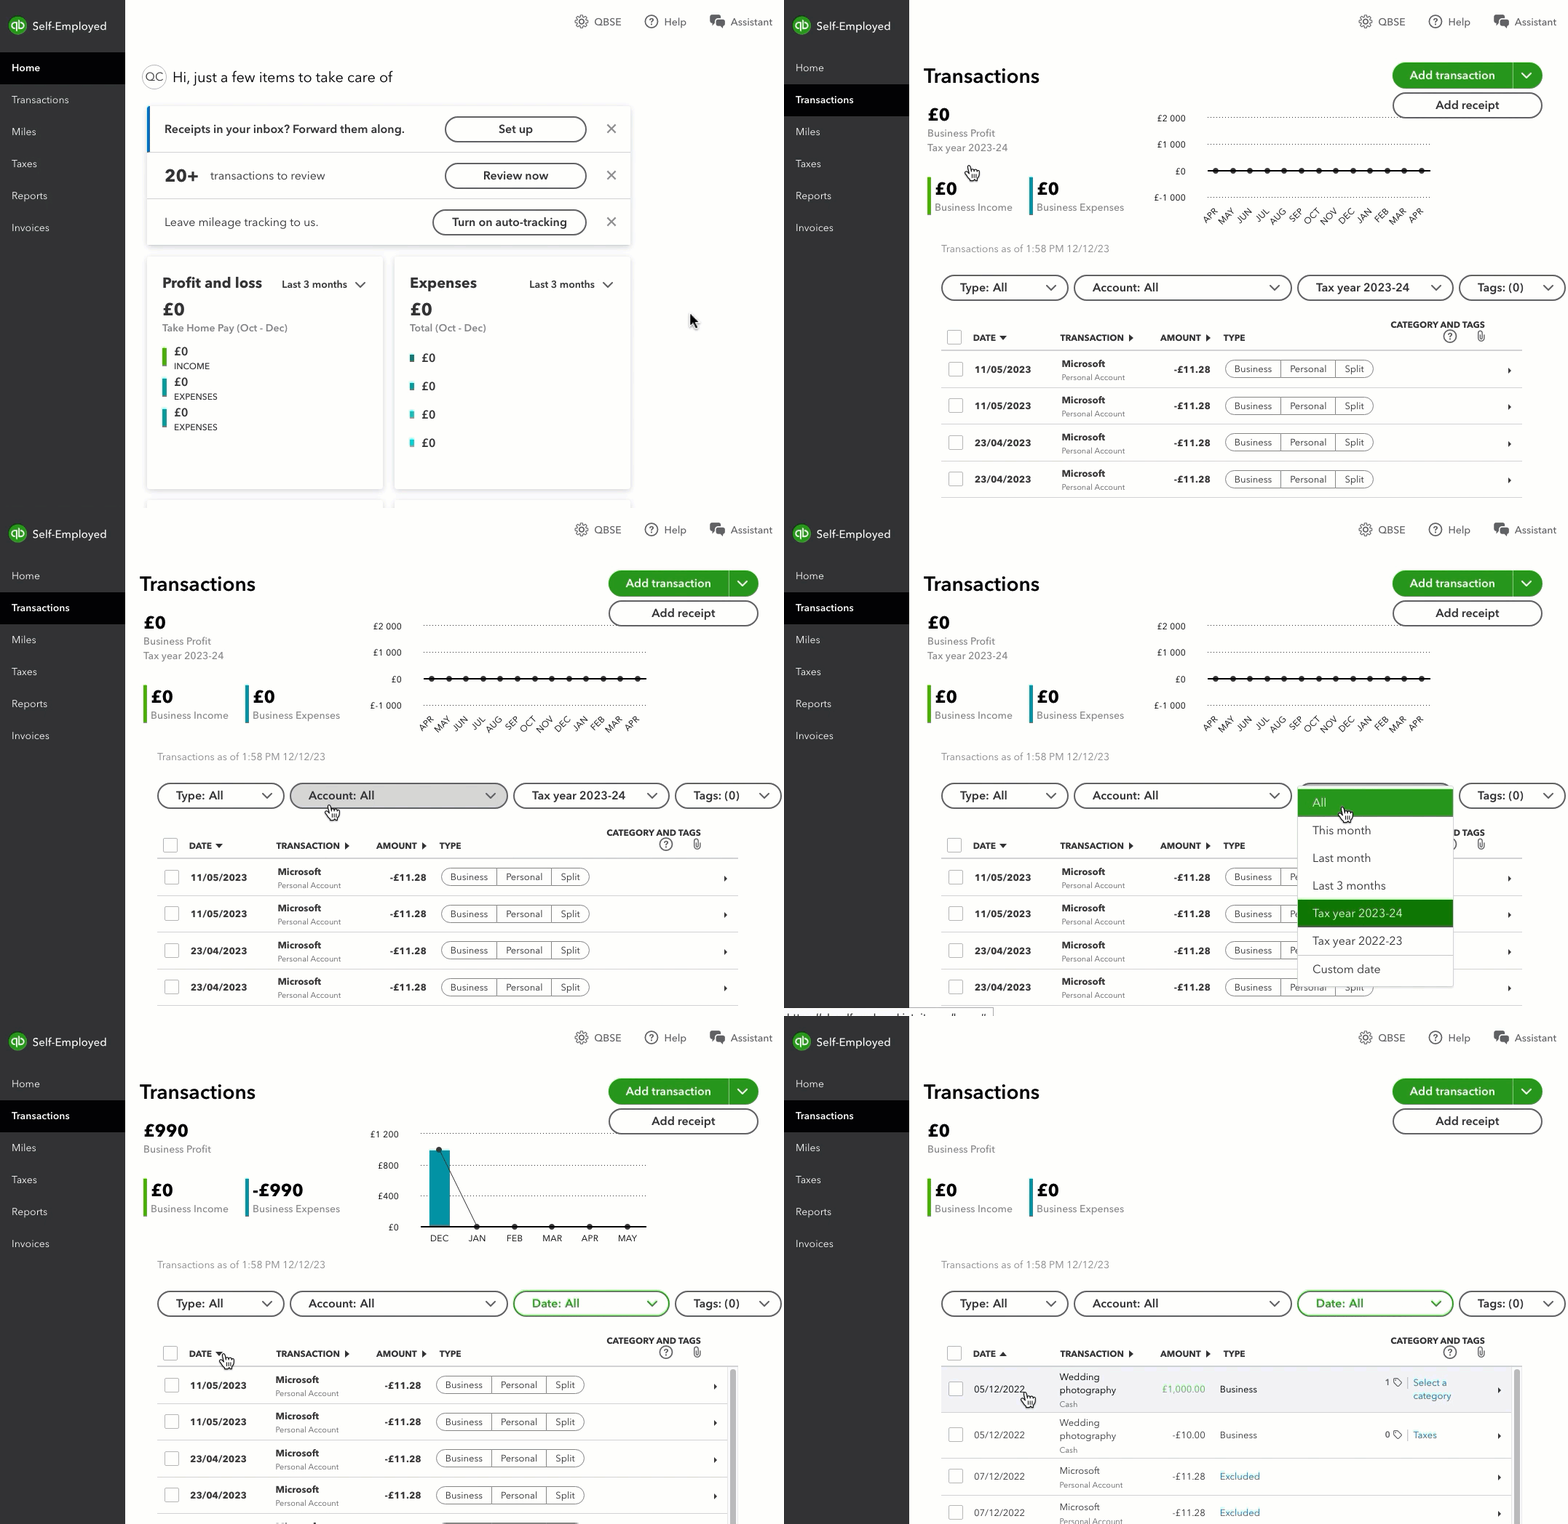
- Go to Transactions.
- From the Account: All dropdown menu, choose the account you plan to upload transactions into.
- From the date dropdown menu, select All.
- Select the arrow ▼ next to the Date column header to sort the list by date.
- Take note of the oldest transaction date in the account.
Step 2: Export the transactions from your bank
- Sign in to your bank’s website.
- Download your transactions as a CSV file by following your bank’s instructions. Look for a button or link on your account page.
Note: Your bank may not have specific instructions for QuickBooks Self-Employed, but as long as you download the transactions as a CSV file, it will work. - Set the date range to include at least one day before the oldest transaction in your QuickBooks Self-Employed account. Keep in mind that you can add transactions as far back as January 1, 2014.
- Follow any on-screen instructions to complete the download.
Step 3: Import the transactions into QuickBooks Self-Employed

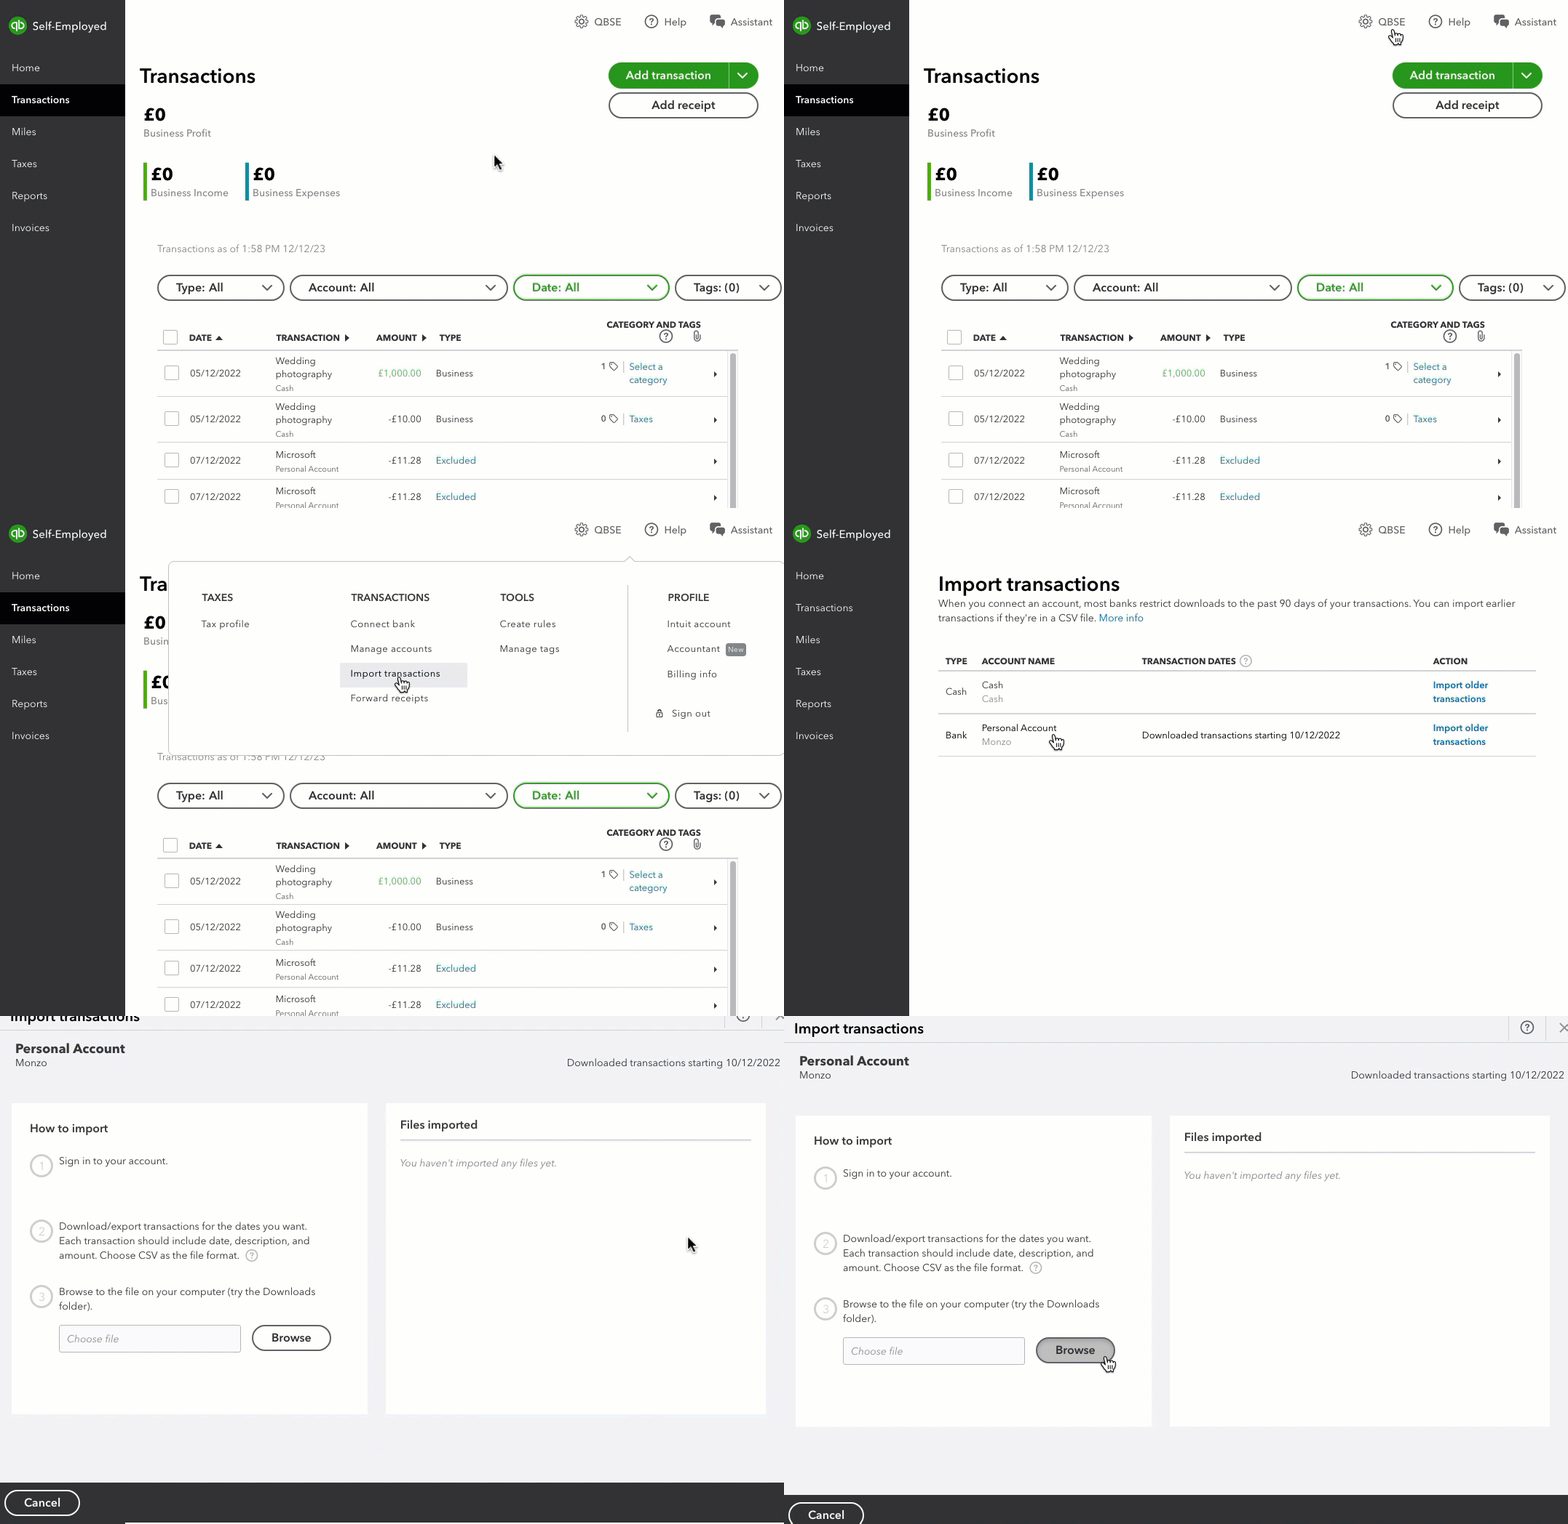
- Open QuickBooks Self-Employed on your computer.
- Select ⚙️ Settings.
- Select Import transactions.
- Next to the account you want to bring transactions into, select Import older transactions.
- Select Browse and locate the CSV file you downloaded from your bank. Typically, it can be found in your downloads folder.
- Select the file and then Open to start the import process.
- Check the column headers and data in the CSV file. Make sure the Date, Description, and Amount columns match the columns and order in QuickBooks. Other column headers can be in any order.
- Select Continue to complete the import.
If you see “Error Importing”
This means that the file you are trying to bring is too big. Make sure your file size is below 100kb. If it exceeds this limit, you can try reducing the amount of information you download from your bank. Alternatively, you can download the files in smaller batches.
Step 4: Review imported transactions
It’s important to keep your books accurate and organised, so let’s go ahead and check for any duplicate transactions.
- Go to Transactions.
- From the Account: All dropdown menu, choose the account you plan to upload transactions into.
- From the date dropdown menu, select All.
- Select the arrow ▼ next to the Date column header to sort the list by date.
- Look a few days before and after the original oldest transaction you noted in Step 1. If you find any duplicate transactions, simply delete them.