Set up bank rules to categorise online banking transactions in QuickBooks Online
by Intuit•248• Updated 1 week ago
Learn how to use bank rules to automatically categorise transactions from your bank.
When you download transactions from your bank, you need to categorise them so that they enter the right accounts. Bank rules can do this automatically.
The more QuickBooks Online uses the bank rules you create, the better it gets at categorising. After a while, the app learns how to read transactions, then automatically adds details.
This article will cover how to:
- Create a bank rule
- Review recognised transactions
- Add bank rules automatically
- Copy or delete bank rules
- Reorder bank rule list
- Import existing bank rules
- Fix bank rules not applying to transactions
Create a bank rule
- Go to All apps
 , select Accounting, then select Rules (Take me there).
 - Select New rule.
Note: Select Go to rules if you are adding for the first time. - Enter a name in the What do you want to call this rule? field.
- From the Apply this to transactions that are ▼ dropdown, select Money in or Money out, and then bank account.
- From the in ▼ dropdown, select a bank account, or select All bank accounts.
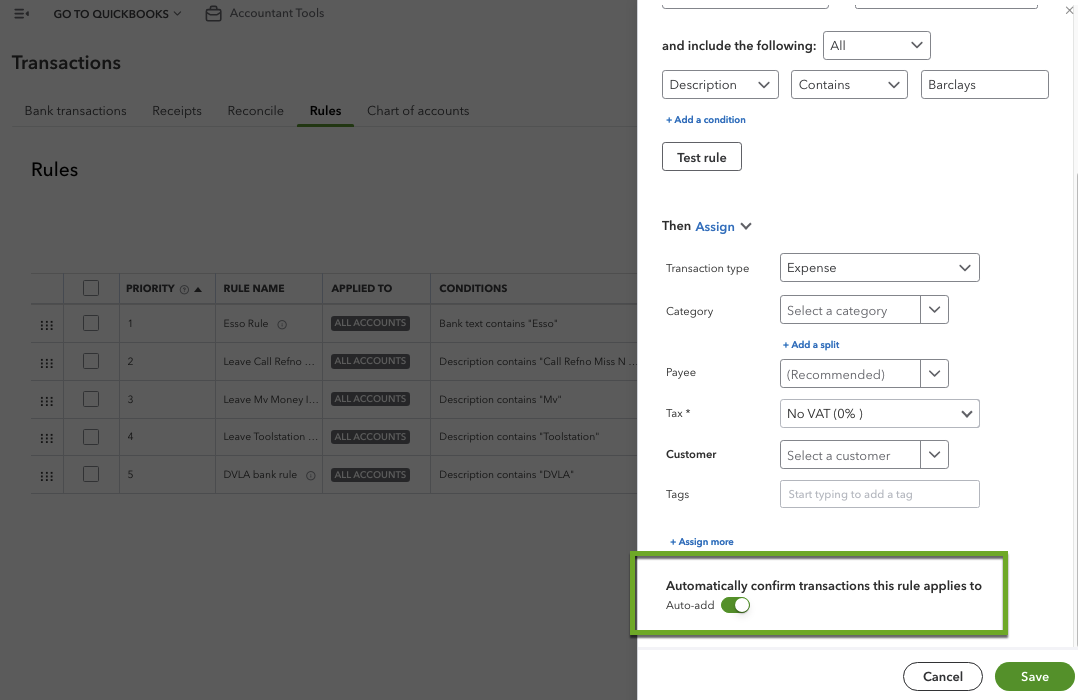
- Set the rule conditions. You can set a single rule with up to 5 conditions. Set and include the following, then select + Add a condition.
- In the Conditions fields, specify whether the rule applies to Description, Bank text, or Amount. Then select Contains, Doesn't contain, or Is exactly and enter the value or text to decide how QuickBooks applies the rules.
- Select the settings for the rule. Select Transaction type, Category, Product/service, Payee, Tax, and Customer to apply.
Note: You may see different options depending on the company settings you’ve turned on. - Select Save.
QuickBooks automatically applies your rules to transactions in the Pending tab. These are the ones you need to review every day.
Create a bank rule from within a transaction
Tip: You can also create a bank rule directly from a transaction within the Pending tab. Here's how:
- Go to All apps , select Accounting, then select Bank transactions (Take me there).
- Select the Pending tab.
- Select transaction to open its details.
- Select Create rule to open the create rule window.
- Follow the steps in this article to create a bank rule.
Review recognised transactions
After a rule is applied, a RULE badge appears in the Match/Category column of the transaction.
To filter rules, follow these steps.
- Go to All apps , select Accounting, then select Bank transactions (Take me there).
- Select the All transactions ▼ dropdown.
- Select Rules.
Add bank rules automatically
The auto-add feature in QuickBooks automatically categorises and confirms transactions that meet the criteria set in a bank rule.
Create targeted rules so that specific transactions are automatically accepted into your books from the Bank transactions (Take me there) page.
Tip: We recommend starting with simple, consistent transactions like rent or fuel expenses. Then, use it to cover more transactions.
- Follow the steps to create a new bank rule.
- Turn on Auto-add under Automatically confirm transactions this rule applies to in the Create rule window.
- Select Save.
After you create an auto-add rule, any transactions on the Pending tab that meet the conditions are automatically added. Auto-add rules run when you sign in, upload a file, or create or modify a new auto-add rule.
Copy, deactivate or delete a bank rule
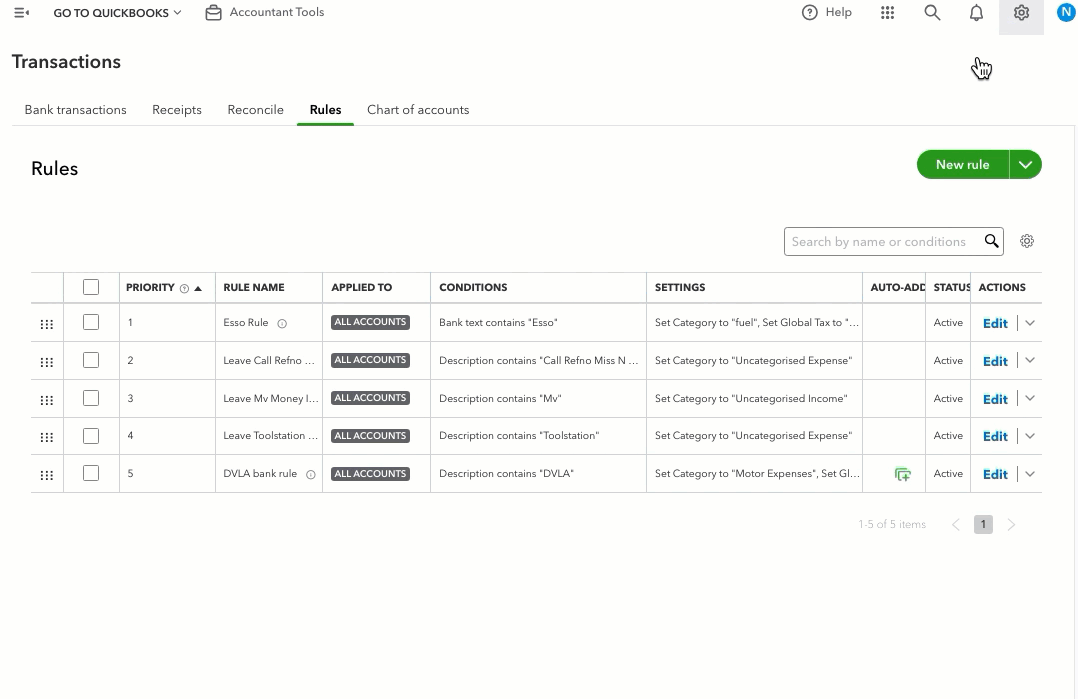
- Go to All apps , select Accounting, then select Rules (Take me there).
- If you need to make changes to a bank rule, select Edit.
- In the Actions column ▼ dropdown, select to Copy, Disable/Enable, or Delete the bank rule.
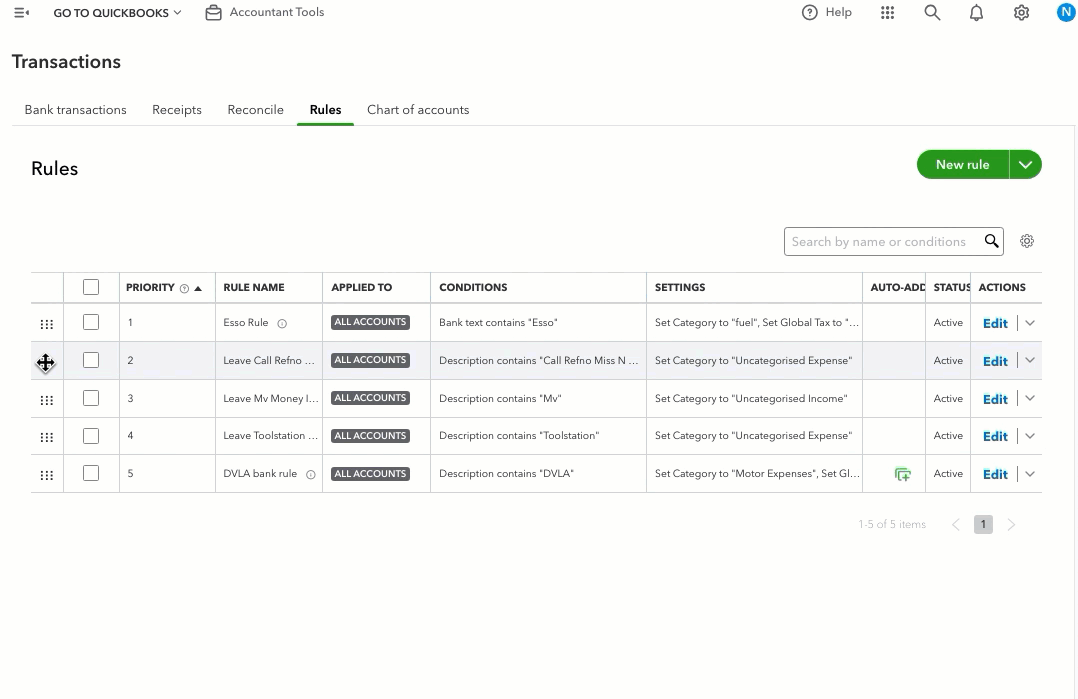
Reorder bank rule list
You can reorder your bank rules by priority. The rule with the highest priority will always be applied first.
- Go to All apps , select Accounting, then select Rules (Take me there).
- Select reorder
next to the rule you want to reorder, and drag the rule to your desired order.
Import existing bank rules
If you set up banking rules on another QuickBooks Online company file, you can export them to another company file:
- Sign in to the company file you want to export the bank rules from.
- Go to All apps , select Accounting, then select Rules (Take me there).
- Select the New rule ▼ dropdown and then Export rules.
- Save the export file in Excel.
- Sign out of the company file and sign in to the one you want to import the rules into.
- Go to All apps , select Accounting, then select Rules (Take me there).
- Select the New rule ▼ dropdown and then Import rules.
- Select Select the file to upload and find the Excel file you exported and select Next.
- Select the rules and details you want to import.
- Follow the prompts to finish the import.
If your bank rules aren't getting applied to transactions
If your bank rules aren't getting applied, it might be because you’re using a rule based on bank text when you meant to make a rule based on description, or vice versa. To explain the difference:
- The Bank text is exactly the same information the app receives from the bank. The bank text is the transaction you'd see listed in your bank account or on your bank statement.
- The Description is a simplified version of the bank text to make it easier to understand. For example, the app might simplify bank text by just giving the supplier name.
By default, the app shows the description in your list of transactions. To show the bank text instead:
- Go to All apps , select Accounting, then select Bank transactions (Take me there).
- Select the settings icon ⚙ within the Bank transactions section.
- Select the Show full bank description checkbox.
We're here to help
If you've got any questions or need a hand fixing a connection error, linking or reconciling a bank account, let us know. Sign in to QuickBooks and start a discussion in our QuickBooks Community.