A beginner's guide to online banking in Quickbooks Online
by Intuit•14• Updated 1 year ago
This guide will show you how to use QuickBooks Online's online banking features, as well as provide links to helpful how-to articles so you can make the most out of the banking feature.
This article will cover how to:
- Connect a bank or credit card account
- Manually upload transactions
- Review, categorise and match transactions
- Navigate the banking dashboard
- Exclude a transaction
- Set up bank rules
- Reconcile an account
- Review the reconciliation report
- Fix bank errors
Before you start
- Check if your bank supports Open Banking. Refer to this list of participating banks and if your bank isn't listed, don't worry, you can skip step 1.
- Make sure you set up VAT so you can include it in your transactions.
- If you have a foreign currency account, here's how you can set it up.
Step 1. Connect your bank account
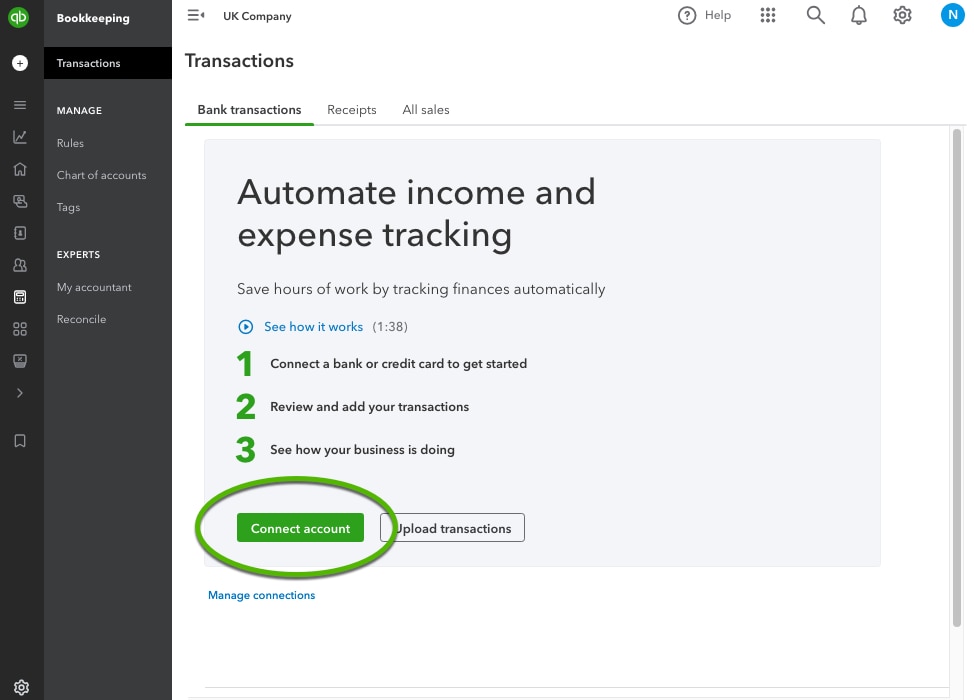
- Depending on your view, go to Transactions or Bookkeeping.
- Select the Bank transactions tab.
- If this is your first bank account, select Connect account. Or, if you've already created one, select Link account.
- Follow the instructions to connect a bank account.
Here are a few key points to be aware of once your account is connected to QuickBooks Online.
• Refresh your bank connection every 90 days
You'll need to refresh the link between your bank and QuickBooks every 90 days as part of the Open Banking rule.
If you don't, QuickBooks won't be able to automatically pull in transactions after the disconnection. This means you'll have to manually import any missing transactions for the period when the connection was inactive.
Follow these steps to reconnect your account.
• Manage your connections
You can easily manage all your bank connections and keep track of when you need to renew them. You'll find all your past consents and the upcoming renewal dates, allowing you to stay on top of everything.
Step 2. Manually upload transactions
To import recent or older transactions, or if your bank or credit card cannot sync with QuickBooks yet, you can upload transactions manually using a CSV file.
Keep in mind, the maximum file size is 350 KB. If the file is too big, you can shorten the date range and bring your transactions into QuickBooks in smaller batches.
Step 3. Review, categorise and match transactions
Once your transactions are in QuickBooks, it's time to sort them out and make sure they're properly categorised and matched.
This step is crucial for keeping tabs on your spending, organising your expenses, and making sure that your accounts are always up-to-date.
Confused about categorising transactions? Don't worry! This guide will walk you through using account type and detail types for better organisation.
Tip: The more you categorise your transactions in QuickBooks, the smarter it gets at automatically recognising and categorising similar transactions for you.
Step 4. Navigate the banking dashboard
Now that you're connected to QuickBooks, you'll see the banking dashboard.
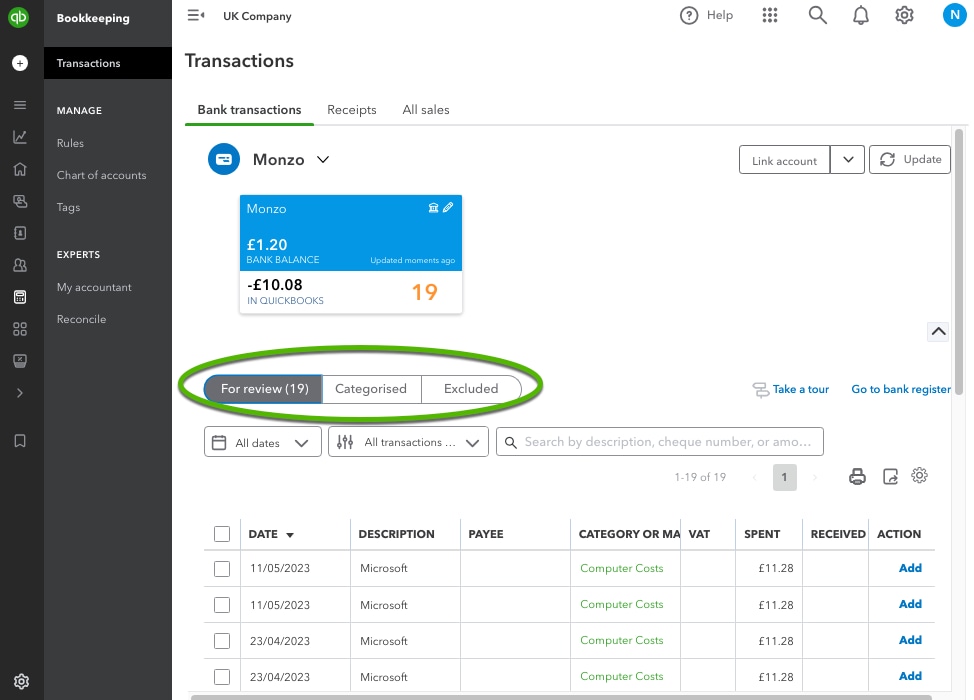
In the Bank transactions tab, you'll see the following:
- For review is where newly downloaded and uncategorised transactions are sent for your attention.
- Categorised shows all the transactions that have already been sorted into their respective categories.
- Excluded shows any transactions that have been excluded from being processed.
To add a transaction, select Add under the Actions column.
You then have the option to assign it to an existing category or create a new one for future use. The great thing is that QuickBooks Online will take care of categorising it for you based on its rules.
Tip: You can use the search bar to find specific transactions using keywords, or you can narrow down the results by date and type of transaction.
Step 5. Exclude a transaction
If you come across a duplicate transaction or a personal expense that you want to remove from the list, you can exclude it.
Once you exclude the transaction, it won't show up in your account registers or financial reports. It's always a good idea to consult with your accountant before taking this step.
Step 6. Set up bank rules
You can create bank rules in QuickBooks to automatically categorise your transactions.
The more you use bank rules, the better QuickBooks gets at categorising them. Over time, it can even scan transactions and add details like payees.
- Go to Transactions and select Rules (Take me there).
- Select New rule. For detailed instructions, see Set up bank rules to automatically categorise transactions.
Step 7. Reconcile an account
Next, you'll want to go through your accounts in QuickBooks and make sure they match up with your bank and credit card statements. This is called reconciling accounts.
Basically, you'll be comparing each transaction in QuickBooks to what's on the statements. If everything lines up, then you can be confident that your accounts are balanced and accurate.
Tip: It's good practice to reconcile your current, savings and credit card accounts every month. By reconciling your accounts regularly, you can catch any mistakes or discrepancies and keep your records accurate.
Here are some help articles to guide you through bank reconciliation:
- What’s a reconciliation?
- Understanding the reconciliation workflow
- How to reconcile an account
- Undo or remove transaction from reconciliations
- Fix issues at the end or after reconciling accounts.
Step 8. Review the reconciliation report
After reconciling accounts, the next step is to review the reconciliation report that QuickBooks create for you. This is important to check for any mistakes or discrepancies and make sure your financial records are accurate.
On the report, select View Reconciliation Report to see a summary of the account including cleared and uncleared balances, cheques, payments, deposits and credits.
Here’s how you can view, print, or export a reconciliation report.
Step 9. Fix bank errors
Tip: Having trouble with transactions not showing up? Just give the bank feed connection a quick refresh by hitting the Update button on the banking dashboard. That should do the trick!
If you come across an error code or error message at any point, our guide covers common errors and how to fix them.
We're here to help
If you've got any questions or need a hand fixing a connection error, linking or reconciling a bank account, let us know. Sign in to QuickBooks and start a discussion in our QuickBooks Community.
Sign in now for personalized help
See articles customized for your product and join our large community of QuickBooks users.