How to use the Client Analysis Tool in QuickBooks Online Accountant
by Intuit• Updated 2 years ago
If you use QuickBooks Online Accountant, then you know how important it is to have a clear understanding of your clients' businesses. After all, being able to provide them with accurate and timely insights is crucial to maintaining a successful relationship.
That's why QuickBooks Online Accountant has the Client Analysis Tool. This powerful tool allows you to segment and understand your client base, get key insights into their businesses, and identify which clients need to prepare for things like end of year taxes and more.
In this article, we'll take a closer look at the Client Analysis Tool, including where to find it and how to get the most out of it. Ready to save time and help your clients grow their business? Great! Let's get started.
Where to access the Client Analysis Tool

- In QuickBooks Online Accountant, go to ProAdvisor.
- Select Benefits, and then Check it out.
- Next to the Client Analysis Tool, select Get started.
How to download the Client Analysis Tool app
Next, let's download the app. Follow these steps to download the tool in QuickBooks Online Accountant.
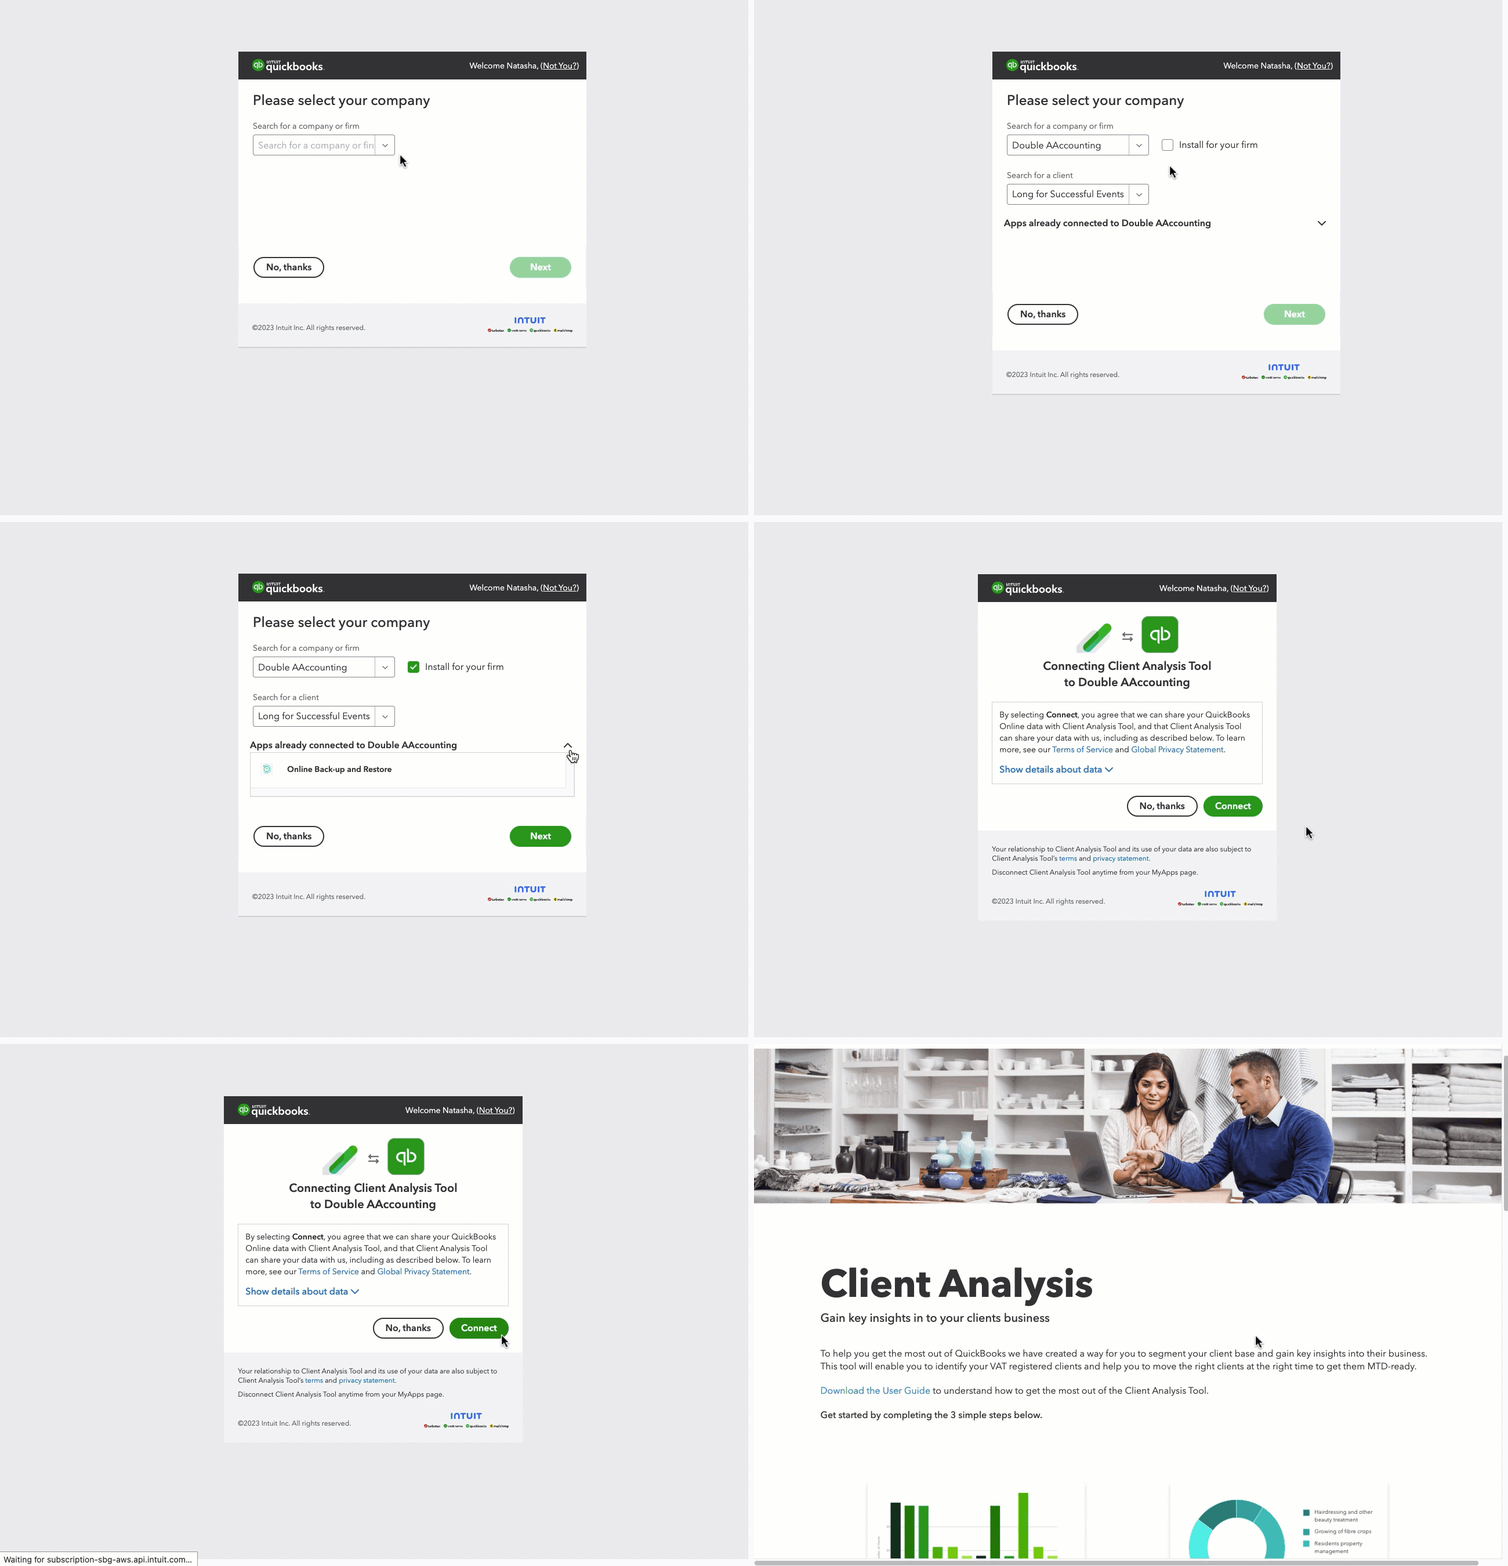
- Select your company or firm.
- Tick the Install the tool for your firm box to confirm.
- Disregard the section to select a client.
- Select Next to continue.
- Once you're ready, select Connect.
- On the Client Analysis Tool info page, select Get Started.
You'll be taken to your Client Analysis Tool dashboard.
Note: Only one person can download, manage and use the Client Analysis Tool at a time. If you need to give access to a member of your firm, you'll need to disconnect the tool from QuickBooks so that they can set it up themselves.
How to use the Client Analysis Tool
Step 1. Download your data template
Use our data template to capture all your client data in one place. You can download it and then upload it into the Client Analysis tool. Remember, the more fields you complete, the better insights you'll be able to gather.
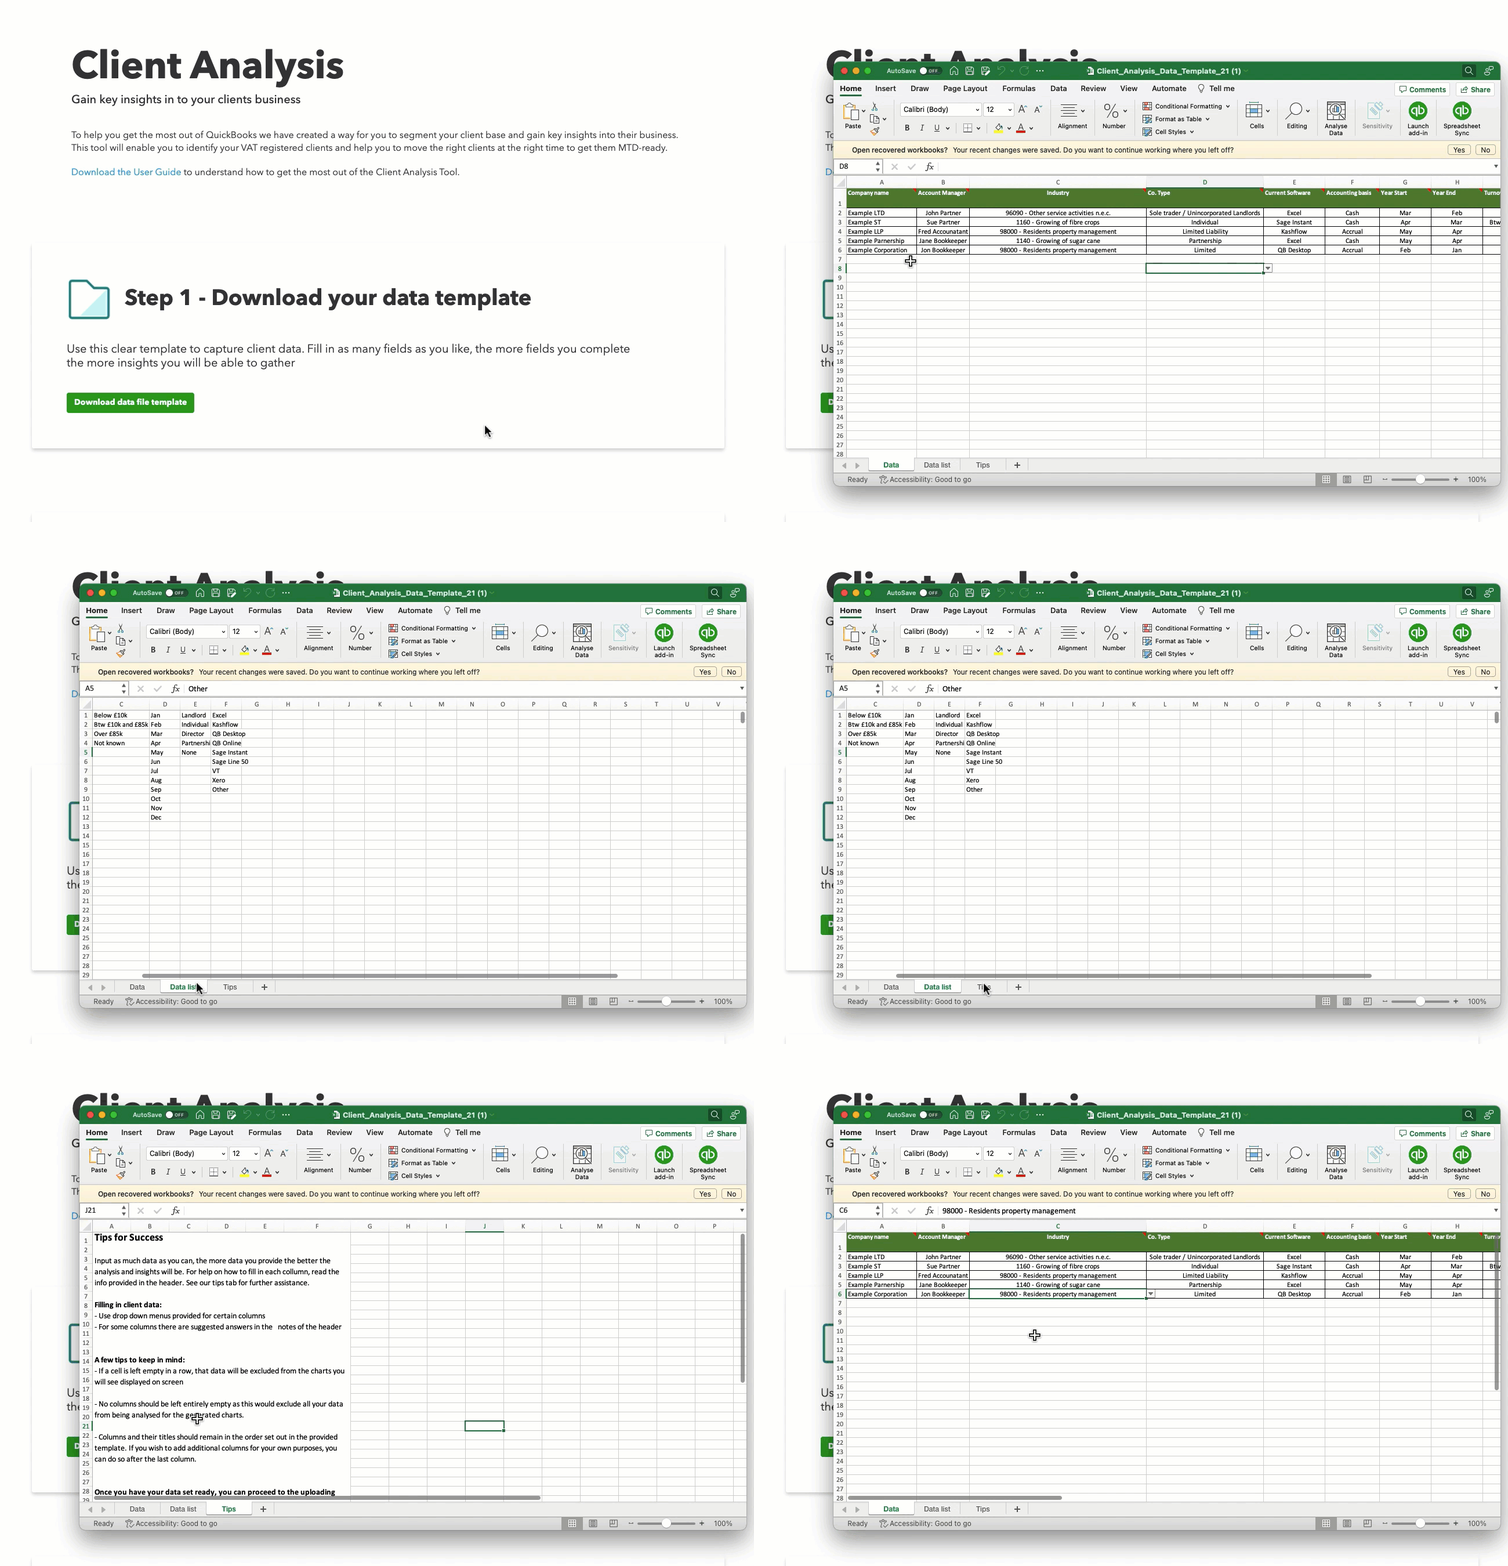
- On the Client Analysis Tool info page, select Download data file template.
- On your computer, open the Excel template.
- Select Enable editing.
- Select the Data tab.
- Add in as much information as you have available. The more data you include, the more accurate your analysis will be.
Tip: If there's a column that isn't relevant to your company, simply leave the cells under that column empty. Don't delete or edit any of the column headers within the template. - Remember to Save your file.
If you'd like to personalise the template to match your business, let's say you want to list all the industries you work with, select the Data list tab on the Excel sheet and add the industries under column B.
For more useful tips, select the Tips tab.
Step 2. Upload your data
Once you have entered the client information onto the spreadsheet, you can upload the completed file into QuickBooks. Here's how:
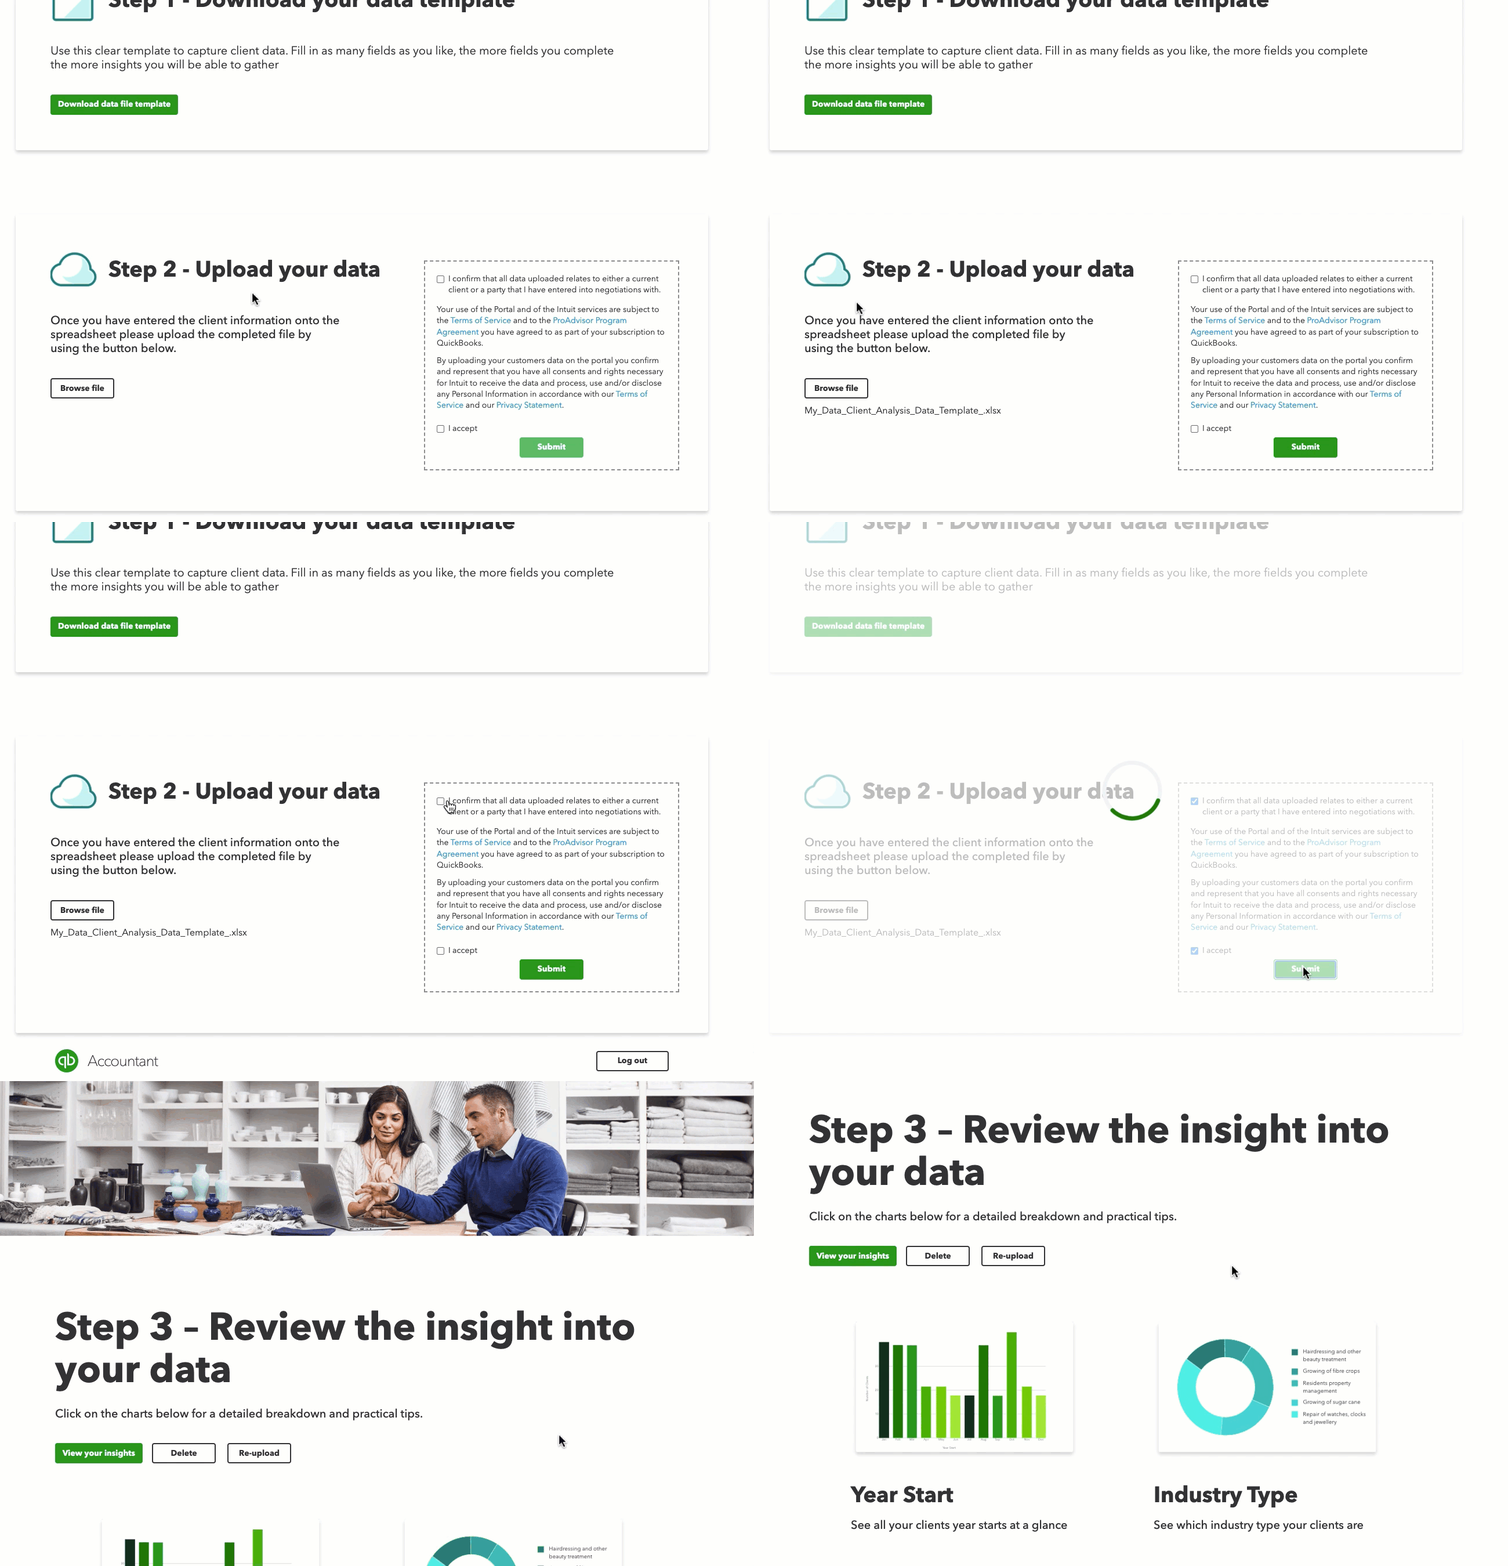
- On the Client Analysis Tool info page, select Browse file.
- Select your file, and then select Open.
- Tick the checkboxes to confirm and accept uploading the file.
- Select Submit.
Note: If you see a warning, don't worry, we'll cover common reasons why warnings may appear and how to fix them. - Select Review data. You'll see your Client Analysis Tool dashboard.
Step 3. Review the insight into your data
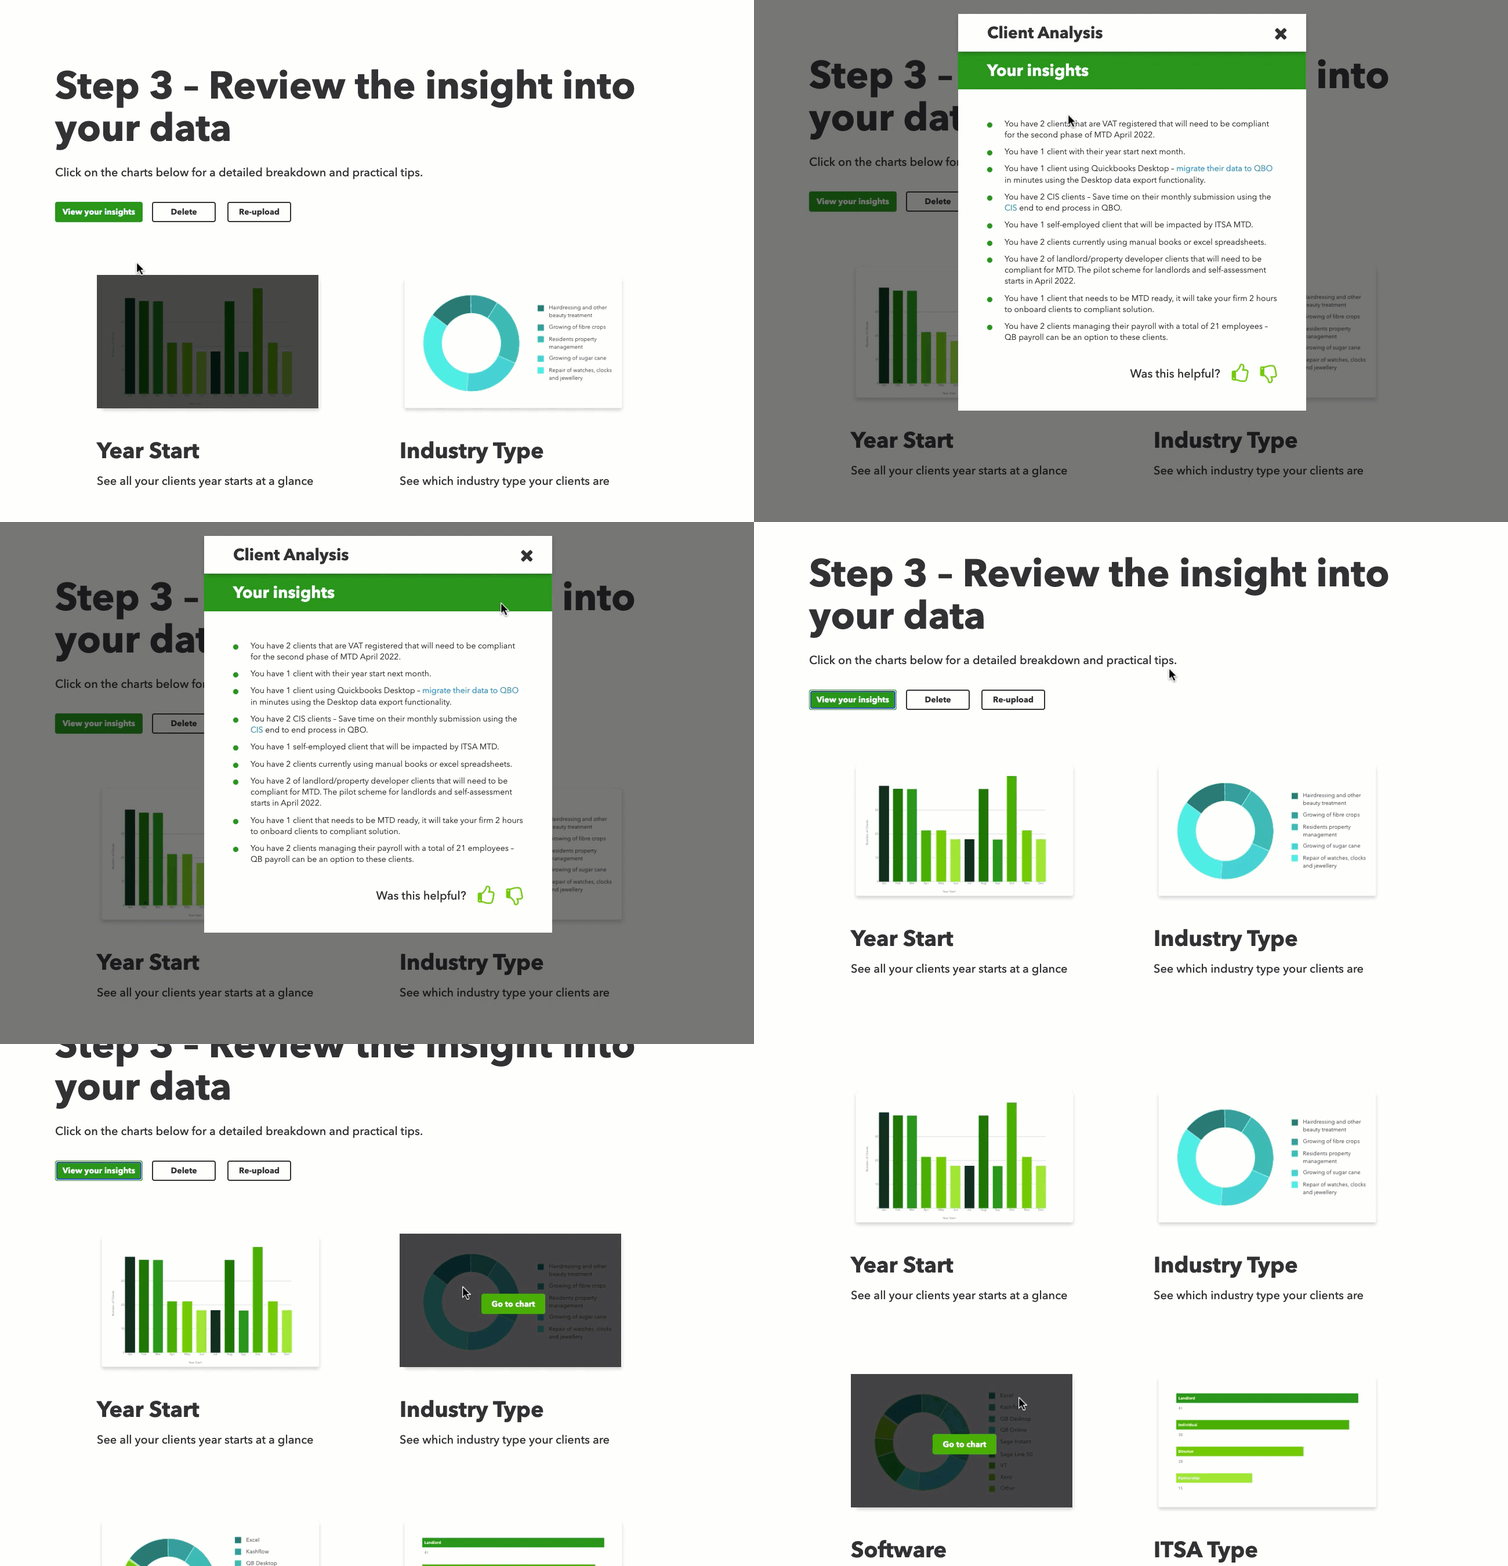
To see a summary of the main information based on the data you uploaded, select View your insights.
Want to see a detailed breakdown of each report along with some practical tips? Hover over any of the six charts and select Go to chart.
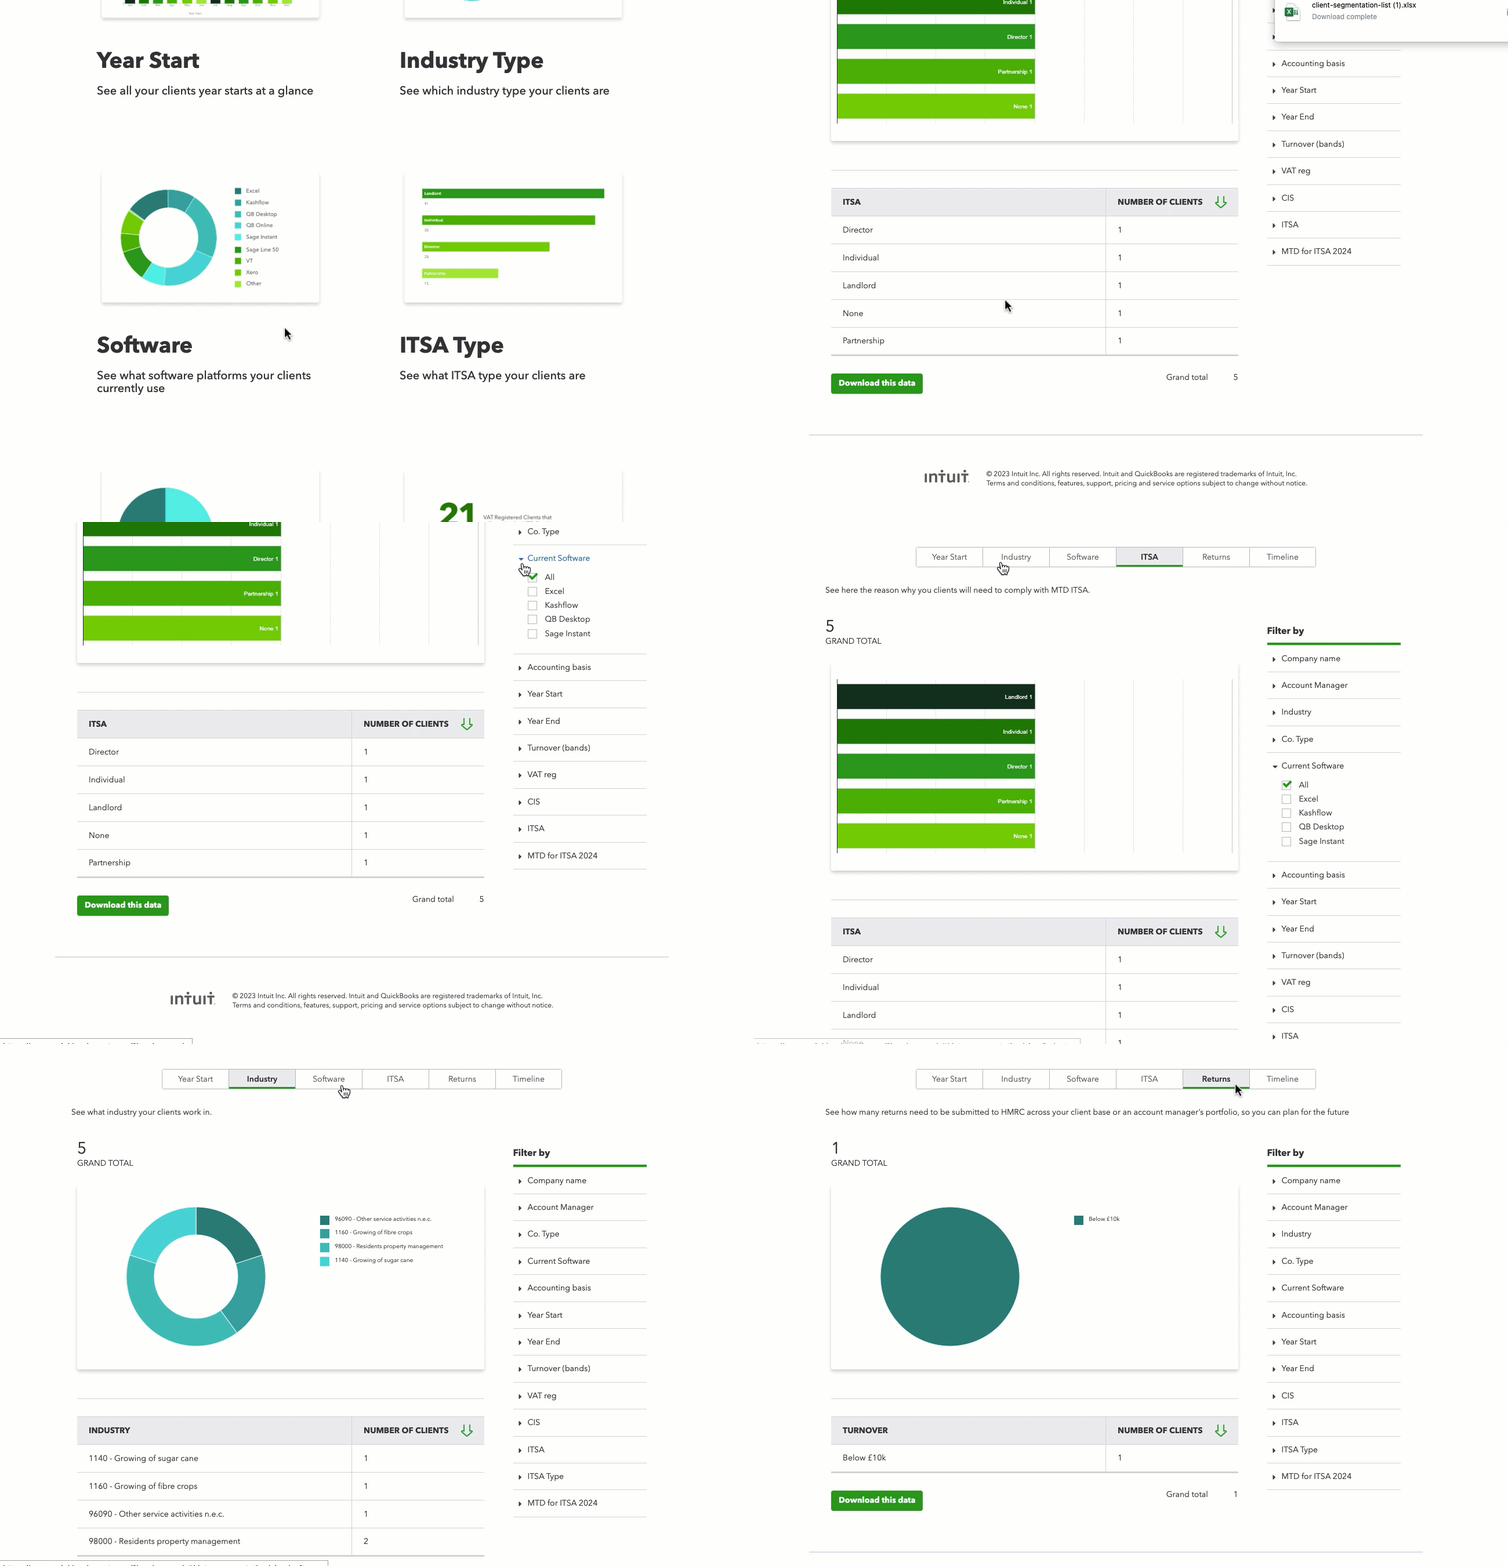
You can download any of the data by selecting Download this data. This will download an Excel file to your computer.
To go back your Client Analysis Tool dashboard, select Back to overview.
Access the Client Analysis Tool from QuickBooks Online Accountant
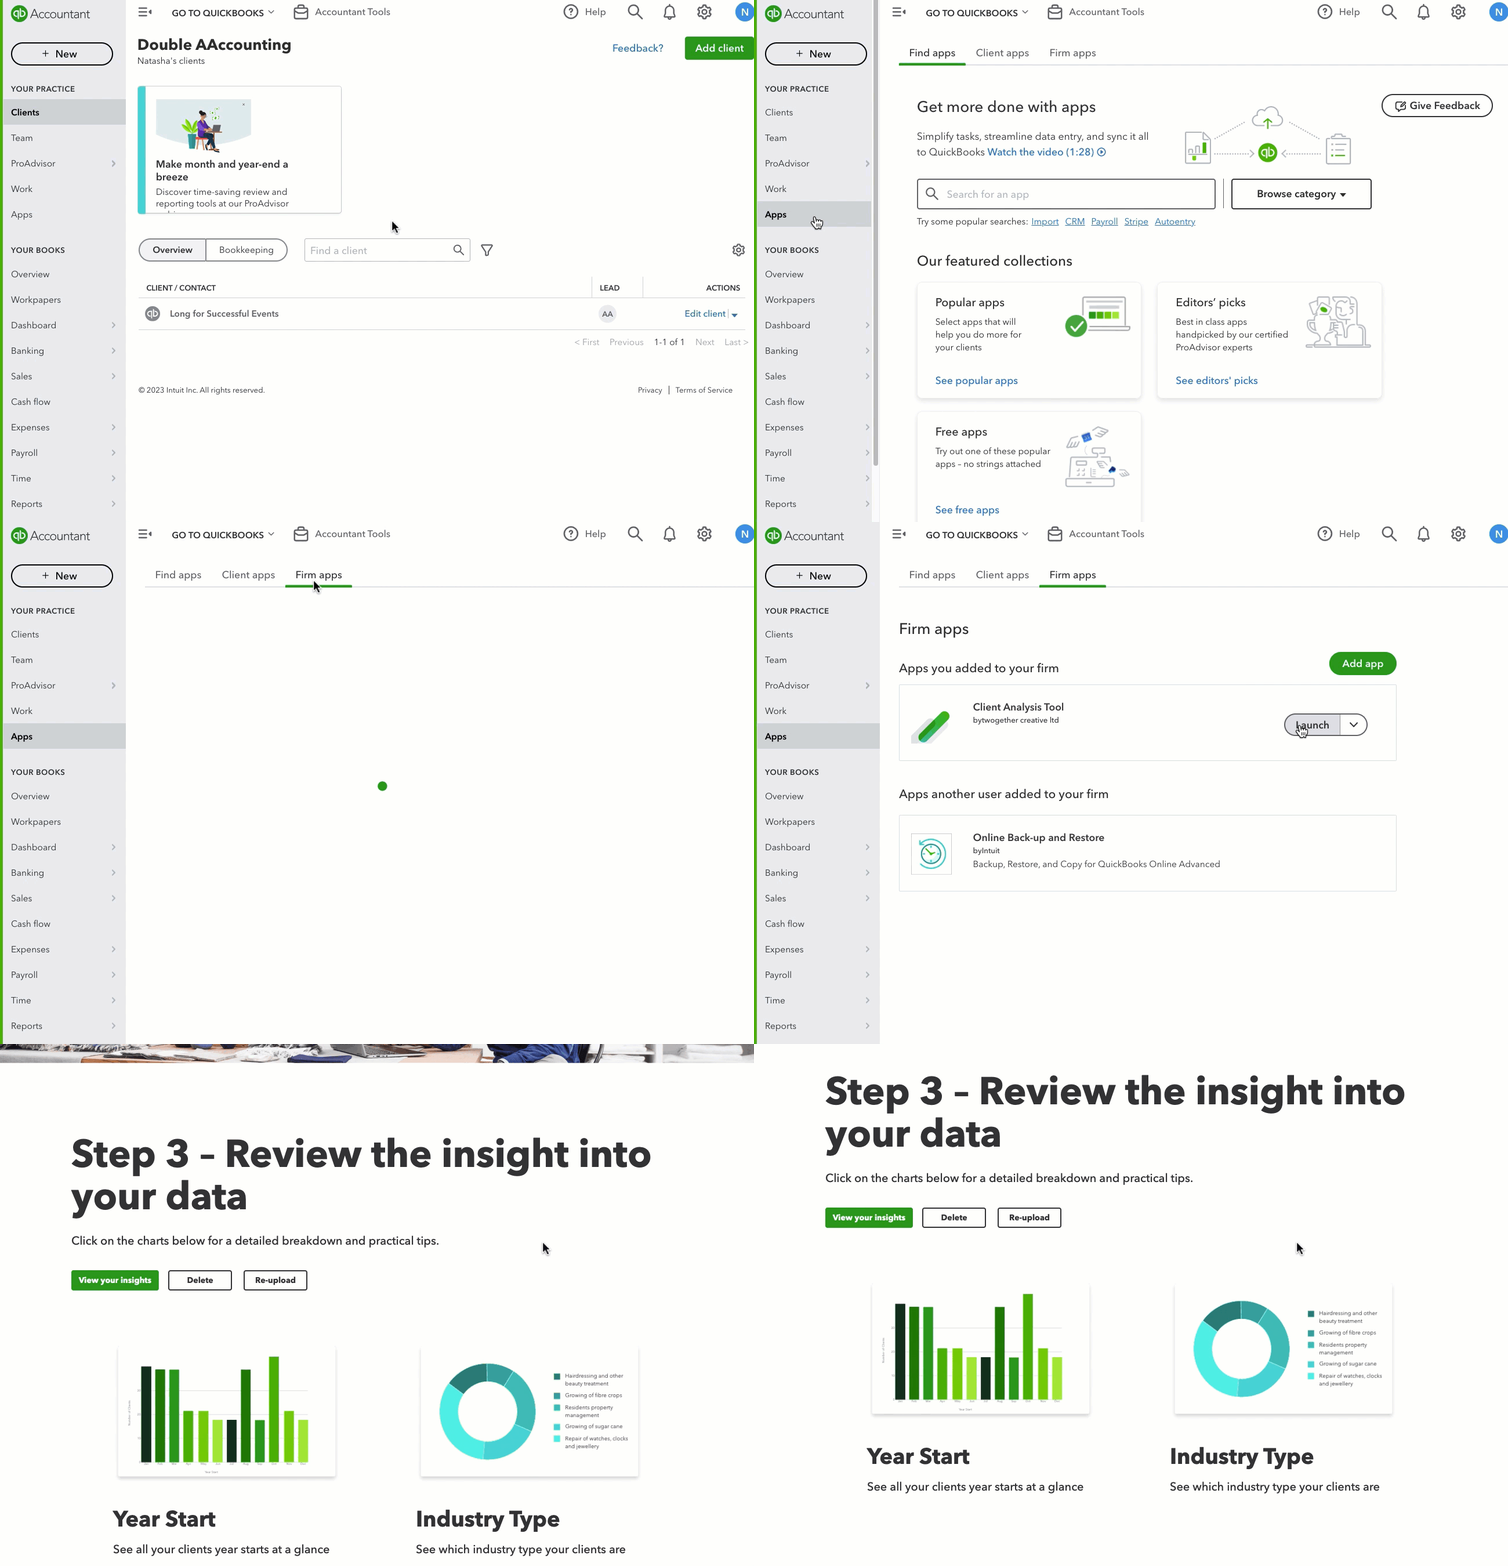
- In QuickBooks Online Accountant, go to Apps.
- Select Firm apps.
- Next to Client Analysis Tool, select Launch.
Disconnect the Client Analysis Tool from QuickBooks Online Accountant
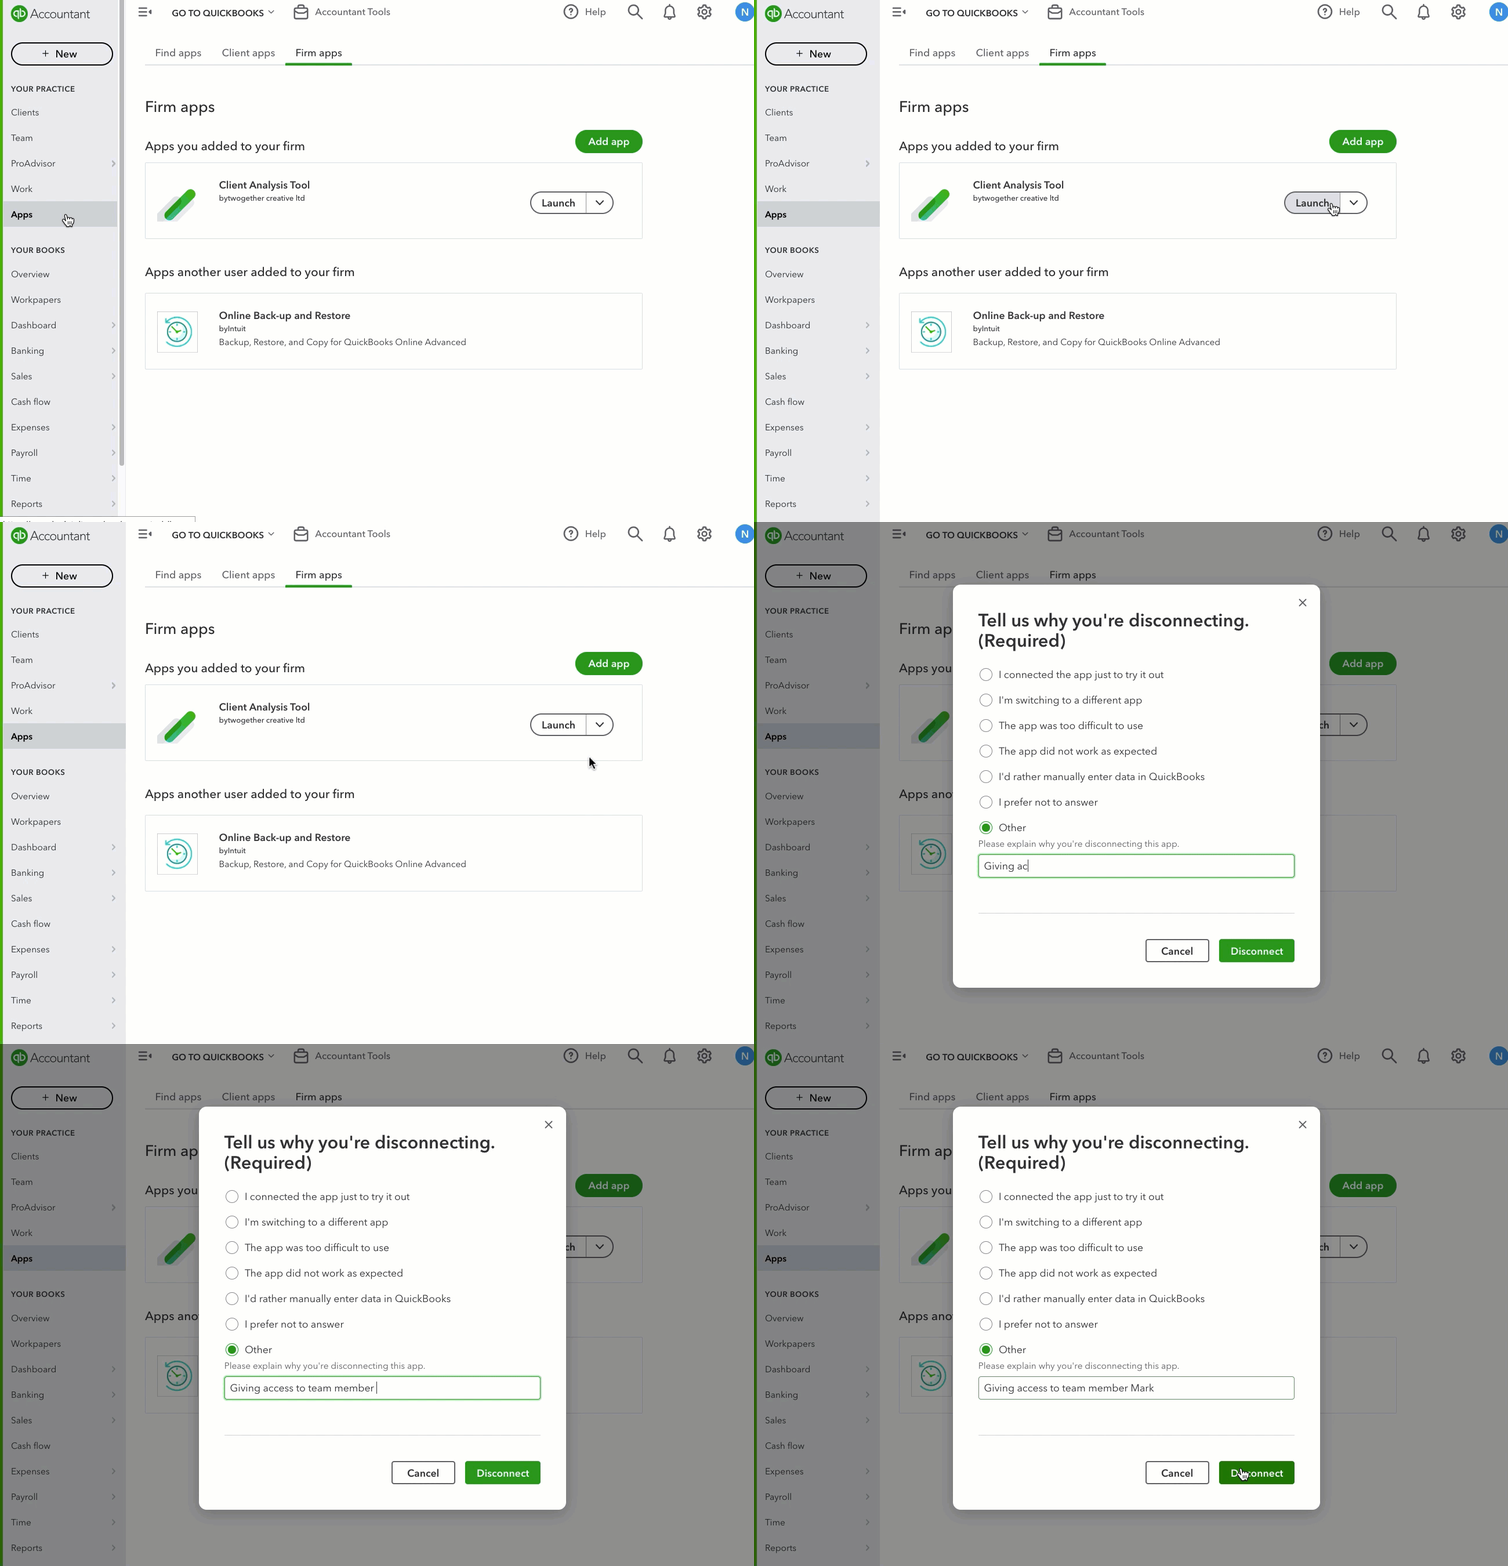
- In QuickBooks Online Accountant, go to Apps.
- Select Firm apps.
- Next to Client Analysis Tool, select the ▼dropdown arrow.
- Select Disconnect.
- Provide the reason you're disconnecting from the app.
- Select Disconnect.
Once you disconnect from the Client Analysis Tool, it'll no longer be listed in your Firm apps.
Troubleshooting tips
Sometimes things don't work the way they should, but don't worry because most of these errors can be solved by following these steps.
Sign in now for personalized help
See articles customized for your product and join our large community of QuickBooks users.