Disconnect accounts connected to online banking in QuickBooks
by Intuit•42• Updated 3 days ago
If you have a bank or credit card account linked to QuickBooks Online, understanding when to disconnect and when to delete an account is important for keeping your books accurate and up to date.
Note: This article is for customers using QuickBooks Online (Advanced, Essentials, Plus, and Simple Start) and Sole Trader.
This article will cover:
- What you need to know before disconnecting or deleting an account
- How to disconnect your bank account
Before you disconnect an account
Disconnecting and deleting an account connected to online banking are two different things, so let’s break down the difference so you understand when it’s best to do one or the other.
When you disconnect an account:
- QuickBooks stops downloading new transactions from your bank or credit card account.
- Your existing accounting data and transactions won’t change.
- You can reconnect the account to QuickBooks at any time to start downloading transactions again.
- QuickBooks deletes the transactions that still need to be categorised in the For review tab.
Note: Upon reconnecting, depending on the date you want transactions to be brought into QuickBooks, these may not appear again.
We recommend disconnecting the account if you want to temporarily stop syncing between your bank or credit card account and QuickBooks.
When you delete an account:
- Deleting an account from your chart of accounts will completely remove it from QuickBooks Online along with any associated data and transactions.
- Deleting an account is permanent and can not be undone, so make sure you are absolutely certain before committing to it.
- You won’t see the account on menus or lists anymore.
- You have the option to delete transaction records while you hold on to your existing data on financial reports.
- If you decide to recreate the account later on, it can be very difficult to restore the deleted transactions back into the account.
- If transactions in a deleted account are tied to other accounts in QuickBooks Online, they will remain in those accounts. For example, if you delete a credit card account, but you made card payments from your current account, the record of those transactions stays in the current account.
If you are sure this is what you want to do, here’s how to delete an account and make it inactive.
Understanding the difference between disconnecting and making an account inactive
We recommend disconnecting accounts that are connected to online banking instead of deactivating them. This simply stops QuickBooks from downloading new transactions. If you disconnect an account from online banking, your existing accounting data won't change. You can reconnect it anytime to start downloading transactions again.
If you have an account that's not connected to a bank or credit card and you don’t need it anymore, learn how to make an account inactive.
How to disconnect your bank account
Follow the steps below based on the product you are using.
Step 1. Review your bank transactions
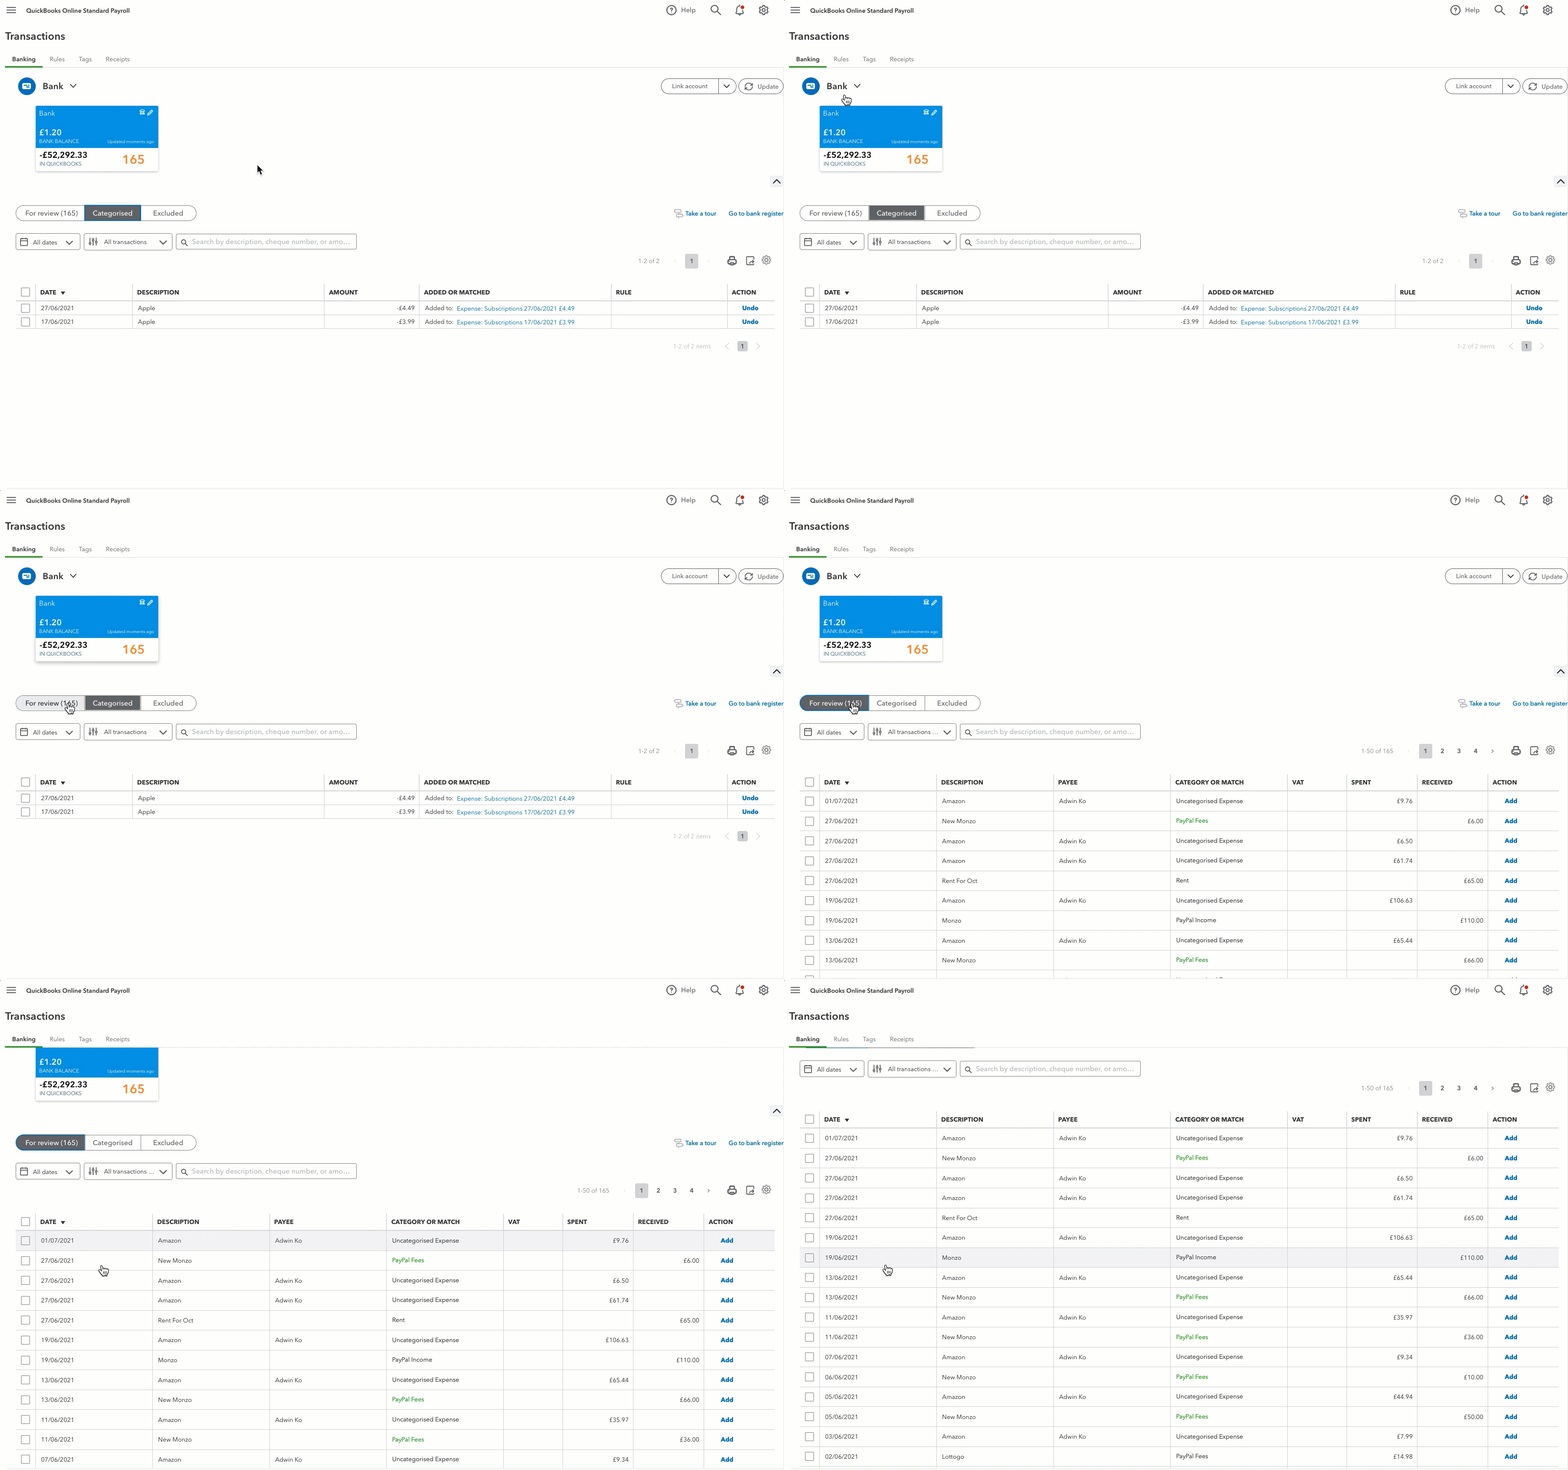
Before you disconnect your bank account from QuickBooks Online, be sure to take a few minutes to go through your transactions to avoid the possibility of losing data you may need.
You might want to exclude certain transactions or manually add others that QuickBooks didn't automatically match.

- Go to Transactions and select Bank transactions (Take me there).
- Select the bank tile for the account you want to disconnect.
- Select the For review tab and make sure all the transactions are correct. You can add, match or exclude transactions as needed.
Step 2. Disconnect the bank account
Take note of the last transaction date. This will prevent duplicate transactions if you choose to reconnect the account in the future.

If the issue persists, sign in to QuickBooks using an incognito or private browser, or try other browser troubleshooting options.
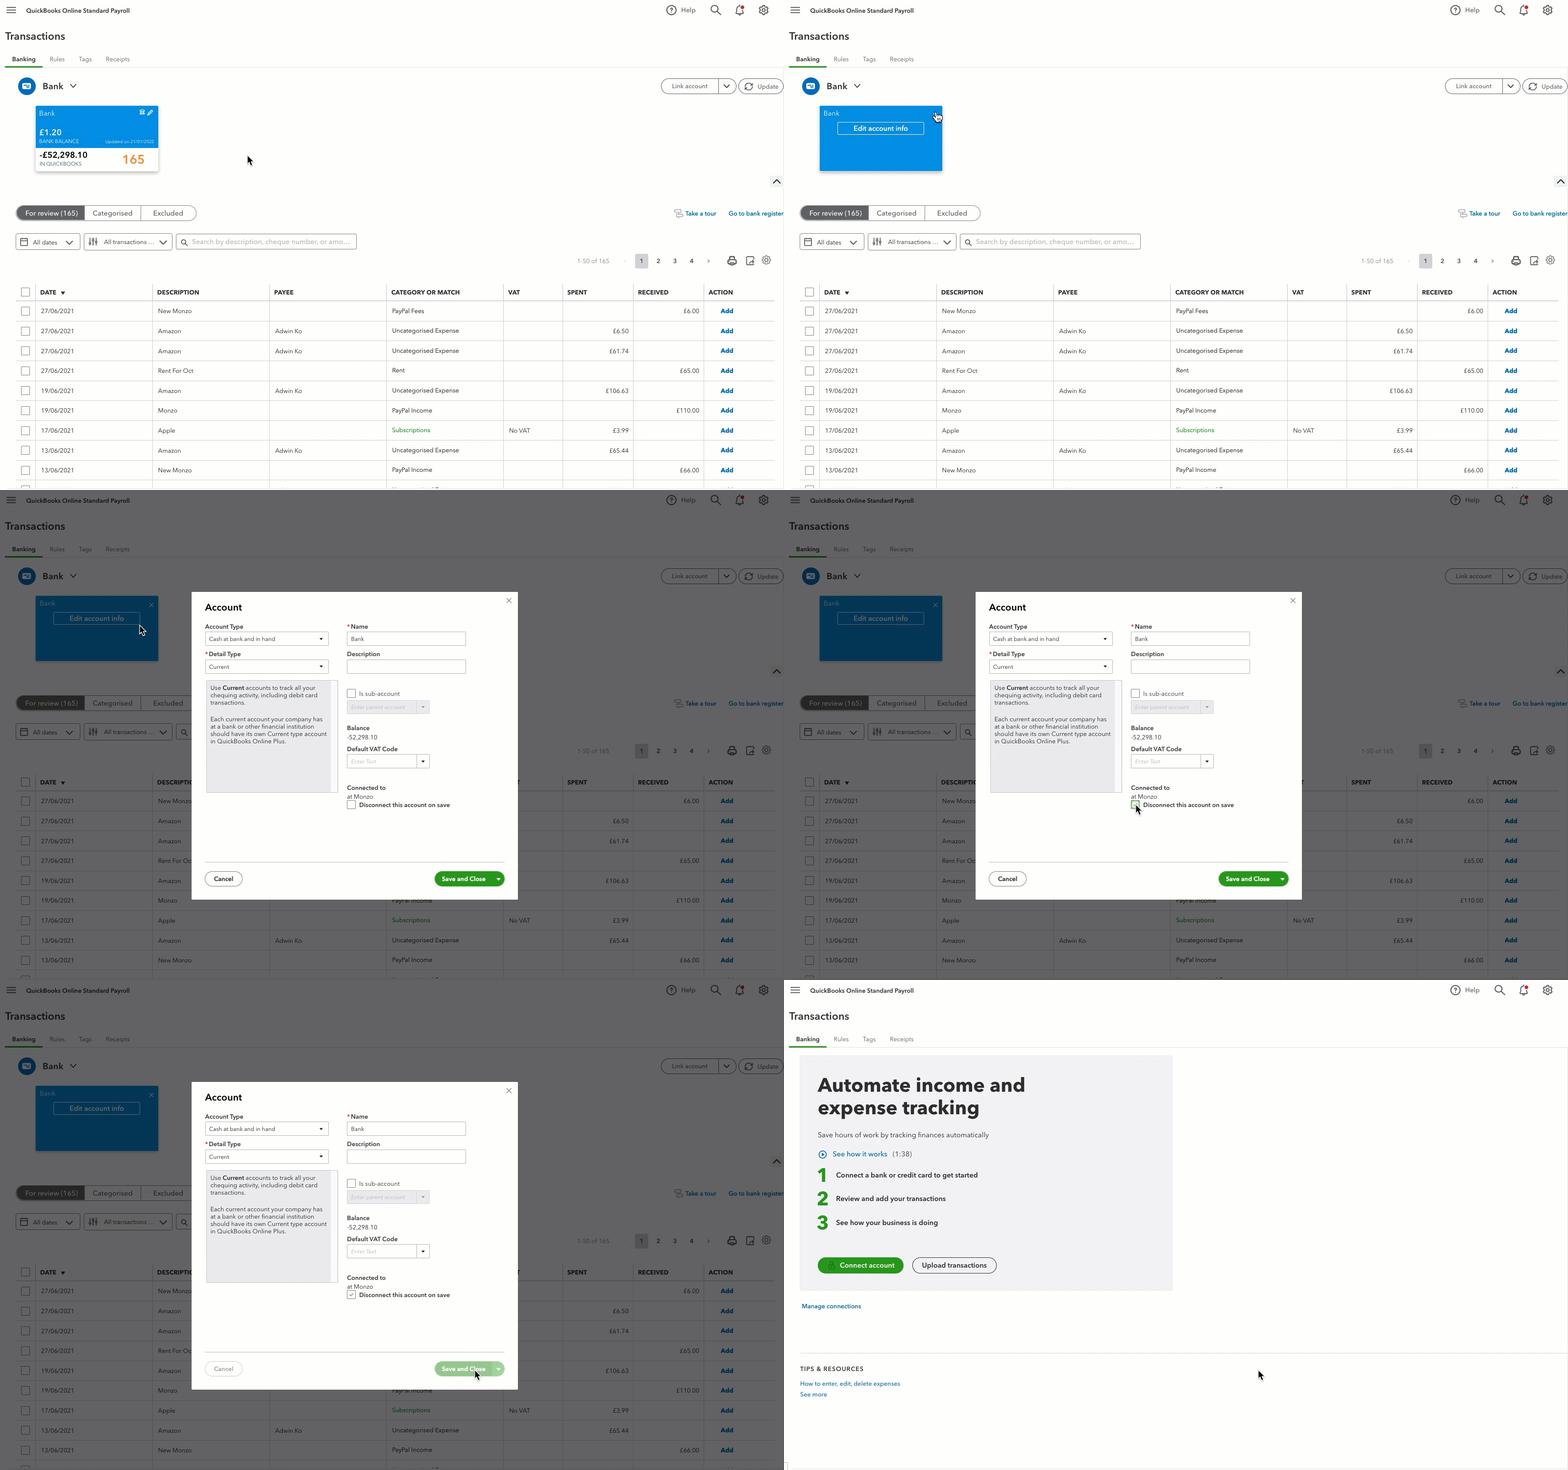
- Go to Transactions, then select Bank transactions (Take me there).
- Make a note of the date of the last transaction. This will prevent you from downloading the same transactions twice when you reconnect your account.
- Select the bank account you need to disconnect.
- Select the pencil icon
 , then select Edit account info.
 - Select the Disconnect this account on save checkbox.
- Select Save and Close.
Disconnect the bank account
Before you disconnect your bank account from QuickBooks Online, be sure to take a few minutes to go through your transactions to avoid the possibility of losing data you may need.
You might want to exclude certain transactions or manually add others that QuickBooks didn't automatically match.
- Go to Transactions and select Bank transactions (Take me there).
- From the New transactions
 dropdown, select Manage connections.
 - For the bank account you want to disconnect, select the
 icon and choose the Unlink option.
 - Select Unlink now to confirm.
You can reconnect the account at any time to start downloading transactions again.
We're here to help
If you've got any questions or need a hand fixing a connection error, linking or reconciling a bank account, let us know. Sign in to QuickBooks and start a discussion in our QuickBooks Community.
You must sign in to vote.
Sign in now for personalized help
See articles customized for your product and join our large community of QuickBooks users.
Take control of your business finances with QuickBooks
![[object Object]](https://digitalasset.intuit.com/content/dam/intuit/sbsegcs/en_gb/quickbooks-online/images/sdr/refer-an-accountant-hero.jpg)
Not relevant to you? Sign in to get personalised recommendations.