Turn on tags in QuickBooks Self-Employed
by Intuit• Updated 1 year ago
Learn how to turn on tags in QuickBooks Self-Employed.
What are tags?
Tags are customisable labels that let you track transactions however you'd like. You can tag invoices and transactions. Group tags together and run reports to see how specific areas of your business are doing. They don't impact your books. Instead, they're a way for you to track the info that matters most to you.
Read this to learn more about tags and why you should use them.
Setting up tags
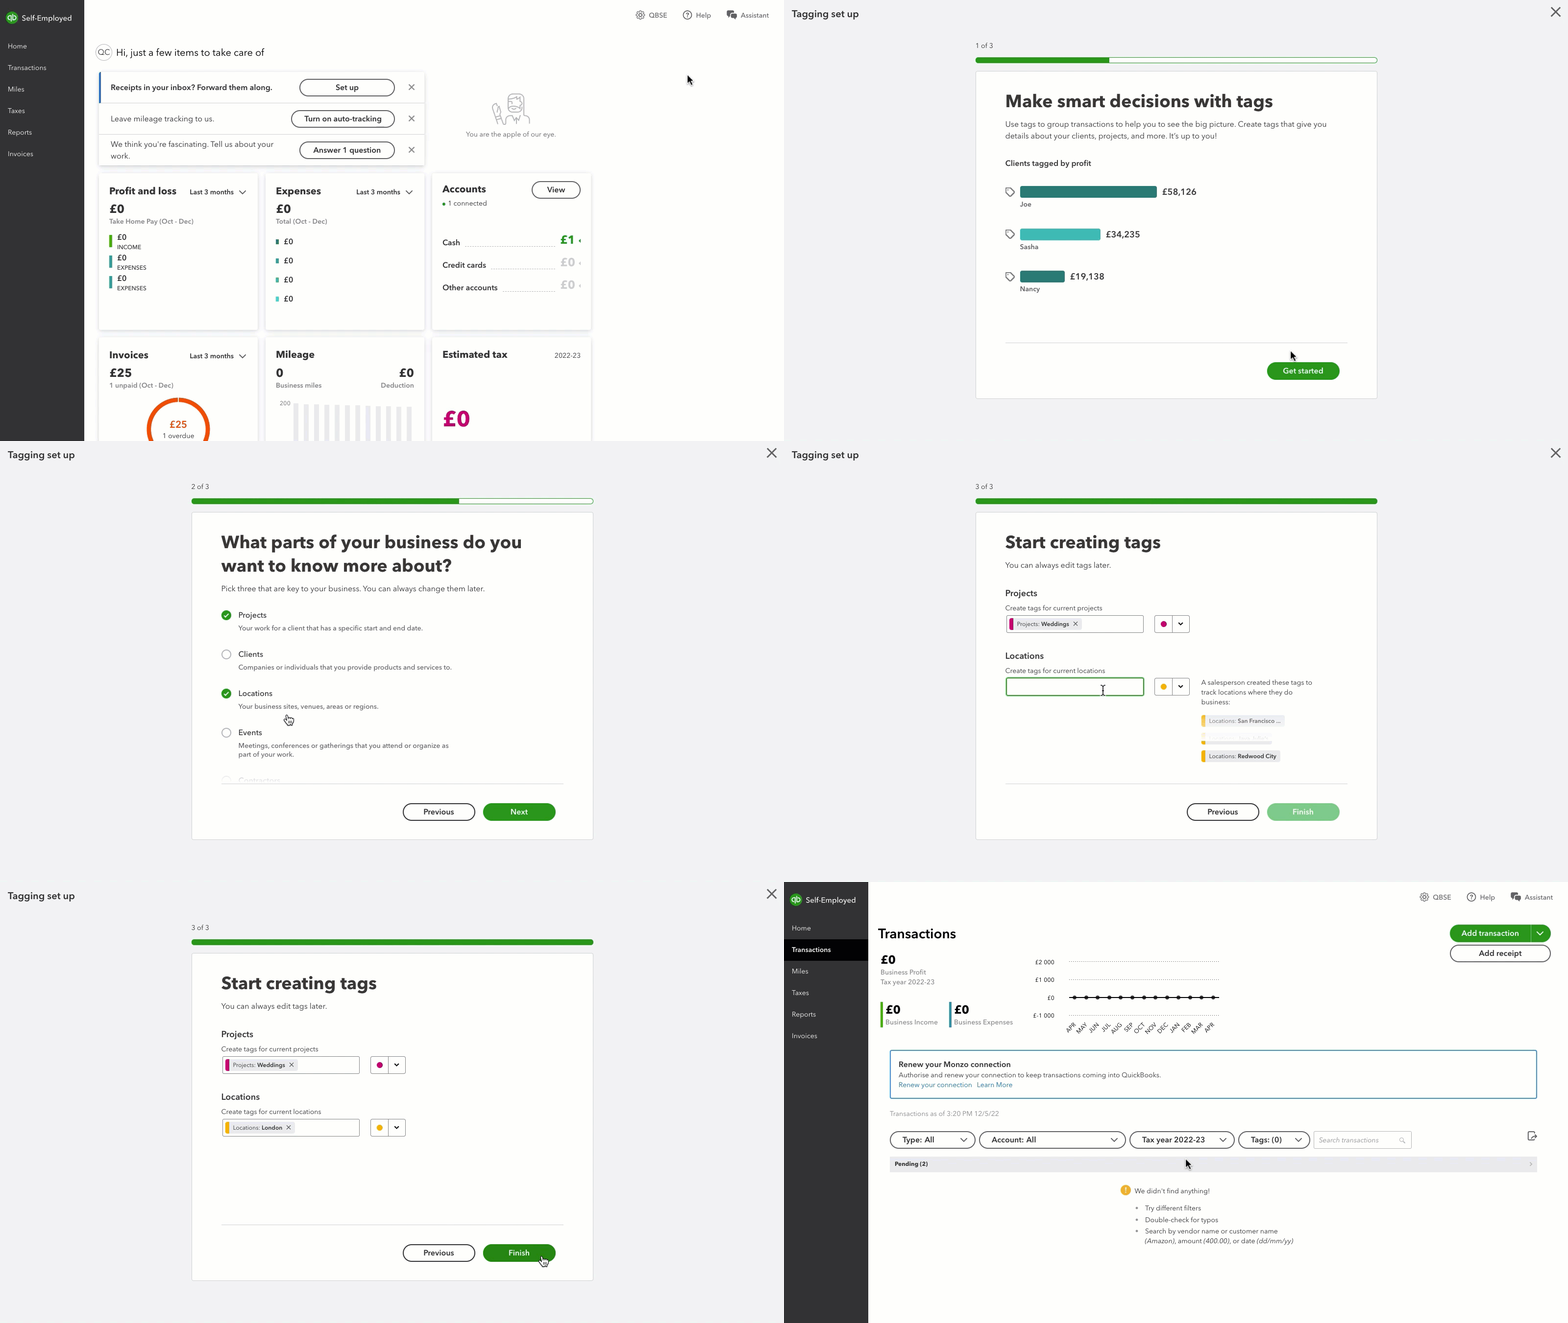
If this is your first time setting up, here's how to turn on tags:

- Select the gear ⚙️ icon.
- Under Tools, select Set up tags.
- Select Get started.
- Pick up to three things you want to now about your business, then select Next.
- Go ahead and create the tags–you can always edit these later.
- Once you're done, select Finish.
That's it! You can start tagging your transactions.
Tagging transactions
.gif)
- In Transactions, start marking transactions as Business or Personal.
- Select + Add tag once it appears, and start tagging away. You can name them whatever you want, and choose colours for them.
- To look at your tagged transactions, use the Tags filter and select the tag you want to see.
- If you want to remove a tag, open the transaction and select the X on the tag.
Managing tags
.gif)
- Select the gear ⚙️ icon.
- Under Tools, select Manage tags.
You can create a new tag or group, plus Edit or Remove tags completely if you need to.
Sign in now for personalized help
See articles customized for your product and join our large community of QuickBooks users.
More like this
- Custom categories in QuickBooks Self-Employedby QuickBooks•28•Updated over 1 year ago
- Work from home deduction in QuickBooks Self-Employedby QuickBooks•62•Updated over 1 year ago
- QuickBooks Self-Employed Overviewby QuickBooks•18•Updated 1 year ago
- Manually add transactions in QuickBooks Self-Employedby QuickBooks•5•Updated January 19, 2024
- Create invoices in QuickBooks Self-Employedby QuickBooks•35•Updated April 08, 2024