Switch between Business and Accountant view in QuickBooks
by Intuit•328• Updated 1 month ago
Learn how to switch between Business and Accountant view. QuickBooks Online lets you choose the view that best suits your accounting needs. Whether you prefer a simplified interface or a more detailed one, you can switch between Business and Accountant views whenever you want, and your data will remain untouched.
| This article is for customers who use QuickBooks Online. |
Why two views?
- Business view: Perfect for those new to accounting or who prefer a simplified experience. It uses everyday language and focuses on common tasks like sales and invoicing, making accounting less intimidating.
- Accountant view: Ideal for users with accounting experience or those who want access to all of QuickBooks Online's features. It uses standard accounting terminology and provides a more detailed interface.
Key differences
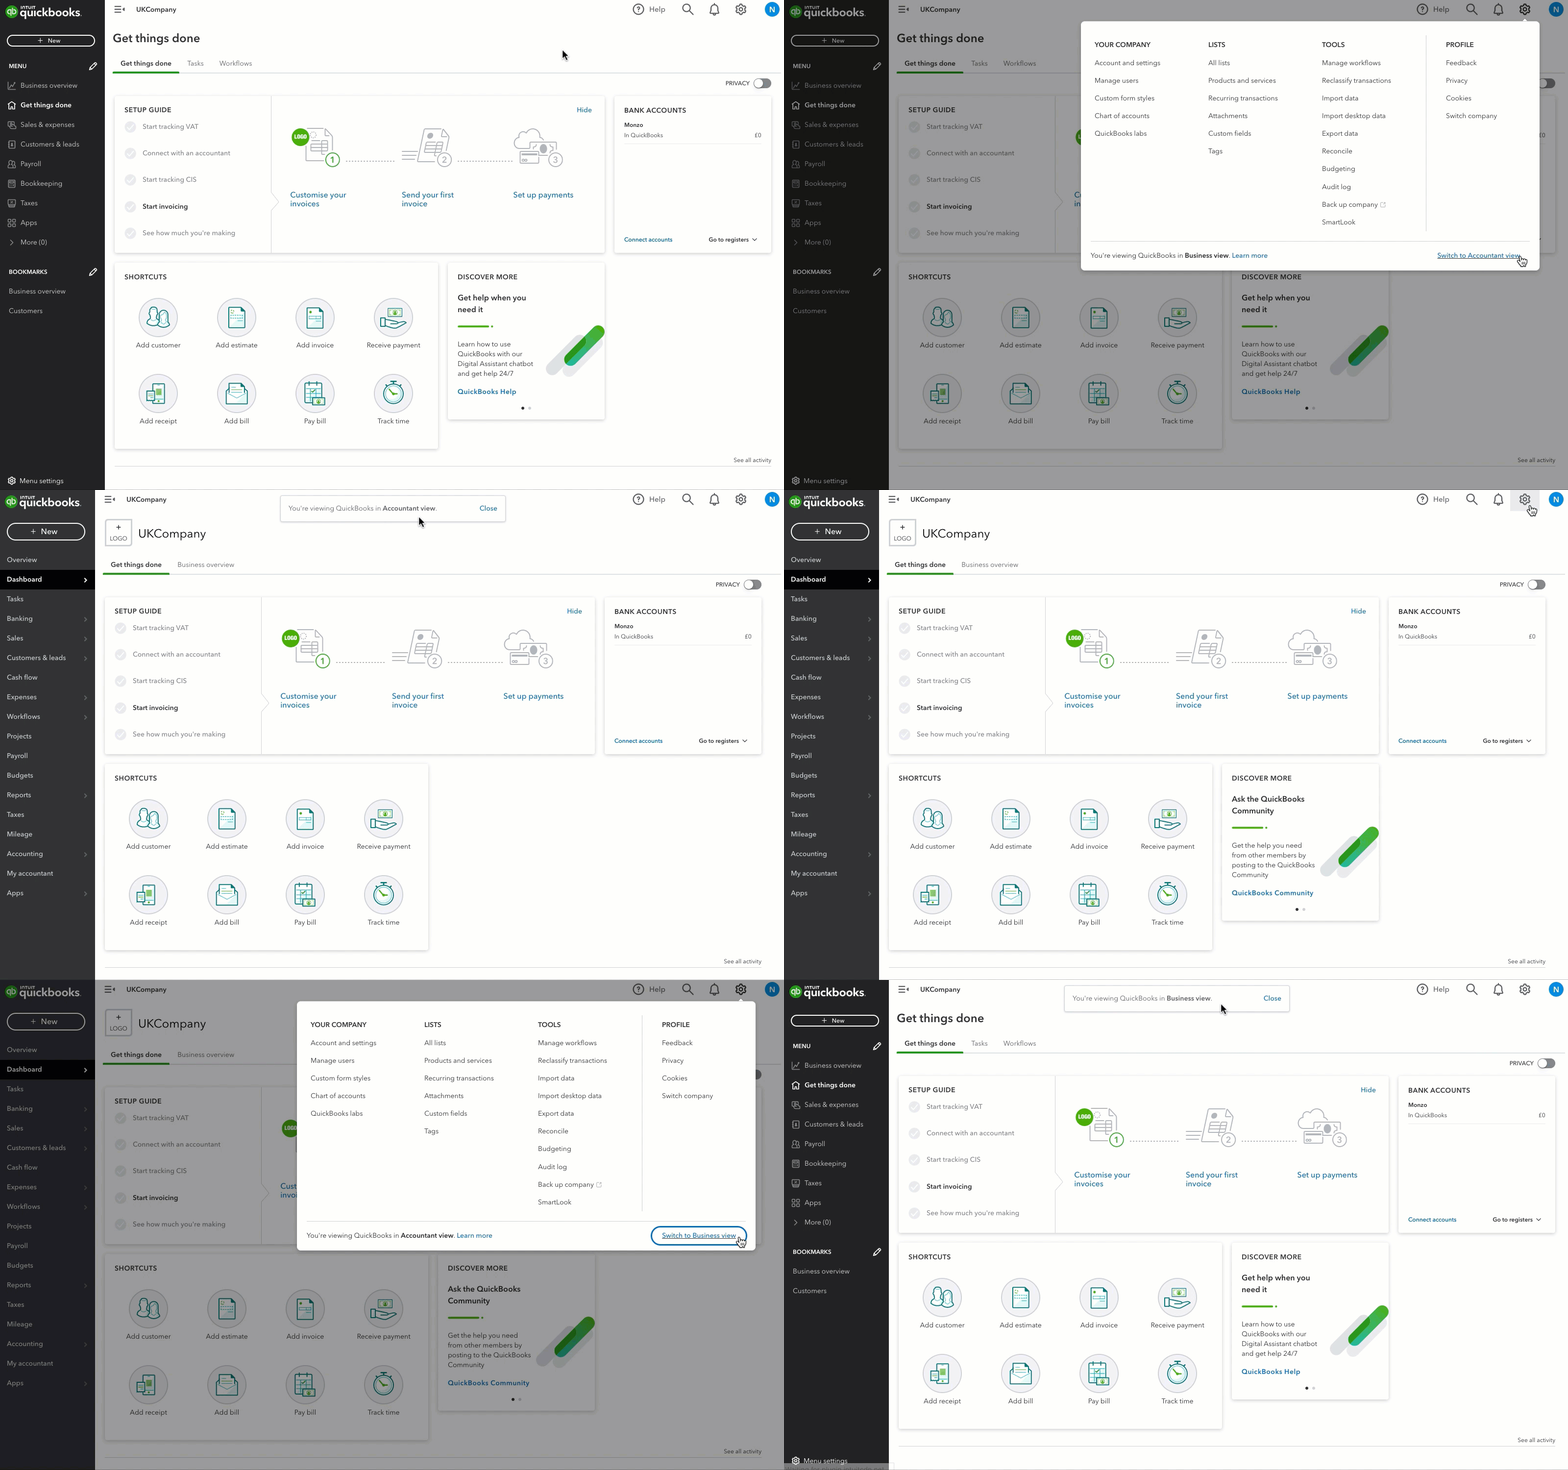
- Dashboard visuals: In Business view, you'll see a cash flow chart right on your dashboard. This chart isn't visible in Accountant view.
- Language and menu labels: Business view uses simpler language for menus and features, while Accountant view uses traditional accounting terms. The functionality remains the same, regardless of the labels.
How to switch views
Based on what you tell us when you first set up QuickBooks, you'll start in either Business or Accountant view. To switch views:
- Select Settings ⚙.
- Select Switch to Business view or Switch to Accountant view.

Bookmark your page
The bookmark section allows you to display the features you use the most in order to save time in your daily tasks.
- Next to Bookmarks, select Edit ✎.
- Select which pages you want to appear under Bookmarks.
- To reorder your bookmarks, select reorder
 and drag them to your desired order.
 - To remove a bookmark, uncheck the pages you want to remove from Bookmarks.
- Select Save.