Working through tasks in QuickBooks Practice Manager
by Intuit• Updated 7 months ago
In this article, we’ll show you how to work through your tasks and subtasks in Practice Manager, and provide helpful links to articles with step-by-step instructions to make the process easier. Let’s get started!
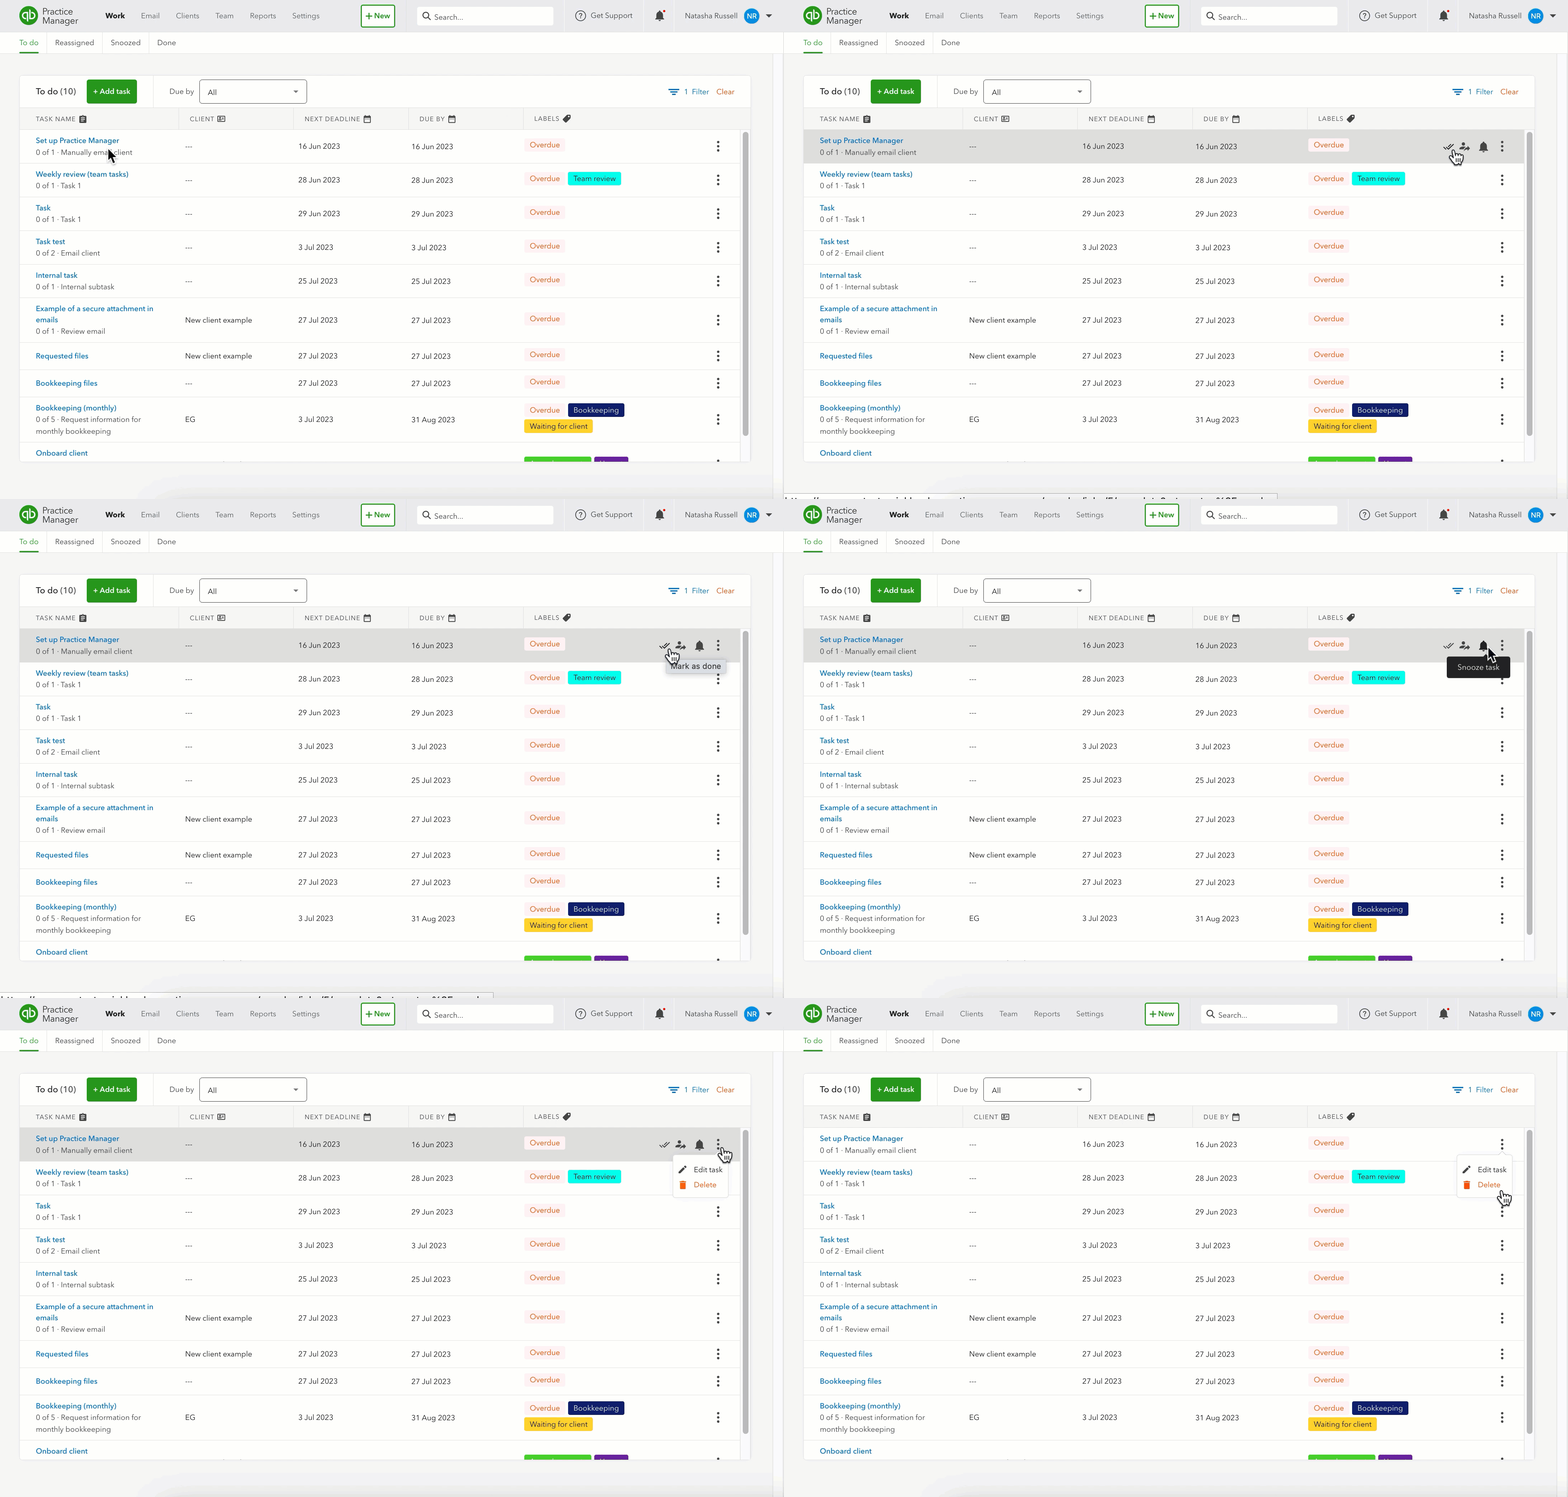
To manage your tasks in Practice Manager, start by checking your to-do list.
.gif)
- Go to Work.
- Select the To do tab. This will show all your pending tasks in chronological order, with the closest deadlines at the top.
Tip: Use the due date filter to narrow down the list by selecting All. Note that this defaults to today's date. - Here are the different ways to add a new task in Practice Manager.
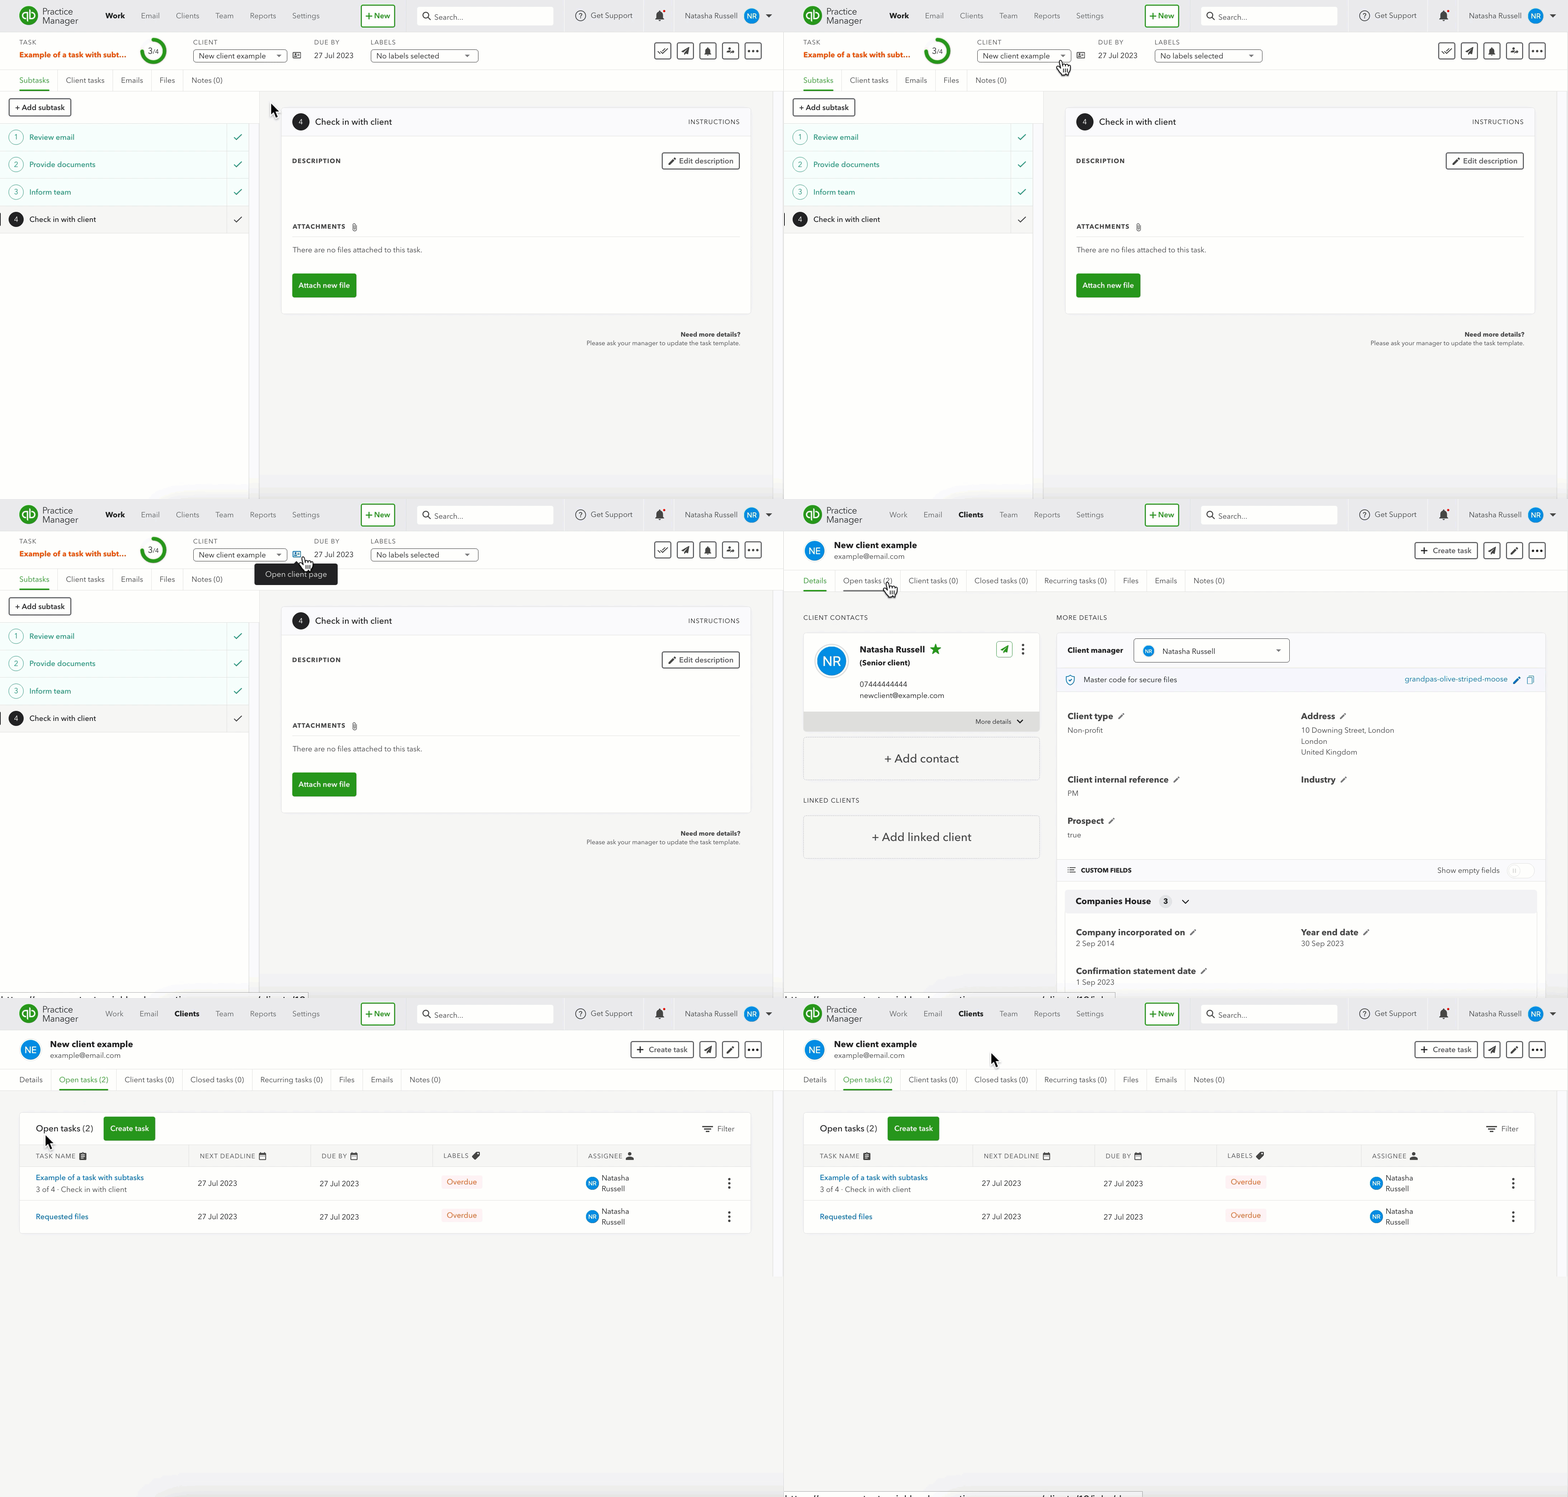
Note: You can also go to a client’s detail page and select the Open tasks tab to see the list of tasks.
.gif)
If you need to check up on tasks that have been reassigned, select the Reassigned tab. All snoozed (or postponed) tasks will be in the Snoozed tab, and those marked as complete will be shown in the Done tab.

Mark a task as done by selecting the tick icon next to the task. If you need to delay or snooze a task, select the bell icon. To change who's working on a task, select the reassign icon.

Additionally, if there is a particular task that requires multiple steps before completion, Practice Manager lets you break down this task into subtasks which can then be assigned individually and tracked separately from each other within one main job or project.
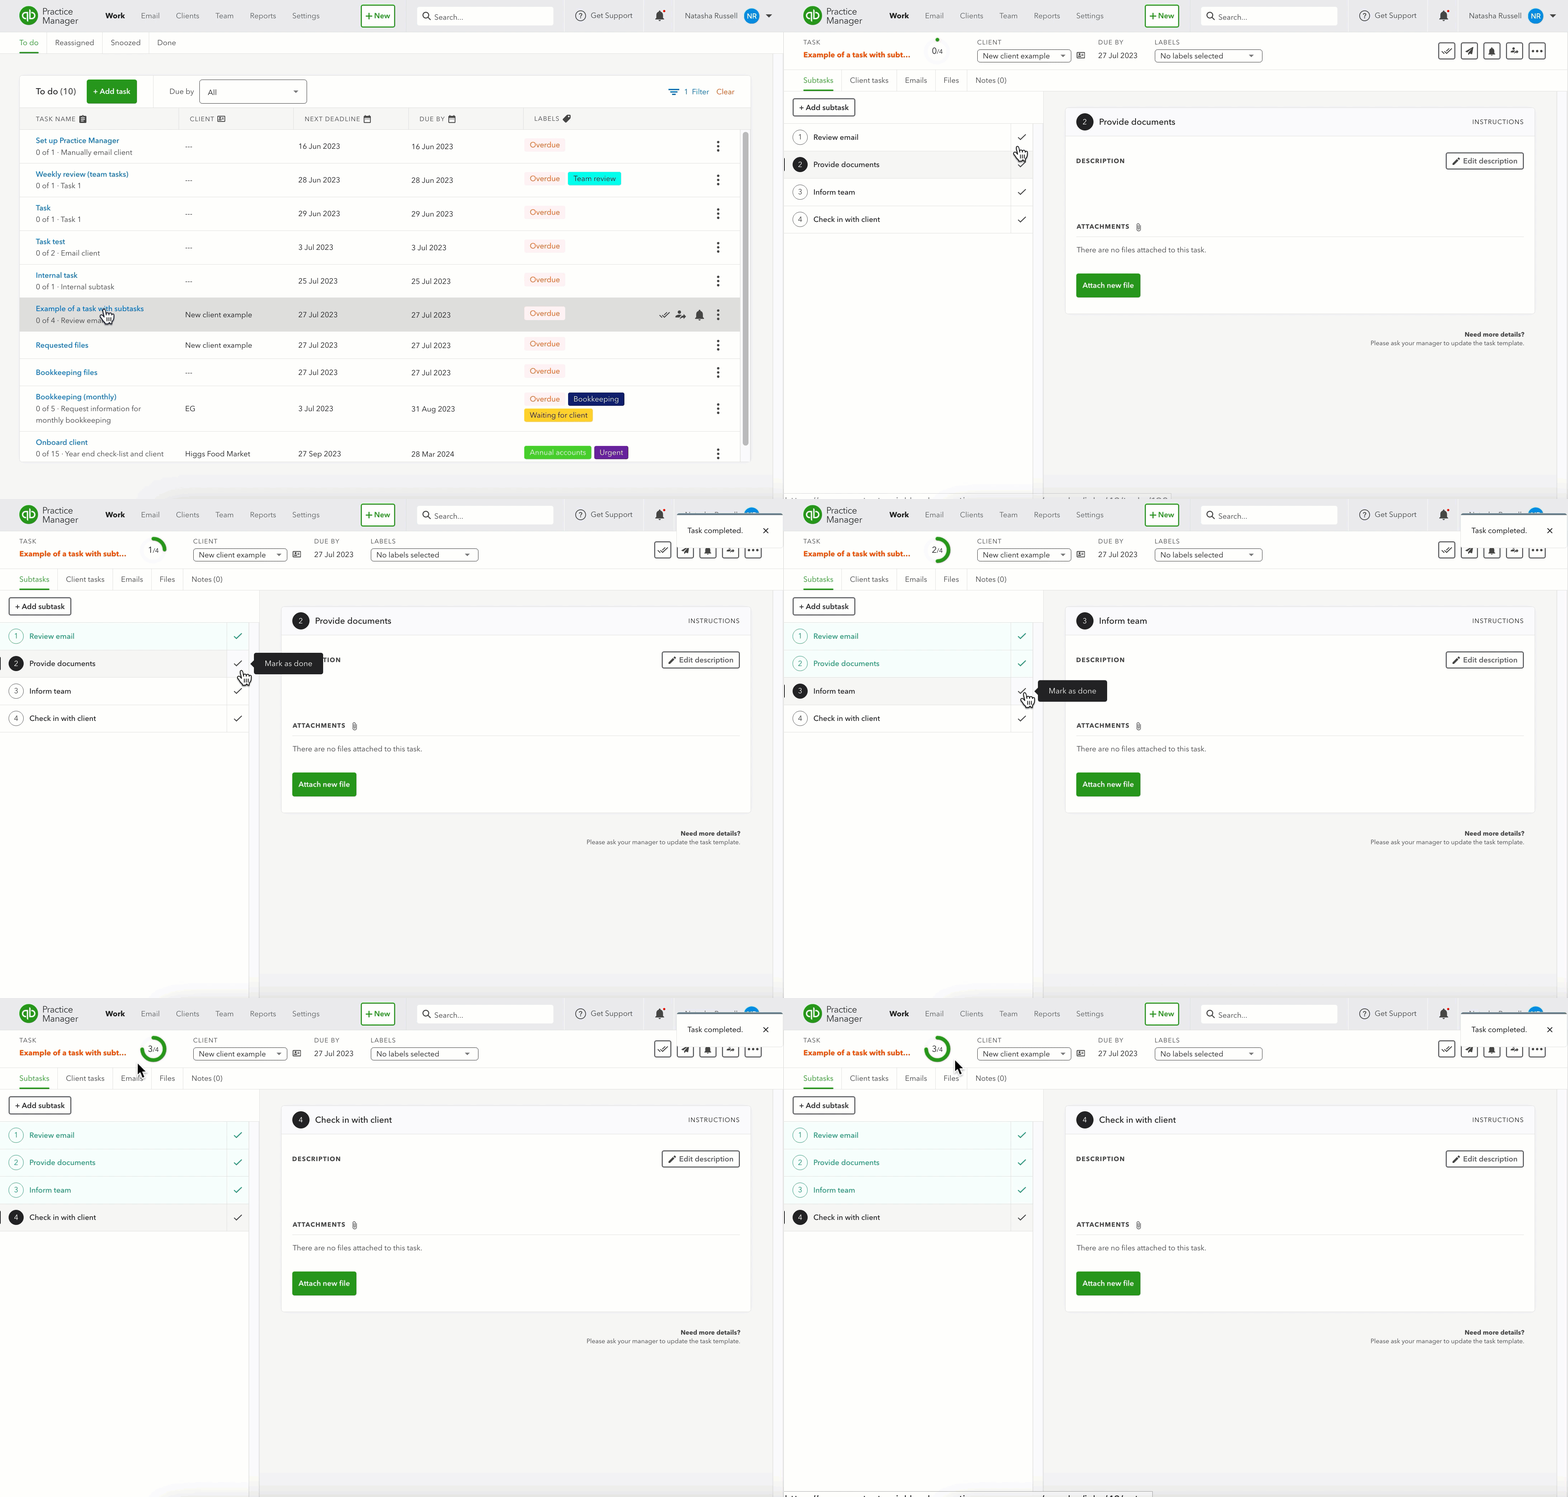
To go through the list of subtasks, select the task name to open its details. The first thing you’ll see is the task name and the client across the page. This lets you know what the task is and who it’s for. You’ll also see a completed percentage that shows you how much of the task has already been done.

You can select the icon next to the client field to open that client’s detail page. This is useful if you need more information on that client, or if you want to access any other related tasks they have going on.
If you need to change the client or the due date, you can hover over the field and edit it if needed.
.gif)
Any labels associated with this task list will show on this page too. Labels allow for easy categorisation and organisation of tasks, so you can quickly find what you need when sorting through large lists of tasks. We’ll cover this in more detail later.
.gif)
There are several icons that can help you work through your tasks quickly and efficiently:
- The first icon is a tick to mark a task as complete when all associated subtasks are finished.
- The second icon, an envelope, allows you to email clients directly from Practice Manager, enabling quick communication about their tasks.
- The third icon is a bell, allowing you to snooze a task until a later date and time.
- Lastly, the three-dot icon provides additional options like viewing the task template (if applicable), editing the task, converting it from a one-time event to a recurring one (or vice versa), or deleting the task if needed.
When you work through tasks and subtasks, it’s important to select the tick next to them. Selecting the tick will update the completion percentage automatically.
Note: Internal subtasks will automatically be marked as complete when all of the subtasks above it are complete. This means that you won’t have to manually mark off subsequent steps once all the previous steps are done.
.gif)
Task labels are an important part of working through tasks in Practice Manager, and can be set up from the ‘Settings’ tab. You can use labels to quickly identify the status of each task at a glance. For example, if you had a label for ‘High priority’, any task assigned this label would immediately be visible when looking over your list of tasks.
.gif)
As you work your way through the instruction subtasks (which often consist of a list of tasks to complete), you can mark each one off when finished. Once you complete all the items on the checklist, remember to mark the subtask as complete by selecting the tick.

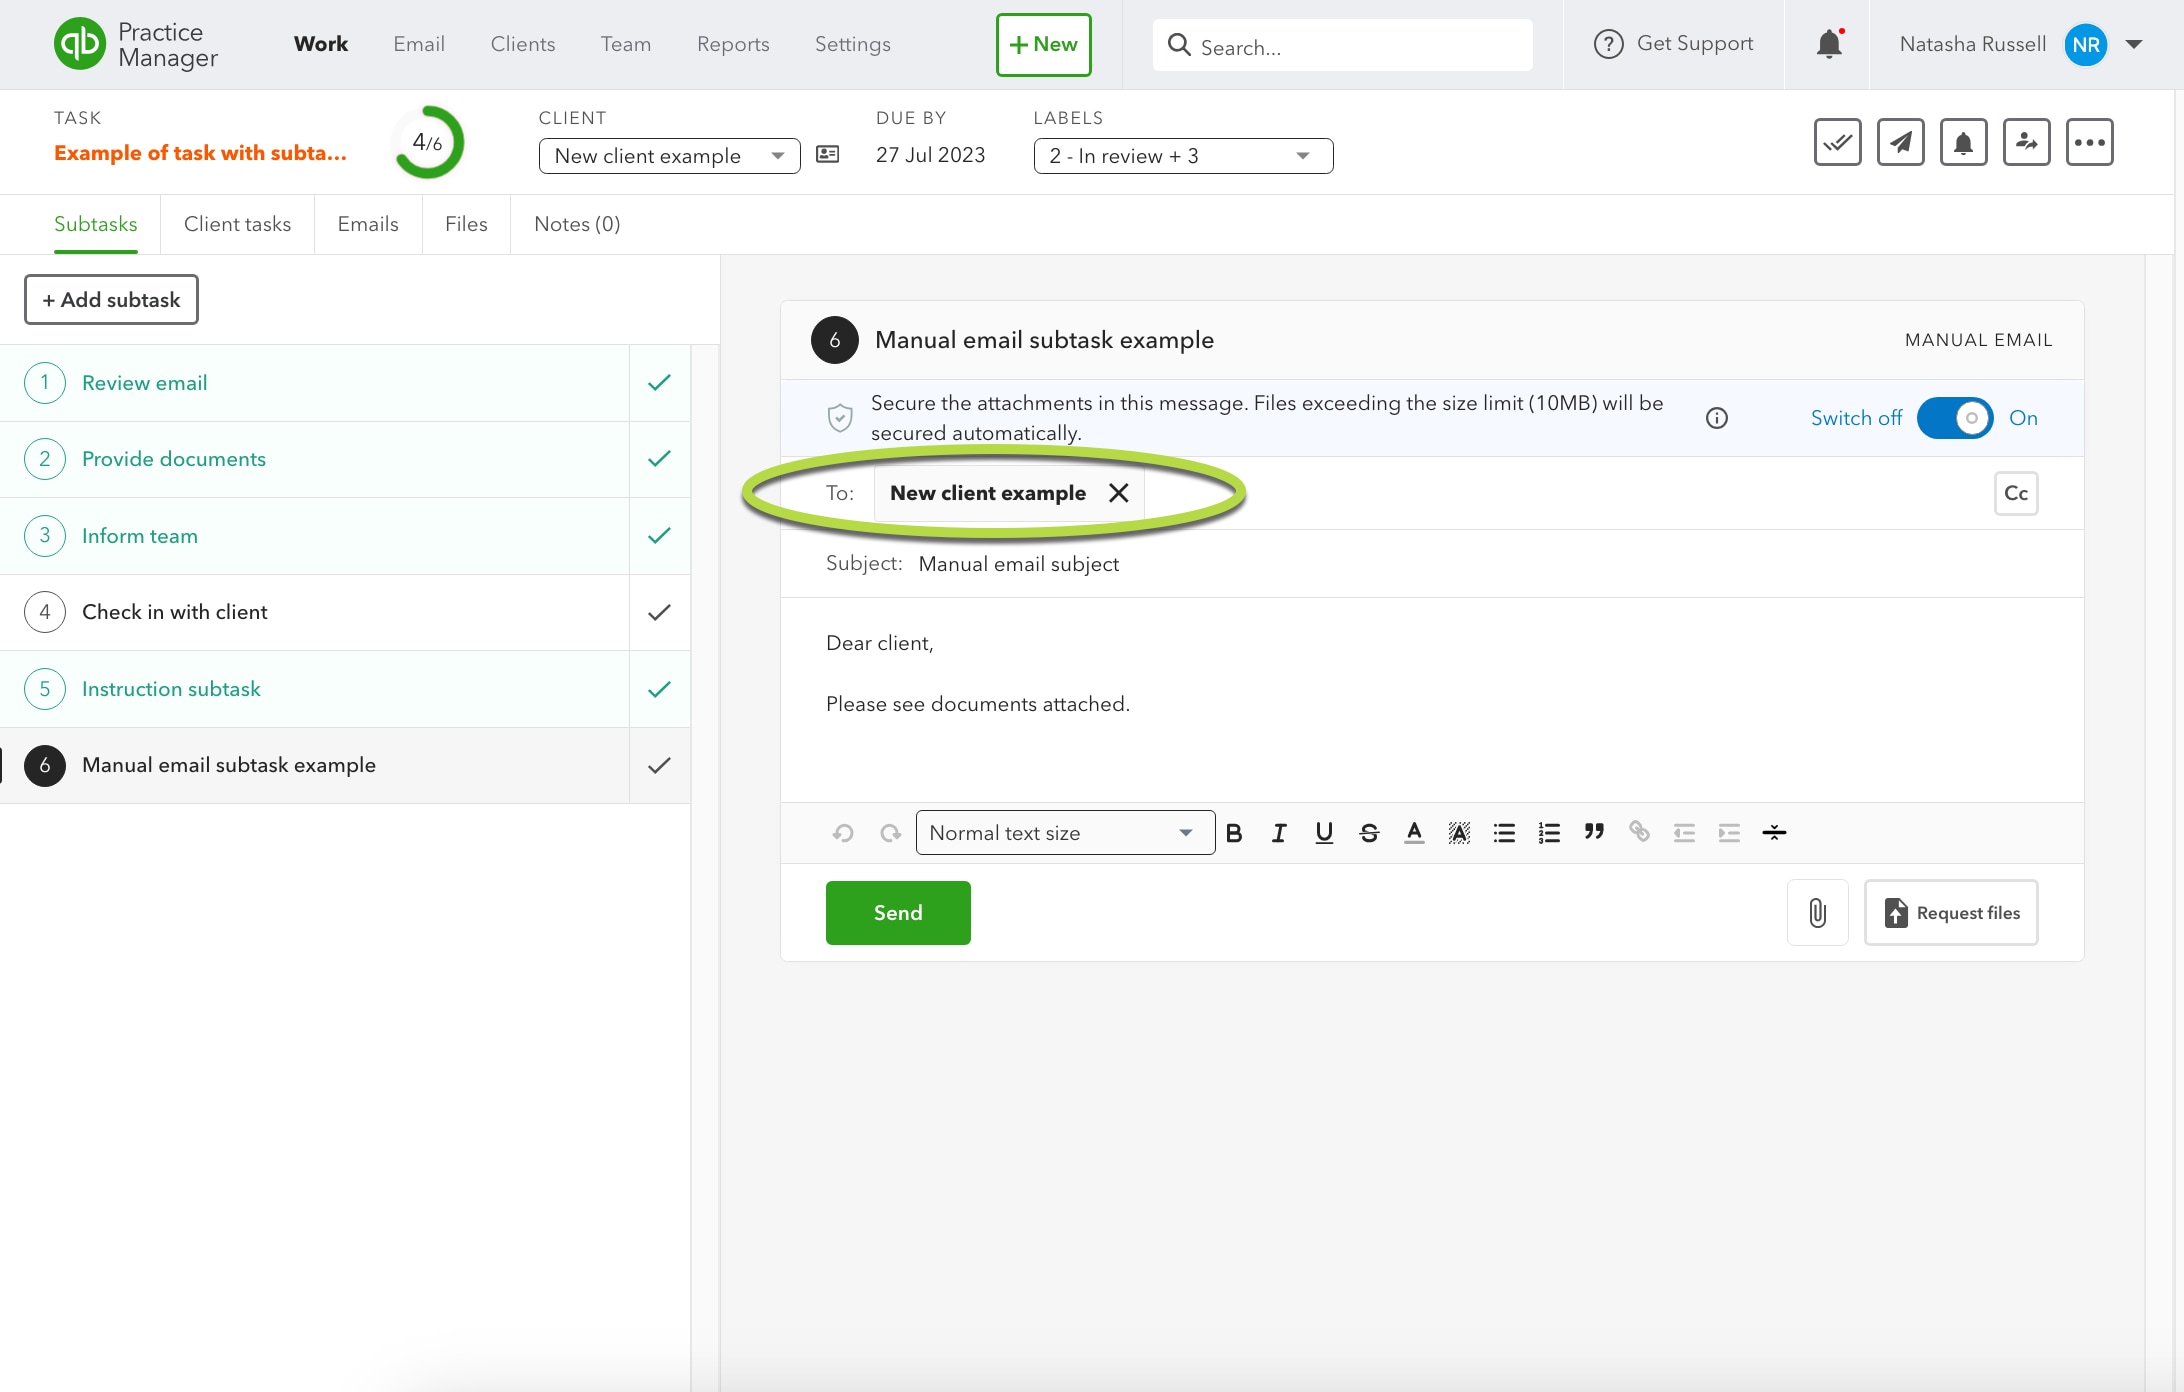
For manual email subtasks, make sure you add the recipient’s email address in the ‘To’ field and attach any files or documents that need to be securely sent or requested. Once all the required information is added, and you hit send, the subtask will be marked as complete.
Automated email subtasks are even more efficient. The recipient email address and files are already pre-filled. All you need to do is set up the trigger date and time for when it should be automatically sent out. Note that an automated email will only be sent automatically if it’s part of a scheduled recurring task.
.gif)
Once all the subtasks are complete (great work!), the task name will turn green and the task itself will automatically go in the Done tab.
Use the three-dot icon next to the task to Open and view its details, or Delete the task entirely if you need to. You also have the option to Reopen the task.
To see all tasks and subtasks for a client, you can open their client details page and select the Closed tasks tab.
Tip: Save the QuickBooks Practice Manager resource page to your bookmarks for easy access to helpful articles and step-by-step instructions.
We're here to help
If you have a question about Practice Manager or need help with it, let us know. Sign in to QuickBooks and start a discussion with a qualified QuickBooks Online expert in the community.