Create and edit custom fields
by Intuit•18• Updated 2 months ago
Learn how to create and use enhanced custom fields in QuickBooks Online Advanced.
Overview
Custom fields let you track the information that matters most to you and your customers, such as sales reps, customer types, supplier IDs, PO numbers, Project Managers, or info unique to your industry.
You can add custom fields to sales forms, purchase orders, expense forms, customer profiles, and supplier profiles. This gives you more flexibility to add custom data and drive insights through detailed reports.
Important notes and prerequisites
- Product: Using enhanced custom fields requires a QuickBooks Online Advanced subscription. You can upgrade to QuickBooks Online Advanced from another product to use this feature.
- Limits: You can have up to 12 active custom fields for each type of form (invoice, estimate, purchase order, expense, bill, and so on), and each type of profile (customer and supplier).
- Data types: Besides text, you can also create custom dropdown, date, and number fields.
- Print visibility: A maximum of 3 custom fields may have Print on form turned on for any single form type (such as Sales Receipt or Invoice).
- Purchase orders: To use custom fields in purchase orders, you need to turn on purchase orders for your company first.
Create custom fields
- Go to Settings
 and select Custom fields.
 - Select Add custom field. If you’ve already created a field, you’ll see Add field instead.
- Enter the name of the custom field in the Name field.
- Select the type of data in the Data type ▼ dropdown that will go in your custom field: Text and number, Number, Date, or Dropdown list.
- If you select the Dropdown list, enter the items in the list.
- Select the category the custom field belongs to: Customer, Transaction, Supplier, or Project. Customer fields are for customer profiles, and supplier fields are for supplier profiles. You can assign transaction fields to sales forms and purchase forms.
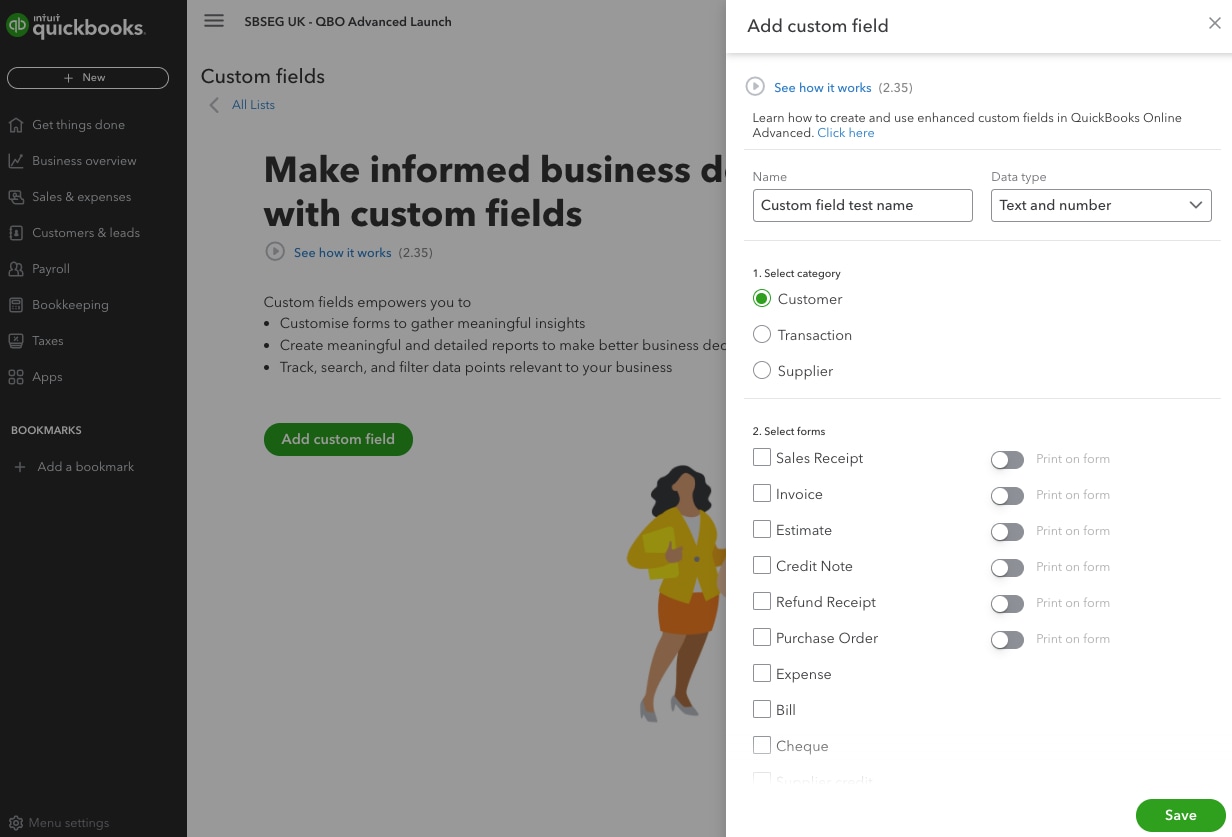
- Select the forms where you want the custom field to appear.
- If you want customers or suppliers to see the field on a form select Print on form.
- When you’re finished, select Save.
Manage your custom fields in one place
The custom fields page lists all your custom fields so you can manage them easily. For each custom field, you can see what category it applies to and which forms it appears in. You also see the print icon ![]() if the custom field is visible to customers or suppliers on a form.
if the custom field is visible to customers or suppliers on a form.
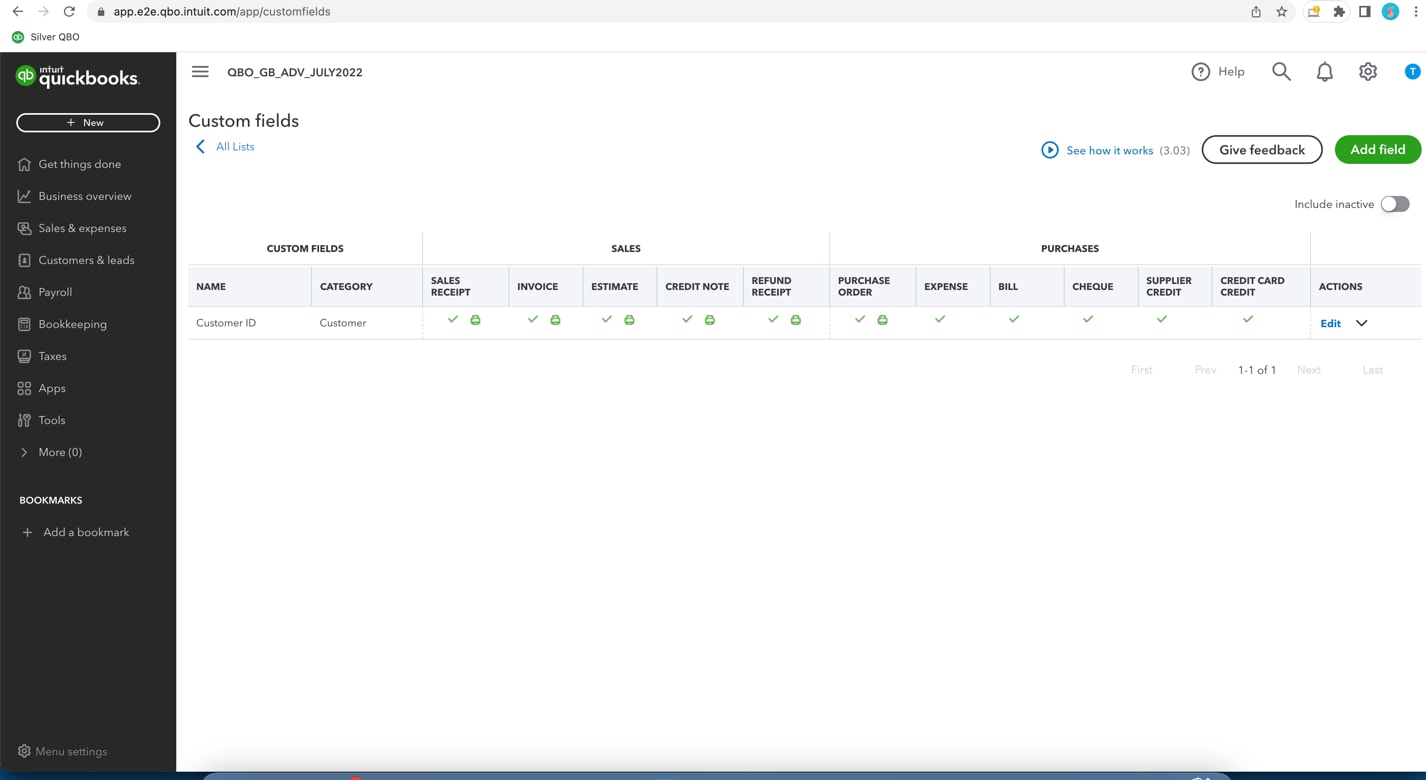
- Go to Settings and select Custom fields.
- To edit a custom field: In the Actions column, select Edit. Edit the field's name, select the forms it appears on, and select whether it's visible to customers or suppliers. Select Save.
- Note: Any edits you make here apply to all forms that use the field.
- To make a custom field inactive: Select the ▼ dropdown next to Edit, then select Make inactive. Select Yes in the pop-up message to confirm.
- Note: Your past data won’t disappear. You’ll still see the field on sales forms and purchase orders you've used it on, but it won’t appear on new forms.
Create or edit custom fields from a form
You can create and edit custom fields from any sales form (invoice, sales receipt, expense) or purchase form (expense and purchase order).
- Open an existing form or create a new one.
- Select the settings icon at the top of the form (not on the navigation bar). This opens a panel with the Custom fields section.
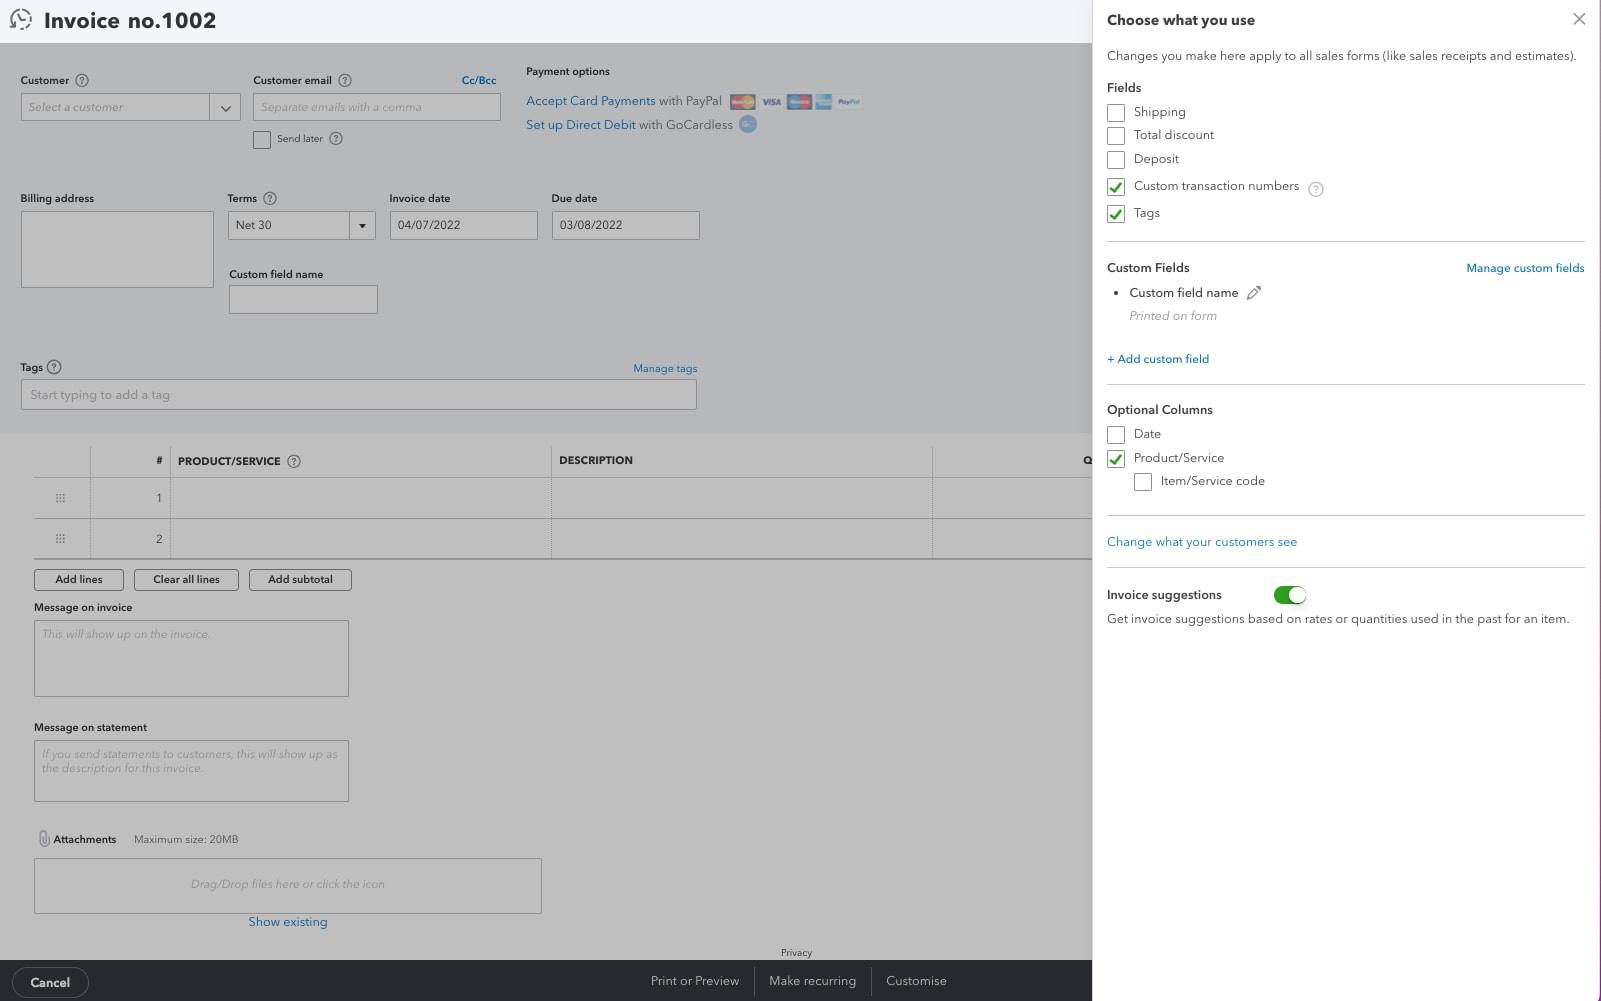
- Select Manage custom fields next to the Custom fields.
- This opens the Custom fields page so you can create and edit custom fields.
- When you're done making changes, close the window to return to the form.
Important: Changes you make to forms affect all forms and customer profiles using the custom field, not just this form.
Create or edit custom fields from a customer or supplier profile
For customer profile:
- Go to All apps
 , select Customer Hub, then select Customers & leads (Take me there).
 - Find and open a customer profile.
- Select Edit.
- Go to the Custom fields tab.
- To create a field: Select + Add custom field. Fill out the info, then select Save.
- To edit a field:
- Go to Settings and select Custom fields.
- For the custom field, you want to update, select Edit from the Actions column.
- Update the info as needed.
- Select Save.
- Go to Settings
- Close the window to return to the profile, then select Save to save your changes.
For supplier profile:
- Go to All apps , select Expenses & Bills, then select Suppliers (Take me there).
- To add a new custom field:
- Find and open a supplier profile.
- Select Edit.
- Go to the Custom fields tab and select + Add custom field.
- Fill out the info about the field.
- Select Save.
- To edit an existing custom field:
- Go to Settings and select Custom fields.
- For the custom field, you want to update, select Edit from the Actions column.
- Update the info as needed.
- Select Save.
- Go to Settings