QuickBooks HelpQuickBooksHelpIntuit

Set up sales tax in QuickBooks Desktop

by Intuit1 Updated 3 years ago

You may be required to collect taxes for certain goods and services you offer. QuickBooks helps you keep an accurate record of these taxes so you can easily monitor and remit them to the appropriate tax collecting agency.

Note: Before you set up your sales tax items/groups, make sure you check the tax rates and requirements with your tax agency.

To start recording sales tax in QuickBooks Desktop, you need to turn on this feature and set up sales tax items or tax groups.

  1. Go to the Edit menu, then select Preferences.
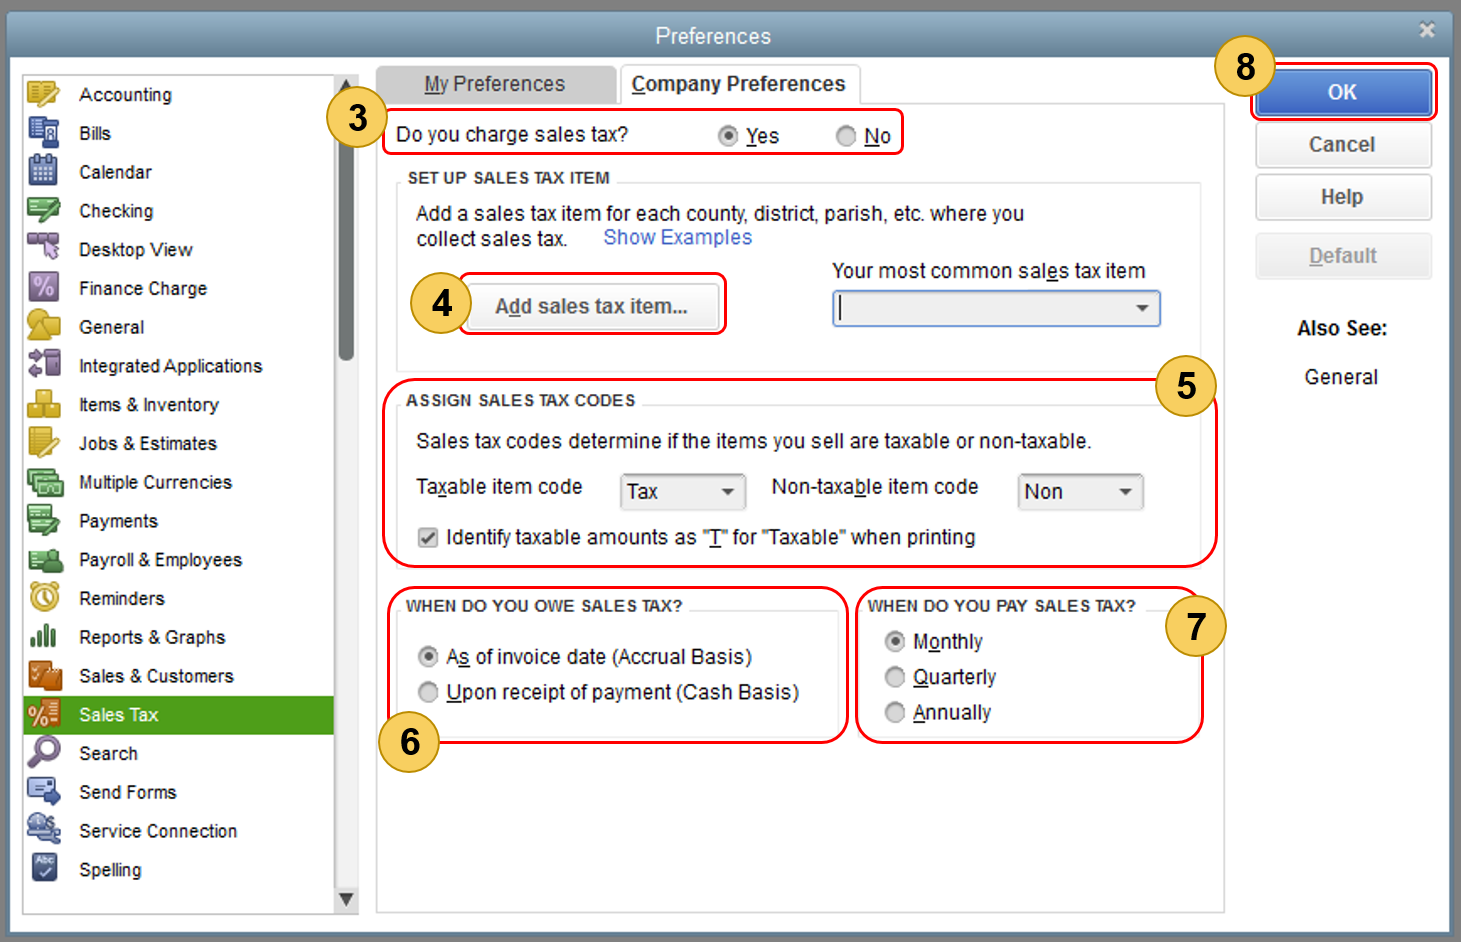
  2. On the Preferences window, select Sales Tax then go to the Company Preferences tab.

    User-added image

  3. Select Yes to turn on sales tax.
  4. Set up the sales tax items or sales tax groups for each county, district, city, etc. where you collect sales tax. Click Add sales tax item to do this.
  5. Assign sales tax codes. Sales tax codes help you track taxable and non-taxable sales and/or customers. Setting up and assigning the correct sales tax code allows you to run a report that divides the total taxable and non-taxable sales. When you turn on sales tax in QuickBooks, two tax codes are automatically created: TAX (taxable) and NON (non-taxable). TAX is used for items and customers that you need to collect tax for. NON is used for items and customers that are exempted from tax such as non-profit organisations, out-of state sales, or items that your customers will resell.
  6. Set the Sales tax basis (Accrual or Cash). Take into account your company’s accounting an preference.
  7. Set up your preference for paying the sales tax (Monthly, Quarterly, Annually).
  8. Select OK.

Sign in now for personalized help

See articles customized for your product and join our large community of QuickBooks users.