Email receipts and bills
by Intuit•93• Updated 2 weeks ago
Learn how to email your expense receipts and bills to get them into QuickBooks Online.
If you have a receipt, you can email it toQuickBooks. We’ll extract info from it and create a transaction for you to review. Then you can edit the receipt, add it to an account, or match it to an existing transaction in the Receipts (Take me there) menu. You’ll also have the receipt on file for tax time.
Note: There are two types of user views in QuickBooks Online. Make sure you’re on Business view so you can follow these steps.
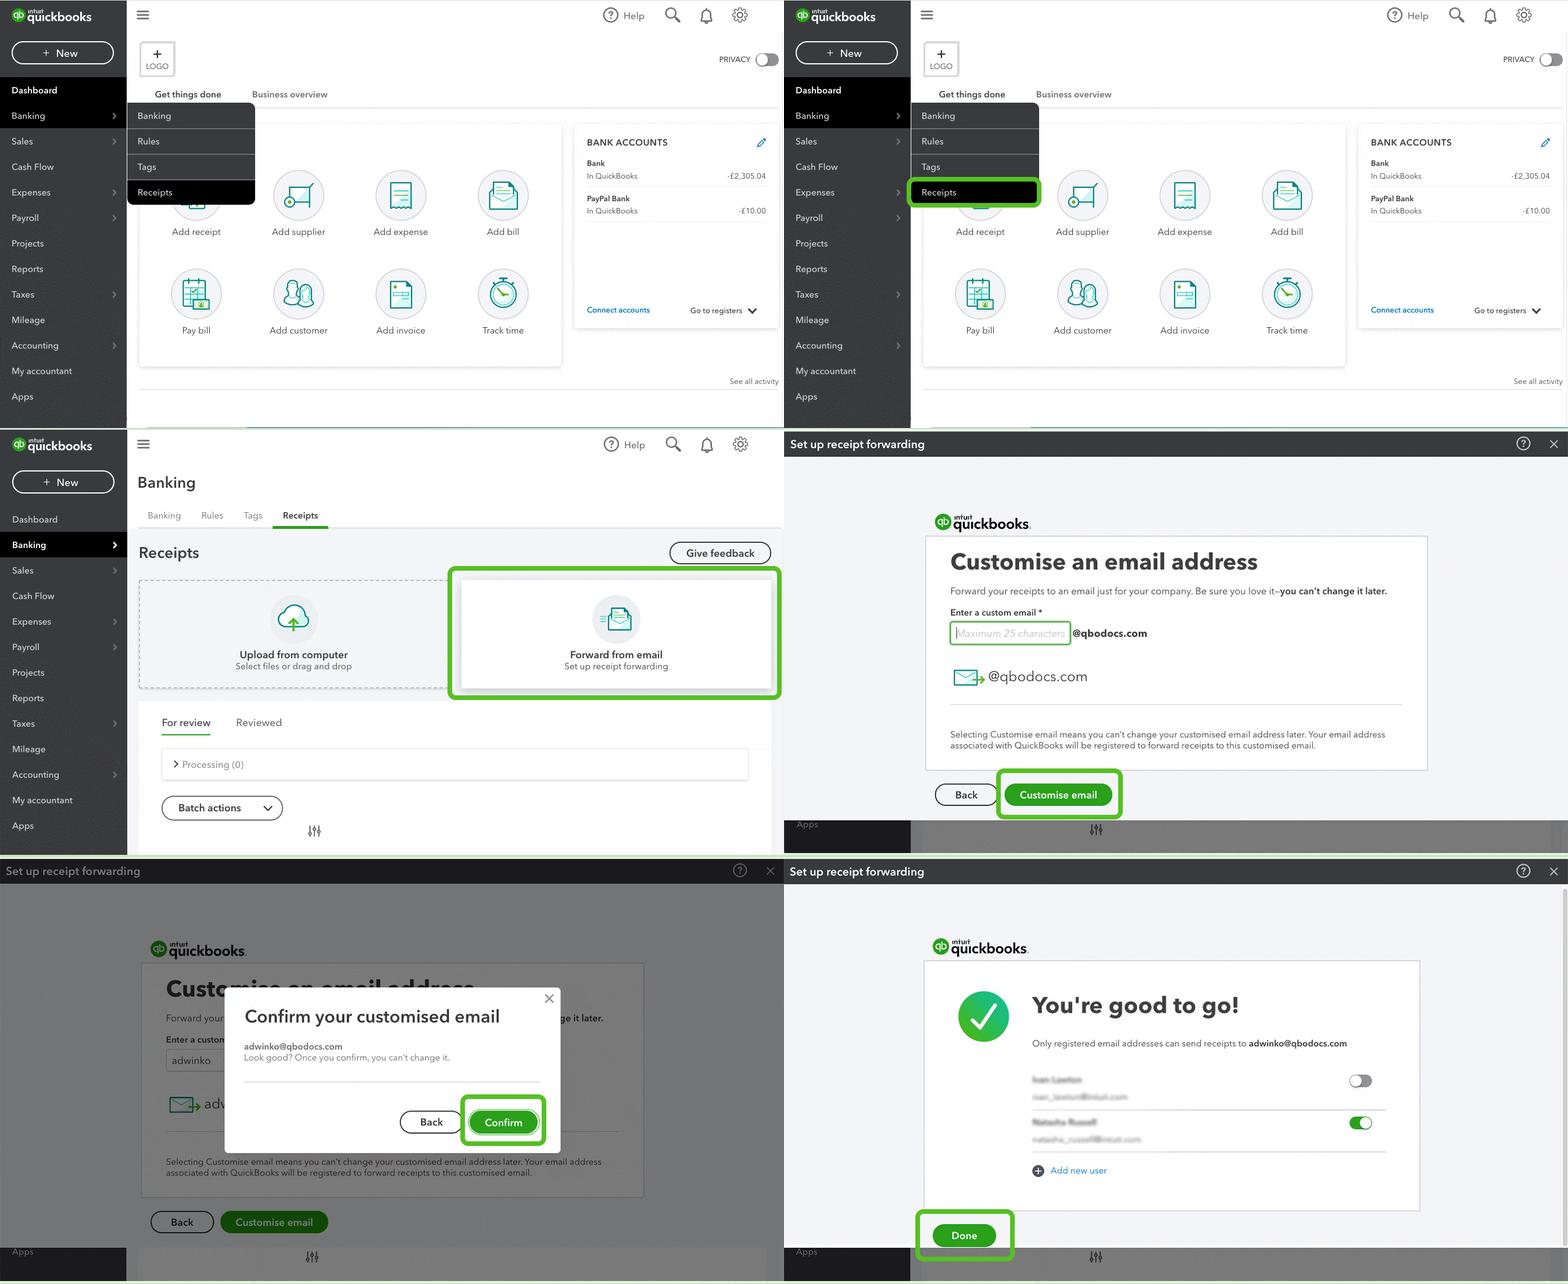
Step 1: Customise an email address to forward to
Create a custom email address so you can forward images of your receipts and bills, even when you're on the go. To create the custom email address:

- Follow this link to complete the steps in product
- Select Forward from email.
- In the Enter email address field, create a customised email address. It will have @assist.intuit.com at the end.
Note: If you want to update the email address later, go to the Your forwarding email section, then select Update. Enter a new email address and select Confirm change. - When you're ready, select Next.
- Confirm that it's accurate and then select Looks good.
- Select Done.
Give users permission to forward receipts
You can give standard users permission to forward receipts. Here’s how.
- Follow this link to complete the steps in product
- Select Manage forwarding email.
- Turn on the toggle for the users you want to give permission to forward receipts.
Note: If you haven’t set up users yet, select Add new user. They’ll appear after they accept your invite. - When you’re done, select Close.
Step 2: Forward images of receipts and bills to QuickBooks
When you get your receipts and bills, take a picture of it and send it to us. Here’s how.
- Take a picture of your bill or receipt on your mobile device.
Note: The photo's file type must be a pdf, jpeg, jpg, gif, or png. - Make sure each image or file contains only one receipt.
- Email the image to your custom email address @assist.intuit.com. It may take a few minutes to send.
Note: You can send multiple receipt images in one email. The email attachment's file size must be between 46KB to 20 MB.
We'll take care of the rest. QuickBooks automatically pulls dates, amounts, supplier, and last four digits of the credit card from the image.
Step 3: Review and categorise your bills and receipts
Now your bills and receipts are in QuickBooks. Follow these steps to review and categorise them into the correct accounts.