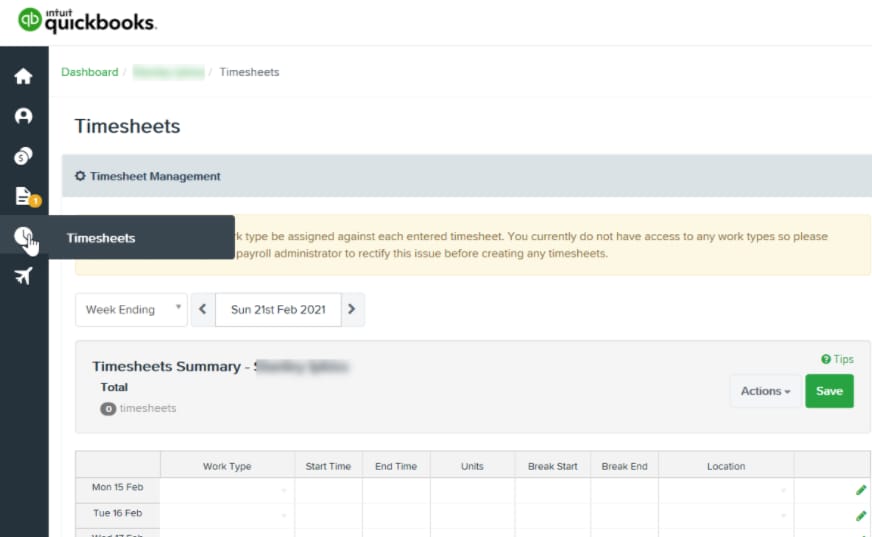
Once your employee is setup through the self service portal they will be able to submit Timesheets. When logging into the employee self service portal, there is a Leave icon showing on the dashboard. From here, you can enter timesheets.
To enter Timesheets
First, make sure the employee is set to enter timesheets. To this, simply go click on the employee's name to open their settings, then set the Timesheets option in the Pay Run Defaults section.
- Sign into the Employee portal.
- In the navigation bar, select the Timesheets icon. Here, you can enter your worksheets within the Timesheet management menu that opens.

By default the timesheet will show on the week that is currently being processed. If you want to change the week you can skip ahead using the arrow buttons, or you can click the date button and choose a different date.
You can also select either 'Week Ending' or 'Fortnight Ending' from the drop down box.
Timesheet tips
We’ve designed the interface to be very keyboard-friendly for efficient data entry. For example, when entering start and end times you can simply type 9a and it will recognise it as 9:00am. Similarly, for example, 530p will be recognised as 5:30pm.
- If Work Type is not specified, the hours recorded will be assigned to the default pay category for the employee when the timesheets are imported into a pay run.
- If Location is not specified, the hours recorded will be assigned to the default location for the employee when the timesheets are imported into a pay run.
- If you specify a work type that is linked to a leave category, you'll be able to attach a document to that timesheet.
Entering standard hours
If you have been set up to use ‘standard hours’ to pre-populate your Timesheet, click on the Actions button and choose Add standard hours.
Where you need to edit your standard hours, as mentioned previously, you can simply type 9a and it will recognise it as 9:00am. Similarly, 530p will be recognised as 5:30pm.
Be sure to click Save after making any changes.
Applying your approved leave requests to your Timesheet
If you have an approved leave request, click the approved leave request banner at the top and click the annual leave shift that you’re going to import as a timesheet.
The system will attempt to work out the start and finish times of the shift however you can change these.
Any leave shift however should reflect the hours that you would normally otherwise have worked. If you normally have a break, enter the break into the timesheet, and click Save.
Saving your Timesheet
Once you’re happy with your timesheet click Save. An S will appear next to your timesheets meaning your timesheet has been submitted. Where the timesheet line is a leave entry, an aeroplane icon will also show.
Your manager will receive a notification that your timesheet has been submitted and ready for their approval.
See also
Create Timesheets on behalf of employees
Import Timesheets
Advanced Payroll hub
