The pay conditions engine
Learn how to use rule sets to create pay conditions for selected employees. Rule sets allow you to specify the rules that will determine how an employee is paid.
Most industries have some form of pay conditions – whether it be 150% hourly rate on a Saturday, a tool allowance or overtime for working past midnight.
We've made it easy to use a rules feature that supports different conditions and actions.
The pay conditions engine is not designed to work on its own. Instead, it works in partnership with the following other features in order to provide comprehensive pay conditions support:
Create a rule set
To get started with pay conditions, let's create a rule set.
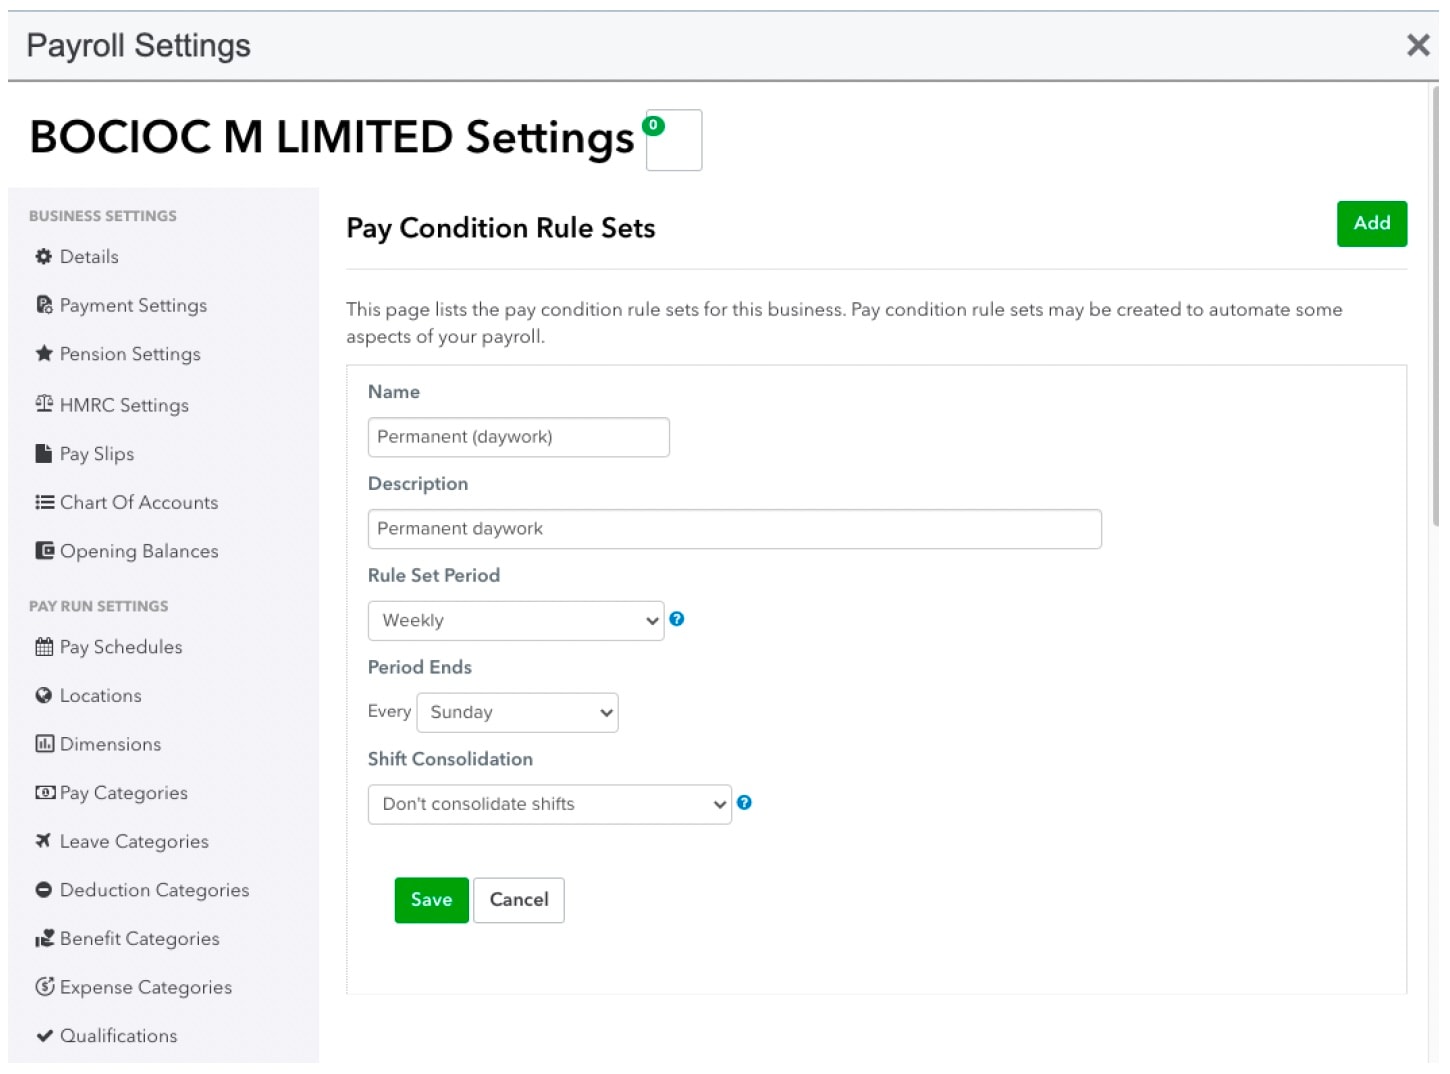
- Select Payroll, then select Payroll Settings.
- Select Rule Sets under Pay Conditions.
- Select Add.
- Name the rule set, and define the period for the rule set (example given below).
- Select Save.
Defining Rules
- Select the Create Rules to go into the rules editor.
- Select Add a rule, Here’s a rule example below shows assigning the ‘bank holiday overtime’ pay category to any hours worked outside of ordinary hours on a Sunday.
Next, you can define rules to be included in your rule set.
- Select the Create Rules to go into the rules editor.
- Select Add a rule. Here’s a rule example that shows assigning the ‘bank holiday overtime’ pay category to any hours worked outside of ordinary hours on a Sunday.
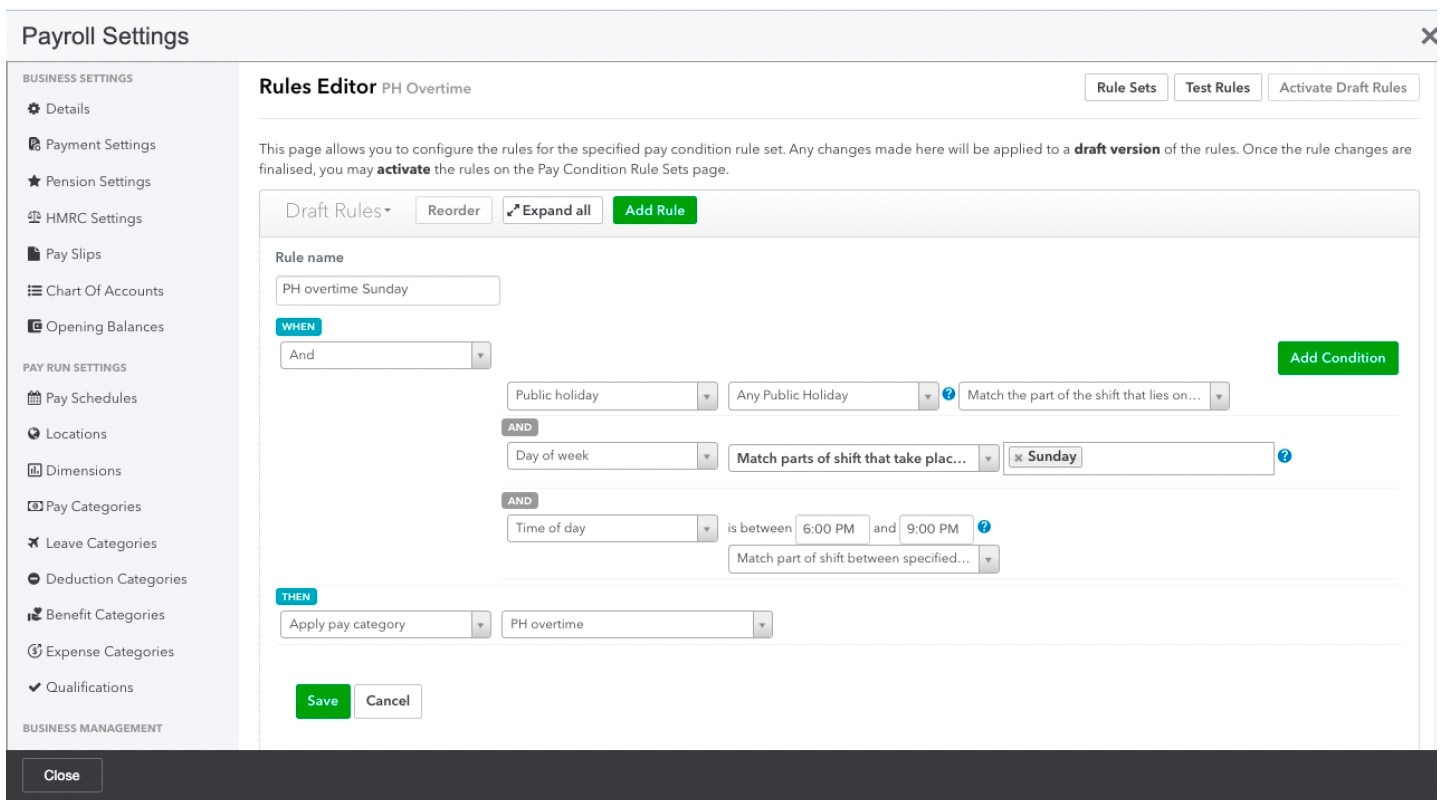
- Note that to use the ‘Bank Holiday’ condition, you must be sure to check your bank holidays in the Bank Holiday calendar interface and to configure the states for your location accordingly.
- QuickBooks will provide an up to date set of bank holidays in each business, automatically. Local/regional and company authorised (e.g. picnic days) bank holidays will need to be added manually.
- There are a number of actions and conditions that you can use already (with more to come). We’ve listed each of the conditions and actions here.
3. After selecting Save, the editor will be replaced with a display-version of the rule:
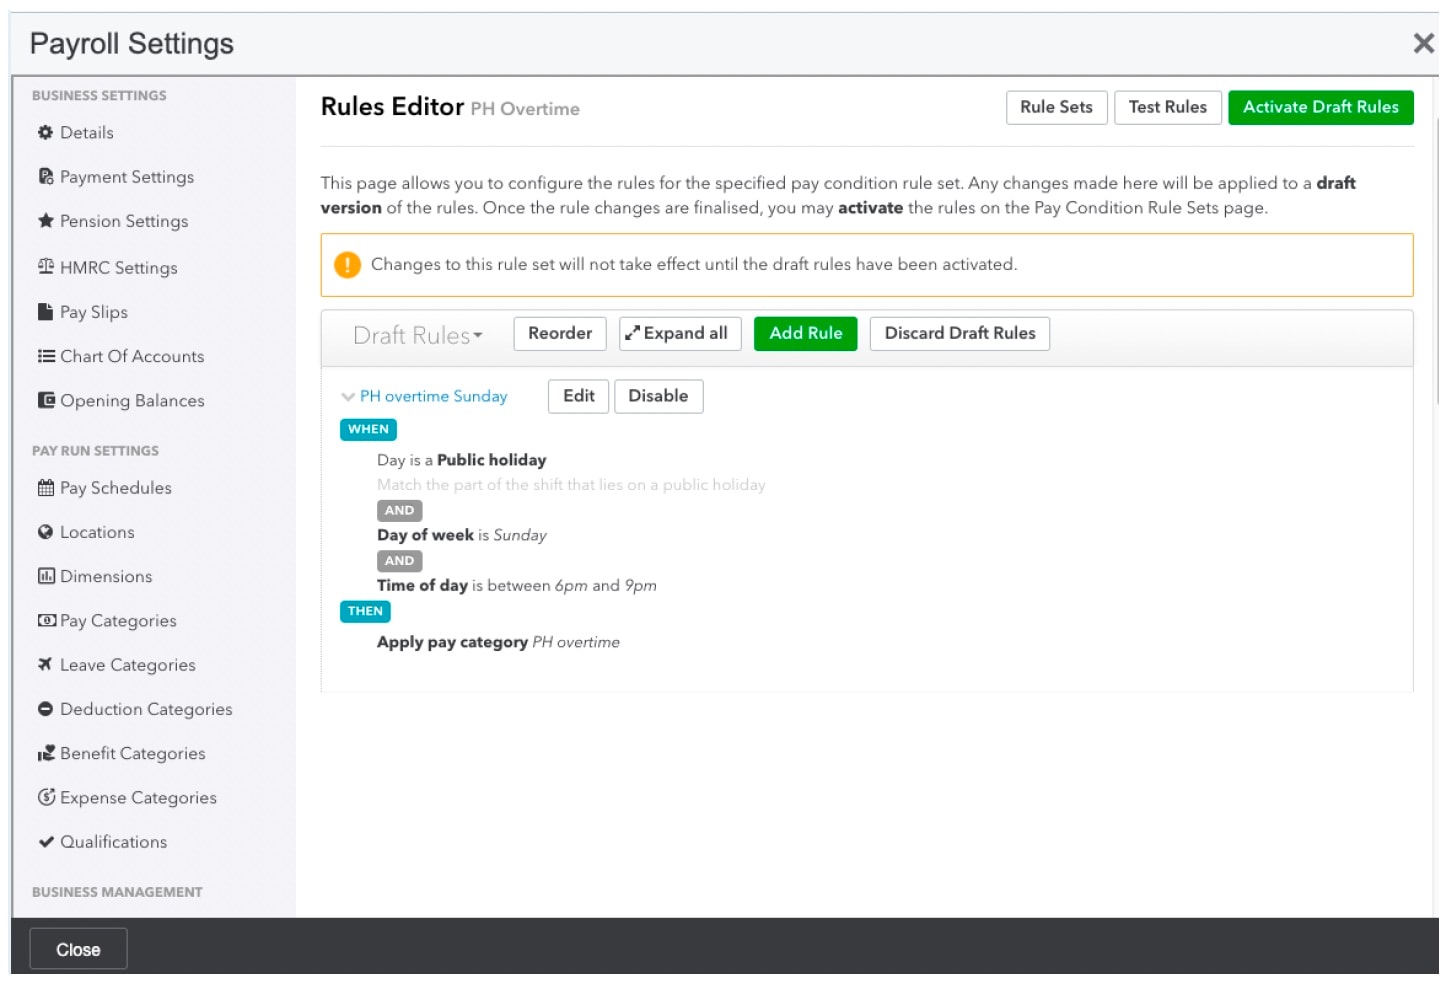
- You can define as many rules as necessary. Note that when rules are evaluated, they are done so in the order shown on the page, from top to bottom.
4. If you need to re-order the rules, select Reorder and then you can drag the rules around to re-order them.
Testing rules
Once we’ve defined our rules, the next step in the workflow is to test them.
- Select Test Rules next to the rule set to apply your rules to a set of sample shifts so that you can verify that the output and shift costings are as expected.
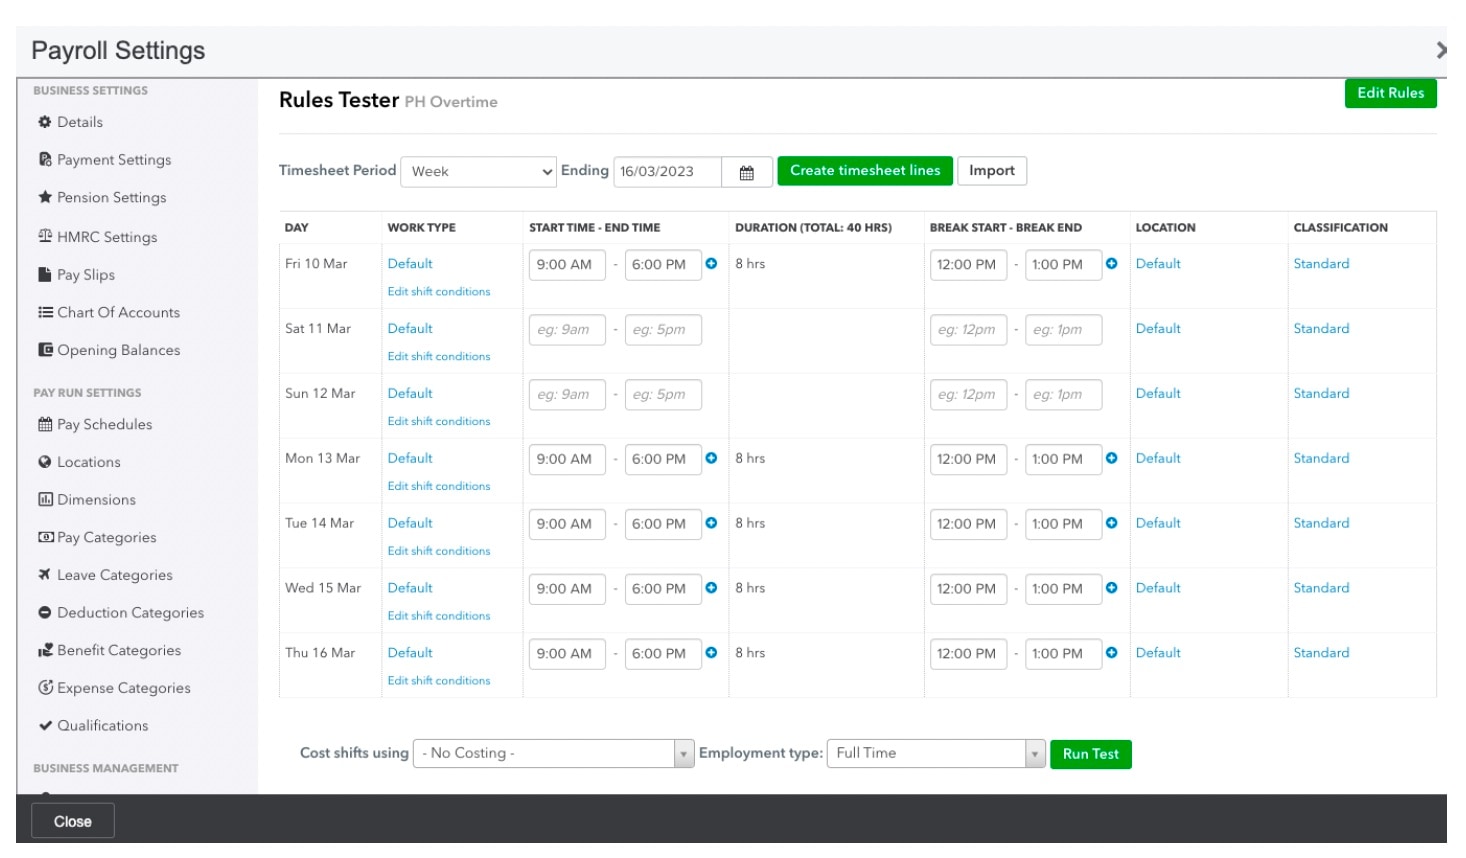
- Once you select the timesheet period and enter the shifts, you can choose to cost the shifts using either a pay rate template or to simulate the costings using an actual employee. Select Run Test and then the results will be shown.
- You can select Edit rules to go back and make changes until you’re satisfied that the output from the test is correct.
- Once you’re satisfied, select Activate Draft Rules. QuickBooks will keep an active rule set and a draft rule set for you so that you can continue working on changes to a rule set without inadvertently impacting any employees that are associated with the rule set.
- Once you’re happy with your changes, select Activate Draft Rules again and any future pay runs will use the new version of the rules.
Applying rules
The next step is to assign the rule set to your employees.
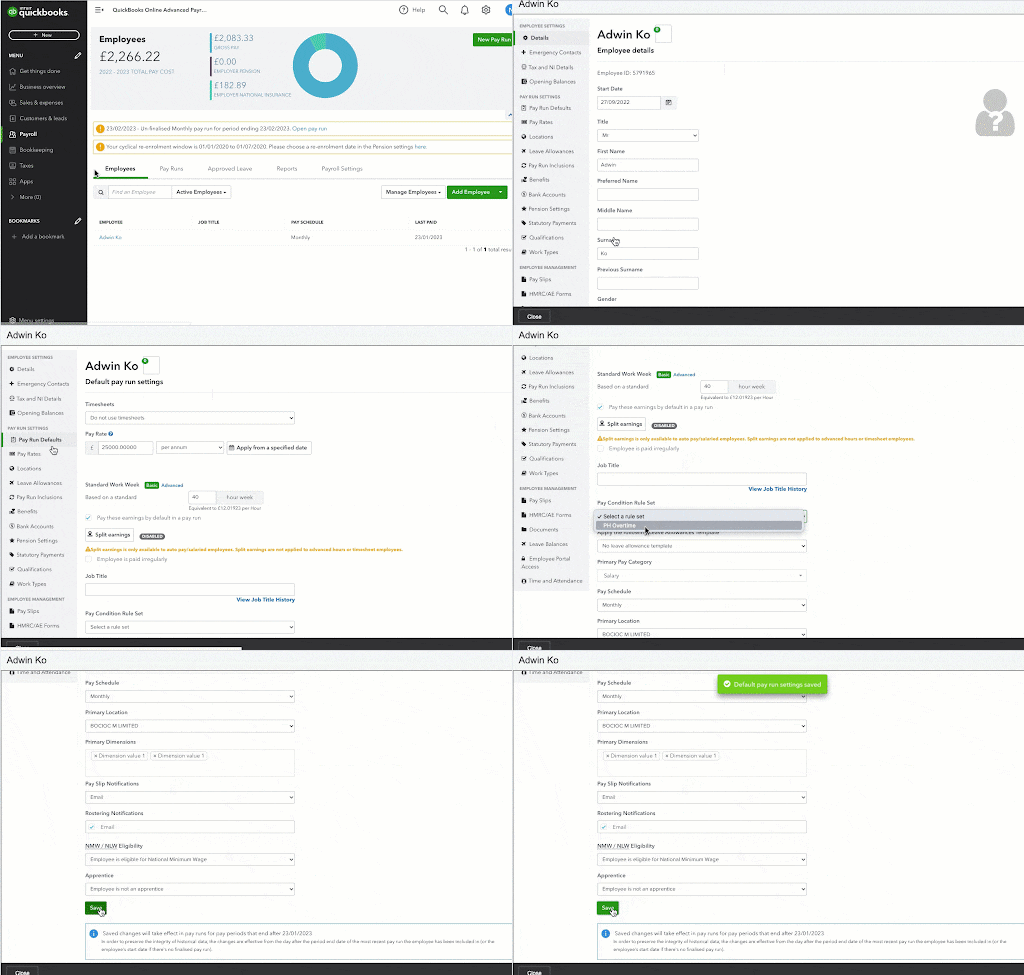
- Select Employees, then select the employee's name to enter their settings.
- Select Pay Run Defaults.
- Navigate to the Pay Condition Rule Set dropdown menu and select the rule set you created.
- Select Save.
This rule set, in combination with a pay rate template and a leave allowance template, mean that setup for an employee is streamlined and consistent.
Now, whenever we import timesheets into a pay run, if the employee is associated with a rule set, their timesheets will be processed through the pay condition engine.
Once the timesheets are imported and the shifts interpreted, there will be an indicator in the pay run to show the rule set that was applied for the employee.