Turn on suggestions
Auto-suggest helps you quickly narrow down your search results by suggesting possible matches as you type.
Showing results for
Get 50% OFF QuickBooks for 3 months*
Buy now
Convert your data to a QB Desktop file and you can use the trial version to access your historical data for good.
Aside from SIAB suggestion to convert your data to QBDT, I'll share other steps that you can take, TooFast.
Once you cancel or close your QuickBooks Online (QBO) subscription, your data will remain accessible in read-only mode for up to one year from the cancellation date. If you decide to close your QBO account now, you can later reactivate it if you need to enter transactions or access your data until December 31, 2025. Once you've finished with the data, you can cancel your subscription permanently.
While it’s true that accounts with the multicurrency feature activated cannot be downgraded to a lower-tier plan, I suggest reaching out to our Live Support team. They can offer alternative solutions that align with your business needs.
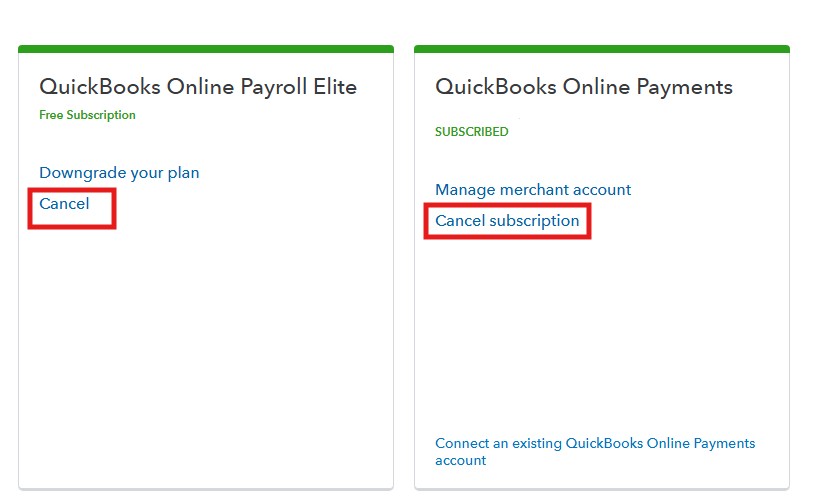
To cancel your account, follow the steps below:

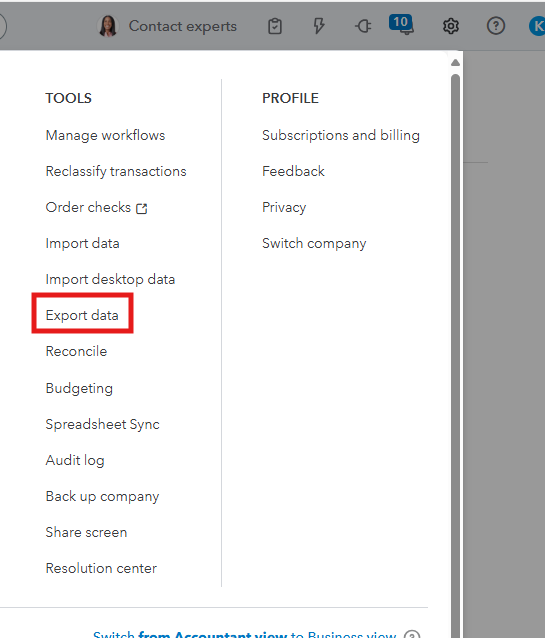
On the other hand, you'll still be able to export your data during the read-only access period after cancellation. Here's how:
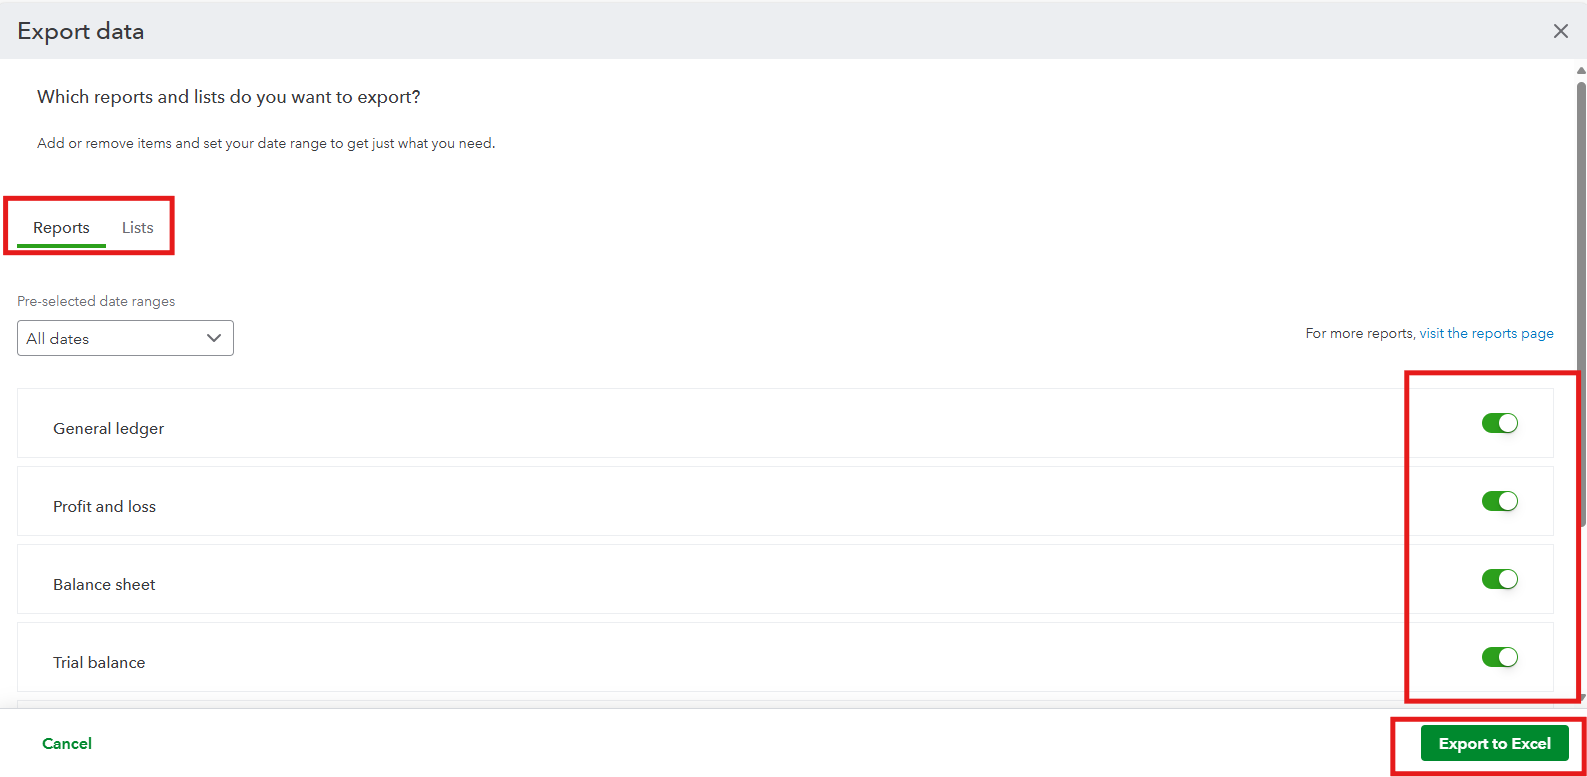
To learn more about the reports and lists that can be exported, check out this article: Export your QuickBooks Online data.
We'll certainly welcome your business again in the future and would be happy to answer any questions you may have.


You have clicked a link to a site outside of the QuickBooks or ProFile Communities. By clicking "Continue", you will leave the community and be taken to that site instead.
For more information visit our Security Center or to report suspicious websites you can contact us here