Learn how to use custom fields for vendors and expenses in QuickBooks Online Advanced.
In QuickBooks Online Advanced, you can create custom fields and use them in various ways to track the details that matter most to you. Here are some examples of how you can use custom fields to track info about your vendors and expenses.
Create a custom field for purchase order numbers
How it helps
You can see purchase order numbers on your bills and other expenses.
When you copy a purchase order to a bill, the purchase order number appears automatically on the bill.
How to set it up
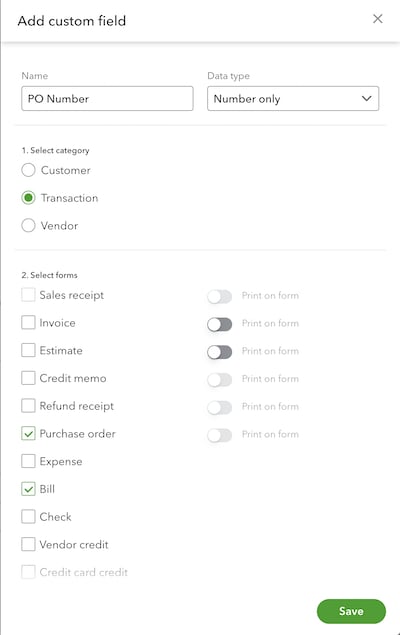
- Create a custom field and give it a name like “PO number.”
- Select the Number data type if your purchase orders have only numbers, or select the Text and number data type if they have letters as well.
- Select the PO number to appear on your bills. If you also want them to appear as a reference on your invoices and sales receipts, select these forms as well.
Create a Vendor ID field to appear on transactions
How it helps
Once you add the Vendor ID for a vendor, any expense form transaction this field is shown on will be auto-filled with the Vendor ID value once you select the particular vendor.
Let’s say your company uses multiple vendors to purchase parts or services to supply to your customers. In that case, you may need to keep track of invoices and associated payables associated with each vendor in your accounts receivable department, then cross-verify with your expense/payables department. A Vendor ID custom field is especially helpful if you use other apps to track your payables.
Tip: You can also create a similar custom field to capture the type of vendor or other vendor-specific info, and then choose what forms you want this info to appear on.
How to set it up
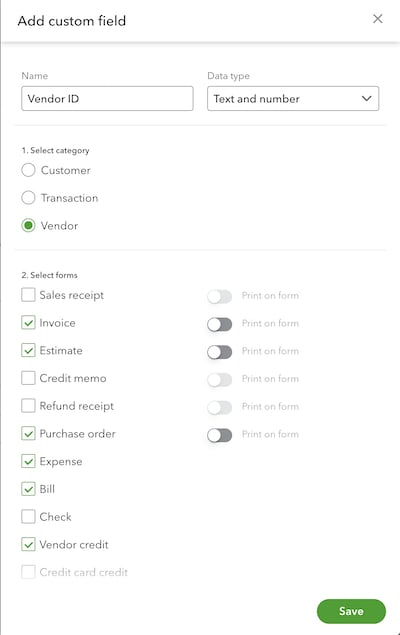
- Create a custom field and give it a name like “Vendor ID.”
- Select all the types of forms you want it to appear on. QuickBooks lets you show the Vendor ID field across both expense form transactions (purchase order, expense, bill, vendor credit) and sales form transactions (invoice, estimate, sales receipt).
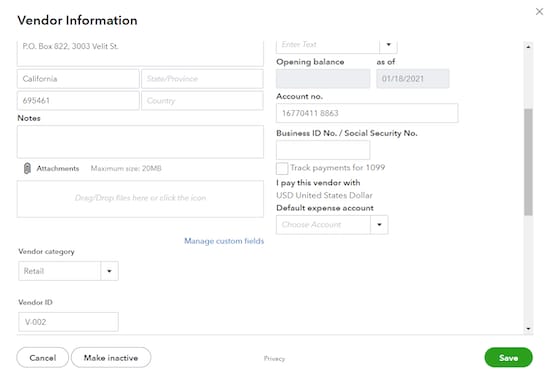
After you create this custom field, add a unique ID to each vendor you have by following these steps:
- Go to Expenses and select Vendors.
- Select the vendor you want to enter an ID for.
- Select Vendor Details.
- Select Edit.
- Find the Vendor ID custom field. Enter the ID for the vendor.
- Select Save.
Capture the invoice date on bills
How it helps
Currently, the Bill form in QuickBooks only includes a Bill date and a Due date. The Bill date captures the date the expense is recorded. However, in many situations, invoices are received for a prior month in which the books have already closed, and the bill(s) for the invoice are recorded at a later date.
With an Invoice Date custom field, you can capture the date the invoice was generated and use reports such as the unpaid bills report to compare the invoice date and the bill date.
How to set it up
- Create a custom field and give it a name like “Invoice Date.”
- Select the Bill form and any other expense transaction forms you want the field to appear on.

Use custom fields to categorize your expenses
How it helps
Imagine your company sends employees to attend multiple conferences a year, virtual or in-person, and has a need for tracking expenses in a detailed way. For example, your marketing manager wants to see how much is being spent per conference (travel by flight or car, hotel stays, meals, and so on), in addition to the conference fee. You can capture this info in an Expense type custom field.
Once your company starts adding data to an Expense type custom field, you can take advantage of it in your reports. For example, you can add Expense type as a column, or group by, sort, or filter by this custom field. Learn more about how to use custom fields in reports.
How to set it up
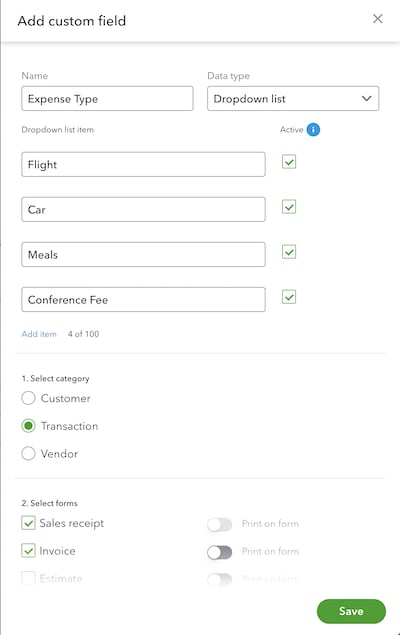
- Create a custom field and give it a name like “Expense type”
- Select the Dropdown list data type and add possible values (Flight, Car, Meals, Conference fee, and so on).
- Based on your needs, mark this field to appear on your expense forms, or choose additional forms, such as bills.