Connect or Disconnect Mailchimp for QuickBooks Online
by Intuit•5• Updated 8 months ago
You can connect your QuickBooks Online account with your Mailchimp account and sync customer and order data to create and support marketing for your business. Once your data is synced to Mailchimp, you can use it to segment your audience and create custom messaging to get more customers or re-engage with existing ones.
In this article, you’ll learn how to connect and disconnect Mailchimp for QuickBooks Online. If you don’t have a Mailchimp account, you’ll learn how to create one.
Before you start
- You’ll need both a QuickBooks Online account and a Mailchimp account to use the features of this integration. If your Mailchimp account is associated with more than one company, you’ll need to choose which one to connect to your QuickBooks Online account, as you can only connect one Mailchimp account to one QuickBooks Online account.
- If you don’t have a Mailchimp account, you’ll be able to create one and then connect your accounts.
- Learn about the different types of contacts and how to work with them in About Your Contacts.
- It might be helpful to familiarize yourself with Mailchimp audiences.
How it works
The Mailchimp QuickBooks Online integration syncs customer and order data to the Mailchimp audience of your choosing.
Once you’ve chosen the Mailchimp audience, your QuickBooks Online customer information syncs to Mailchimp as contacts in the selected audience. The contacts are tagged as having been imported from QuickBooks Online, which helps you identify them for targeted marketing efforts.
Create a Mailchimp account and connect it to QuickBooks Online
To create a new Mailchimp account and connect it to your QuickBooks Online account, follow these steps.
- You can launch the account creation and linking process from several places, including from a personalized prompt, the Mailchimp landing page or the Mailchimp integration page.
- Once you've launched the process, review the information filled in on the screen. If necessary, you can change the Email and Username.
- Email The email address where we'll contact you. Make sure it’s an email address you can access. The reply email address that you use to send emails can be different from this email address.
- Username We’ll automatically use your email address as your username.
- Enter the Password you want to use and click Sign up.
- We'll display a confirmation message. Check your email inbox for the account activation email to complete your account setup.
Note:
- The time it takes to receive the activation email can vary. If you haven't received the activation email, check your spam folder and read our activation email troubleshooting tips.
- Mailchimp blocks signups from role-based email addresses like admin@pottedplanter.com or security@example.com.
Activate your account
After you receive the account activation email from Mailchimp Client Services, you can activate your account.
- Open the account activation email and click Activate Account.

- On the confirm humanity screen, click I'm Not A Robot.

Set up your account
Once you’ve activated your account, you can complete the setup process.
Choose your account plan. To learn more about the different Mailchimp plans, check out About Mailchimp Pricing Plans. Once you’ve made your selection, click Next.
Note: If the number of contacts you import exceeds the limits on the pricing plan you select, we may ask you to complete additional actions on the Mailchimp dashboard. For example, if you exceed the number of contacts for a free plan, we’ll pause your ability to send new messages; or, for paid plans, you may be charged for overages.
- Confirm your business details, keeping in mind the following information.
- Name The name associated with your account profile. The profile name is unique to you and can have access to multiple Mailchimp accounts.
- Business Name The name of your company or organization. It will appear on every email along with your physical mailing address.
- Website URL The URL for your company, organization, or personal website. This is optional.
- Business Phone Number The phone number associated with your company or organization. This is optional. When you’re finished, click Continue.
- Confirm your address and click Continue. A physical address is required by law on any email you send out. Ideas for a physical address include your personal address, business address, or a P.O. Box.
Connect your accounts
Once you’ve completed the setup process, you can connect your new Mailchimp account with your QuickBooks Online account and sync your customer data.
To connect your accounts, follow these steps.
- Review the customer information that we’ll sync from your QuickBooks Online account. Currently, this includes the following fields.
- Full name The customer's first and last name.
- Address The full physical address associated with the customer.
- Invoices Any invoices associated with the customer.
- Sales receipts Any receipts associated with the customer.
- Items Any items or services the customer has purchased.
- Select the marketing status for your synced customers. To learn more about the different types of marketing status, check out About Your Contacts.
- Click Connect accounts.
That’s it! You’ve created a Mailchimp account and connected it to your QuickBooks Online account.
Connect Mailchimp for QuickBooks Online
If you already have both a Mailchimp account and a QuickBooks Online account and want to connect them from inside the Mailchimp app, follow these steps.
- Navigate to the Mailchimp integrations directory.
- Choose Mailchimp for QuickBooks Online.
- Select the Mailchimp audience you want to sync your QuickBooks Online customers to.
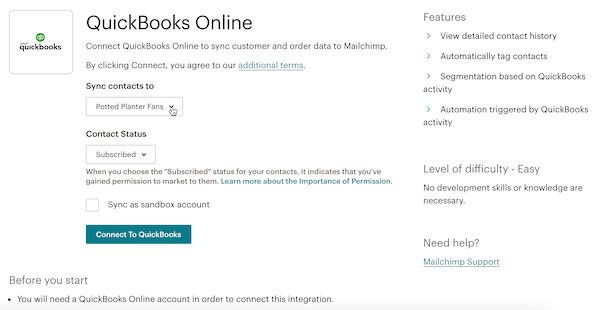
- Choose the status of the contacts you’ll be syncing to Mailchimp.
- Subscribed contacts have agreed to receive your marketing.
- Unsubscribed contacts have not opted into receiving marketing materials.
- Click Connect to QuickBooks.
- Enter your QuickBooks ID and password and click Sign In.
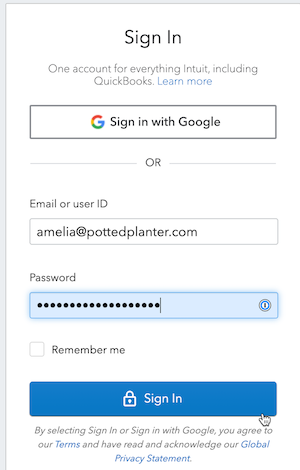
That’s it! Your accounts are connected and you’ll see a success message on the integration page.
Review your imported contacts
Once you’ve connected your accounts and your contacts have synced, you can review the changes to your audience.
To review your imported contacts, follow these steps.
- Click the Audience icon.
- On the Audience dashboard, scroll to review your recently updated contacts.
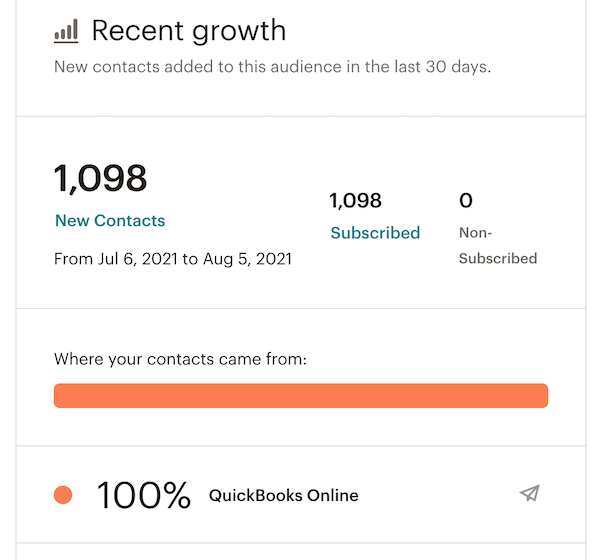
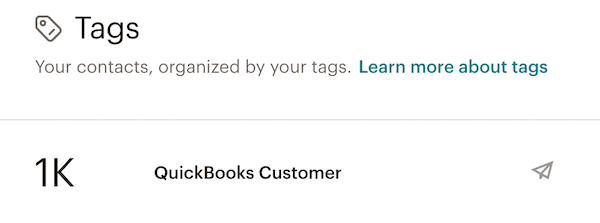
- You can also review your contacts by how they are tagged.
Next steps
After you connect your QuickBooks Online account to Mailchimp, check out how to work with audience segments and automations from your QuickBooks Online dashboard with the following articles and guides.
- Send an Email to a Segment from Your QuickBooks Online Dashboard
- Create an Automated Email from Your QuickBooks Online Dashboard
Disconnect QuickBooks Online
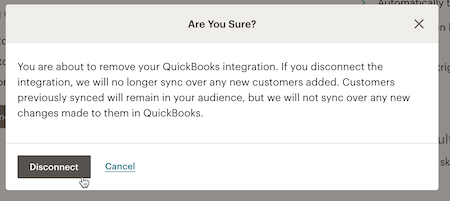
When you disconnect QuickBooks Online from your Mailchimp account, all customer updates are paused. Previously synced order and invoice data is deleted from Mailchimp, while customer data remains as Mailchimp contacts. Disconnecting does not affect any data stored in QuickBooks Online.
To disconnect QuickBooks Online, follow these steps.
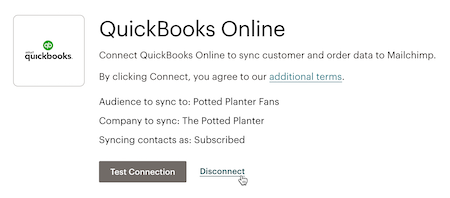
- On the QuickBooks integration page, click Disconnect.
- On the pop-up modal, click Disconnect to confirm.
More like this


