Create an Abandoned Cart Postcard
by Intuit• Updated 2 months ago
We’re retiring our postcards feature on October 30, 2024. You cannot create new postcards, but any recurring or ongoing postcards will continue to send until October 30.
When a customer leaves an item in their shopping cart, recapture their attention with a printed postcard that encourages them to return to your store. Use abandoned cart postcards together with promo codes and abandoned cart emails to give them an extra push.
In this article, you'll learn how to create an abandoned cart postcard.
Before you start
- Make sure you’re familiar with how postcards work in Mailchimp, including pricing and delivery estimates. To learn the basics, check out About Postcards.
- Abandoned cart postcards are available to users who connect a supported e-commerce store or custom API 3.0 integration. To find out if your store supports this automation, visit the Integrations page, click the name of your integration, and check the Features list.
How it works
The abandoned cart postcard campaign helps you turn shoppers into buyers. It targets customers of your connected store who add products to their shopping cart and then leave without making a purchase.
If a shopper puts an item in their cart and leaves it there for 24 hours, we’ll automatically send a postcard order to the printer. This delay gives each customer a reasonable amount of time to return to your store on their own, or with the help of an abandoned cart email.
After the postcard is sent to the printer, we estimate your customer will receive it within 5-11 business days, depending on where they’re located.
Abandoned cart postcard vs. email
Mailchimp offers two types of abandoned cart marketing for your customers: printed postcards and automated emails. Besides the format, there are a few important differences between abandoned cart postcards and emails. Here’s a table that compares the two.
| Details | Postcard | |
|---|---|---|
| Trigger (the action that activates the message) | Potential customer leaves an item in their shopping cart | Potential customer leaves an item in their shopping cart |
| Sending delay | 24 hours | 1 hour, 6 hours, 24 hours |
| Estimated delivery time | 5-11 business days | As soon as possible after send |
| Promo codes available? | Yes | Yes |
| Product blocks available? | No | Yes |
Both are triggered when a customer leaves an item in their shopping cart for a set amount of time, but the abandoned cart postcard has a fixed delay of 24 hours. If you have an abandoned cart email with a shorter delay, this gives it time to convert before sending out a postcard.
Unlike the abandoned cart email, which can include Product blocks that show each customer exactly which items they left in their cart, the content of your abandoned cart postcard will be the same for each recipient. With postcards, you should Use generic messaging to thank people for stopping by your store, and include a promo code to encourage another visit.
Create campaign
To create an abandoned cart postcard, follow these steps.
- Click Create.
- Click Postcard.
- Click Abandoned cart.
- Choose a store from the drop-down menu and click Begin.
This will take you to the postcard builder, where you’ll set your budget, add your content, and start your automation.
Set budget
Set a budget, and we’ll use it to send postcards over time. When we’ve sent enough postcards to meet your initial budget, we’ll automatically renew it for the full amount, and recharge your account. This way, you won’t miss out on any carts. You can pause and edit your campaign at any time to adjust your budget as needed.
To set a budget for your abandoned cart postcard, follow these steps.
- In the Budget section of the postcard builder, click Set Budget.

- Enter the amount you want to spend on postcards, including postage and sales tax.

When your balance is too low to send another postcard, we’ll automatically renew it and recharge you for the full amount. - Click Save.

Add content
Choose a main image for the front of your postcard, and add a heading, body text, and optional brand logo to the back. You can also include a promo code from your online store. Content will appear on the preview as you add it.
To add content to your postcard, follow these steps.
- In the Content section of the postcard builder, click Add Content.

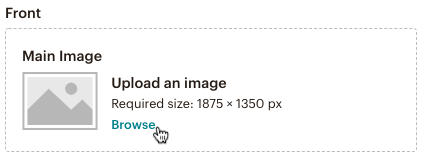
- In the Front section, click Upload An Image and choose an image from the content studio.

This will be the Main image for your postcard. Here are some things to consider when you choose this image.- Postcards support JPEG and PNG file types only.
- We recommend a minimum image size of 1875-by-1350px to ensure a high-quality print.
- The finished postcard size is 4.25 inches by 6 inches after printing and trimming the outer ⅛” bleed zone.
- The output file should be 72dpi.
- We’ll automatically convert your image to CMYK color.
- Digital photos display darker in print. If your image is very dark, you may want to brighten it a little bit.
- In the Back section, enter a Heading and Body.
- Optional: To include a promo code from your connected online store, check the Include promo code box, then click the drop-down menus to choose a store and code. You’ll need to create the code in your store before you can add it to a postcard.

We’ll track purchases made with this code and display the usage and revenue totals in your postcard report. For the most accurate results, we recommend you create an exclusive promo code for each postcard campaign. - Optional: In the Logo section, click Upload An Image to choose a JPEG or PNG image file from the content studio. This will appear on the bottom left of the back of your postcard.

- Click Save.

Nice job! Now that you’ve designed your postcard, you’ll want to preview it to make sure everything looks good and prints as expected.
Preview postcard
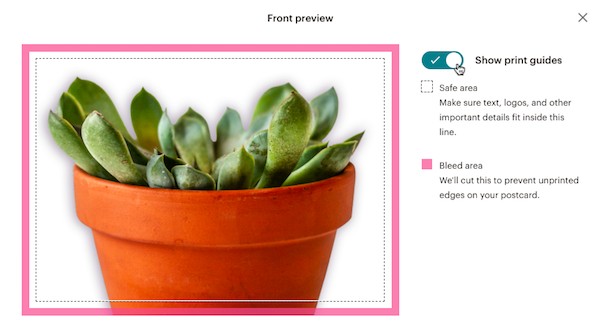
When your campaign goes to the printer, they’ll trim the sides so that the design extends to the edges. Our postcard preview tool shows you exactly where they’ll cut, so you can make sure important details won’t be removed.
To preview your postcard, follow these steps.
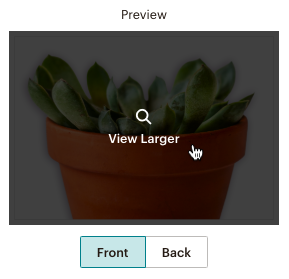
- Click the preview for the Front or Back of your postcard.

- In the preview modal, toggle on the Show print guides slider.

You’ll see lines that mark the Safe area and ⅛” Bleed area. Make sure to keep important details, like text, inside the dotted line. - Review your postcard and click X in the upper-right corner to exit the modal.
Start sending
After you choose your budget and content, you’ll be able to start your abandoned cart postcard campaign.
To start your abandoned postcard campaign, follow these steps.
- Click Start Sending.
- In the pop-up modal, click Confirm Order to confirm.
Your campaign is now active, and will begin to send postcards when customers abandon their shopping carts.
View report
Your report will show the status of your order, and how your campaign performs over time. To view it, navigate to the Reports section of your Mailchimp account and click the name of your abandoned cart postcard campaign.
Here’s what you’ll find in your abandoned cart postcard campaign report.
- Status
Shows whether your campaign is active or paused. - Audience
Who you chose to receive your campaign. - Total spent
The total amount of money you’ve spent on your campaign so far. - Total postcards
The number of postcards your campaign has sent so far. - Recipients by location
Shows a list and map of where your abandoned cart postcards have been sent. - Promo code uses and revenue
If your postcard includes a promo code from your connected store, we’ll show you the number of times it's been used, as well as the total revenue generated from those purchases.
Your report will also display the front and back of your finished postcard.
Sign in now for personalized help
See articles customized for your product and join our large community of QuickBooks users.
More like this
- About Postcardsby QuickBooks•Updated September 04, 2024
- Schedule or Cancel a Postcardby QuickBooks•Updated September 04, 2024
- Create an Abandoned Cart Email on Mobileby QuickBooks•Updated September 04, 2024
- Create a Classic Abandoned Cart Seriesby QuickBooks•Updated September 04, 2024


