Space for pervasive banner when authenticated
Upgrade or Move fixed asset data


Learn how to upgrade or move your fixed asset data.
When you upgrade QuickBooks or install it on a new computer, you'll need to upgrade or move your fixed asset data. Here's how.
Note: Fixed Asset Manager (FAM) is only available in QuickBooks Accountant and QuickBooks Enterprise.
Find the fixed asset file to upgrade or move
Each company file has its own fixed asset folder. Depending on how many clients you have, you might have to go through multiple folders to find the correct FAM file.
Note: Make sure to save a backup of your company file before you transfer your client file.
Open your client’s company file.
Go to Accountant (or Company if you have Enterprise). Then, select Manage Fixed Assets.
Go to Tools, then select Program Options.
Select General, uncheck Automatically compress clients, then select OK.
Open File Explorer and browse to:
C:\Users\Public\Documents\Intuit\QuickBooks\Company Files.Look for and open the FAMXX folder, then select the client file.
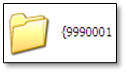
Note: XX represents the QuickBooks Desktop version last used to open the client file. The client file name appears in this format: {0000xxx.
Here are the FAM folder names for current QuickBooks Desktop versions:
| QuickBooks Version | FAMXX |
| QuickBooks Desktop 2024 | FAM25 |
| QuickBooks Desktop 2023 | FAM22 |
If you can’t find the client file
Check if:
You're on a workstation and not the server where you store the file.
You didn’t browse to: C:\Users\Public\Documents\Intuit\QuickBooks\Company Files\FAMXX\Clients.
If you still don’t see the file to transfer, try to repair your QuickBooks. If that doesn’t work, re-install QuickBooks.
Upgrade the fixed asset file
If you upgraded QuickBooks and didn’t skip versions, use this option.
Note: If you skipped QuickBooks versions when you upgraded, you’ll need to Manually upgrade the fixed asset file.
Open your client’s company file.
Go to Accountant (or Company if you have Enterprise). Then, select Manage Fixed Assets.
When the QuickBooks - Application Certificate window appears:
Select one of the following options:
Yes, prompt each time
Yes, whenever this QuickBooks company file is open
Yes, always; allow access even if QuickBooks is not running
Select the Allow this application to access personal data such as Social Security Numbers and customer credit card information checkbox. Then, select Continue.
Select Done.
Select Transfer a prior year Fixed Asset Manager client. Then, select OK.
Note: If you have already set up and created a new fixed asset client file, go to File and select Transfer Client.... A message will warn you that you'll overwrite the existing data. Select Yes to continue.Select Next.
Select Browse to select the client file you want to transfer and select Next.
Select Asset Synchronization, then select Next.
Make sure the Transfer Summary info is correct. Then, select Finish.
Move fixed asset data to another computer
If you installed QuickBooks on a new computer, use a flash drive to move your client's fixed asset file.
Step 1: Back up your client’s fixed asset data
Do these steps on your old computer.
Open your client’s company file.
Go to Accountant (or Company if you use Enterprise), select Manage Fixed Assets.
Go to File and select Backup. Then, select OK.
Browse to the drive where you want to save your file.
Note: Be sure to save the backup in a new folder.Once you’re ready, select OK.
Note: The backed-up folder might have a different file name, but the format will always be { followed by numbers, like this:
Step 2: Restore your client’s fixed asset data
Do these steps on your new computer.
Connect your flash drive to your new computer.
Open your QuickBooks and log in to your client’s company file.
Go to Accountant (or Company if you’re using Enterprise), then select Manage Fixed Assets.
Select Restore a current year QuickBooks Fixed Asset Manager client file.
Select Browse, then go to the flash drive where you saved your client’s file.
Note: Make sure to select the folder where you saved the backup, not the file itself.Select Restore.
Manually upgrade the fixed asset file (optional)
If you upgraded QuickBooks skipped versions, like 2022 to 2024, you'll have to find the client file used in the original version to transfer it. Here’s how to locate and transfer the file.
Open File Explorer and browse to: C:\Users\Public\Documents\Intuit\QuickBooks\Company Files.
Copy the client fixed asset folder (for example, {0000301), and save it to your desktop.
Open the copied folder and rename all the extensions to match your current QuickBooks version.
Here’s the list of file extensions for each QuickBooks version.
For example, if you transfer a fixed asset data file from QuickBooks Desktop 2023 to 2024, rename .F20, .F21, and .M20 files to .F50, .F51, and .M50.Go to C:\Users\Public\Documents\Intuit\QuickBooks\Company Files\FAMXX, for the new QuickBooks version, and check if there's a client file named the same as the one you saved to the desktop.
| QuickBooks Version | File Type 1 | File Type 2 | File Type 3 |
| QuickBooks Desktop 2024 | .F50 | .F51 | .M50 |
| QuickBooks Desktop 2023 | .F20 | .F21 | .M20 |
Go to C:\Users\Public\Documents\Intuit\QuickBooks\Company Files\FAMXX, for the new QuickBooks version, and check if there's a client file named the same as the one you saved to the desktop.
If there’s none, copy the client file from the desktop to the FAMXX folder.
If there is, don’t copy it, because you’ll overwrite that existing folder. Follow these steps first:
Go back to where you temporarily saved the folder.
Change the number of the folder you need to move first. Then copy it again.
For example: If you need to move folder {0000301, but an existing folder has the same number, change the folder number to {0000401. Just be sure to rename all the files in the folder to match the folder number.
Move the folder to your new QuickBooks clients folder.
Sign in now for personalized help
See articles customized for your product and join our large community of QuickBooks users.
Call Sales: 1-800-365-9606