Create rules to speed up reviews in QuickBooks Self-Employed
by Intuit•19• Updated 7 months ago
Learn how to create and use rules to quickly categorize recent and past transactions
Do you regularly do business with the same customers or vendors? Are the transactions usually the same?
Create bank rules so QuickBooks Self-Employed automatically categorizes these types of transactions for you. All you have to do is review the work. You can even apply new rules to past transactions. Let QuickBooks do the heavy lifting so you can focus on your next gig.
Create a new transaction rule
Bank rules work best when you have the same types of transactions from the same customer or vendor.
For example, let's say you always buy your office supplies from the same store. You can make a rule so QuickBooks automatically categorizes transactions from that store as business transactions.
If you're on an internet browser
- Select Settings ⚙ and then Rules.
- Select Create Rule.
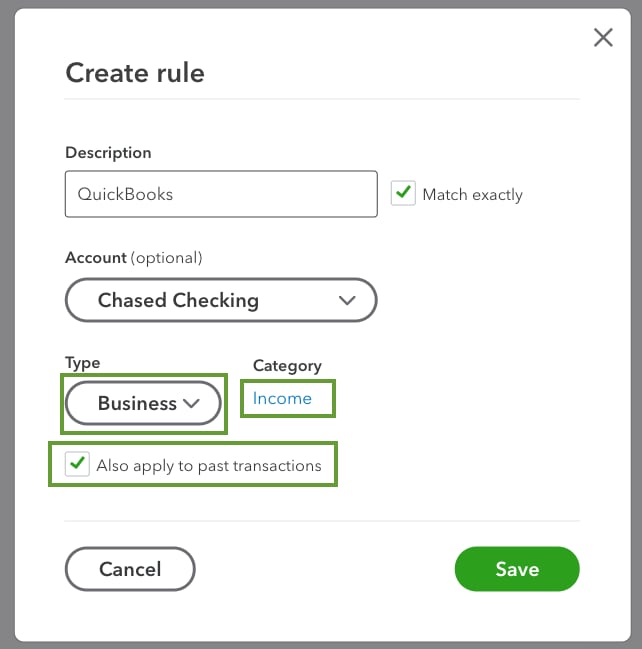
- In the Description field, enter the customer or vendor you want to create the rule for. Select to check the Match exactly checkbox if you want QuickBooks to only use the rule when transactions match exactly.
- From the Account drop-down menu, select the account you want transactions to go into.
- From the Type dropdown, select Business, Personal, or Split.
- If you want QuickBooks to categorize transactions, select the Category link and choose a category.
- If you the rule to apply to transactions you've already categorized, select to check the Also apply to past transactions checkbox.

- When you're done, select Save.
QuickBooks applies your new rule to all future transactions.
If you're using an iPhone or iPad (iOs)
- Tap your Profile icon. Then select Settings.
- Select Manage Rules.
- Tap the +.
- Give your rule a name.
- Select Business, Personal, or Split for the transaction type.
- If you want QuickBooks to categorize transactions, select a Category. Or you can leave them Uncategorized.
- Tap Advanced. Select the Only apply to exact matches switch if you want QuickBooks to only use the rule when transactions match exactly.
- In the Bank Account section, select the account you want the transaction to go into.
- When you're done, tap Confirm.
If you want to apply your rule to transactions you already you've categorized, follow the internet browser steps
If you're using a phone or tablet with Android
- Tap the ≡ menu and then Settings.
- Tap Manage Transaction Rules.
- Tap Create New Rule.
- In the Description field, give your rule a name.
- Select Match exactly if you want QuickBooks to only use the rule when transactions match exactly.
- Select Business, Personal, or Split for the transaction type.
- If you want QuickBooks to categorize transactions, select a Category. Or you can leave them Uncategorized.
- Tap Advanced. In the Account section, select the account you want the transaction to go into.
- When you're done, tap Save.
If you want to apply your rule to transactions you already you've categorized, follow the steps in an internet browser.
Edit or delete a bank rule
You can always adjust your rules or delete ones you don't need them anymore. Note: If you delete a rule, you won't change any of your past transactions.
If you're on an internet browser
- Select Settings ⚙ and then Rules.
- Find the rule and select Edit.
- Make your changes and select Save.
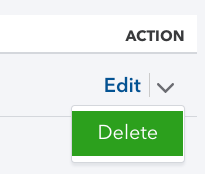
To delete a rule, select the ▼ next to Edit and then Delete. Select Yes to confirm.
If you're using an iPhone or iPad (iOs)
- Tap your Profile icon. Then select Settings.
- Tap Manage Rules.
- Select the rule you want to edit.
- Make your changes and select Confirm.
To delete a rule, select Delete Rule. Select Delete to confirm.
If you're using a phone or tablet with Android
- Tap the ≡ menu and then Settings.
- Tap Manage Transaction Rules.
- Select the rule you want to edit.
- Make your changes and select Save.
To delete a rule, select Delete Rule. Select Delete to confirm.
More like this