Turn on suggestions
Auto-suggest helps you quickly narrow down your search results by suggesting possible matches as you type.
Showing results for
Connect with and learn from others in the QuickBooks Community.
Join nowHi everyone,
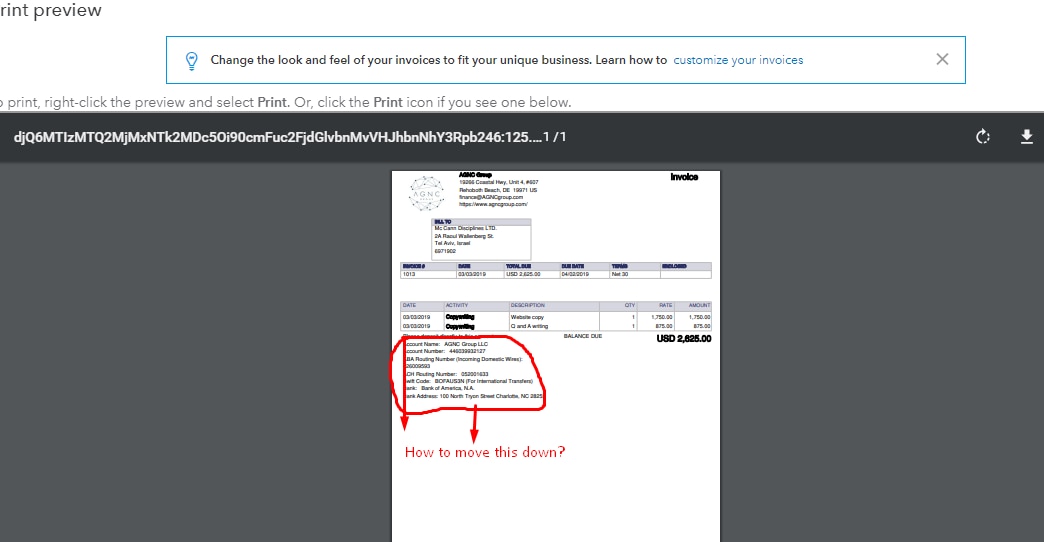
I just want to ask how I can customize our invoice in QB online. I have attached a screenshot of my concern.
And, if it's possible to take the instructions on how to pay us and have them not be all squished up into the payment area, but brought down into the big empty space below it.
I hope someone can give me light into this.
Thank you!
Solved! Go to Solution.
Hello,
If you're using QuickBooks Online and this is an invoice template imported from MS Word, then you need to adjust the text box in MS Word and re-save and re-import it into QuickBooks Online.
Hello,
If you're using QuickBooks Online and this is an invoice template imported from MS Word, then you need to adjust the text box in MS Word and re-save and re-import it into QuickBooks Online.
I have a question in this situation. I raise invoices each month at the begining but we need to customize in the Notes section like this "Tech services for the month/date/year to nextmonth/date/year" automatically for example Tech services from 03/10/2020 to 04/09/2020
How can i do this in QB invoices?
Hi there, michael24012020.
As of now the auto-fill for notes is unavailable in QuickBooks Online (QBO). Although, you can set up and create a recurring transaction template for your invoice. I'll show you how to do that.
Here's how the transaction looks like.

For more information about the recurring transactions, you an check this article: How to create a recurring invoice and manage recurring transactions.
Also, in the future, you can always change the status of your transaction by going back to the Gear icon then select Recurring Transactions. After that click the drop-down icon beside the Edit tab. Here's a screenshot for your reference.

Let me know if there are some thing that you need us to help. We're always here back you up.


You have clicked a link to a site outside of the QuickBooks or ProFile Communities. By clicking "Continue", you will leave the community and be taken to that site instead.