QuickBooks HelpQuickBooksHelpIntuit

Batch delete or void transactions in QuickBooks Desktop Accountant

SOLVEDby QuickBooks7Updated March 01, 2024

Learn how to batch delete or void transactions in QuickBooks Desktop Accountant.

Use the Batch Delete/Void Transactions utility (BDT) to quickly delete or void multiple transactions at once. This helps you save time so you can focus more on your business.

Note:

  • This feature is only available in QuickBooks Desktop Accountant 2018, Enterprise, Enterprise Accountant 18.0, and later versions.
  • You need to sign in as an admin or external accountant user.
  • The Batch Delete/Void Transactions tool doesn't support multi-currency.

Batch delete or void transactions

Note: You can’t batch delete the following transactions (you can still delete them individually):

  • Invoices with reimbursed expenses, times, mileage, or items
  • Invoices with billable time and costs
  • Paychecks
  • Payroll liability checks
  • Sales tax payments
  • Online bill payments
  • Any transaction in a closed period
  • Credit card transactions

To delete them individually, open the transaction, select Edit, then Delete.

  1. Go to the File menu, then select Switch to Single-user mode. If you see Switch to Multi-user mode, don’t select it.
  2. Go to the Accountant menu, then select Batch Delete/Void Transactions….
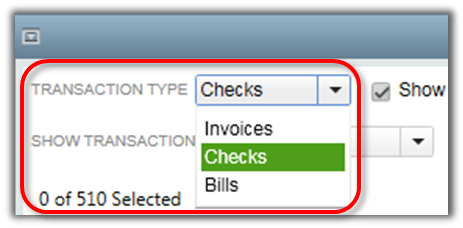
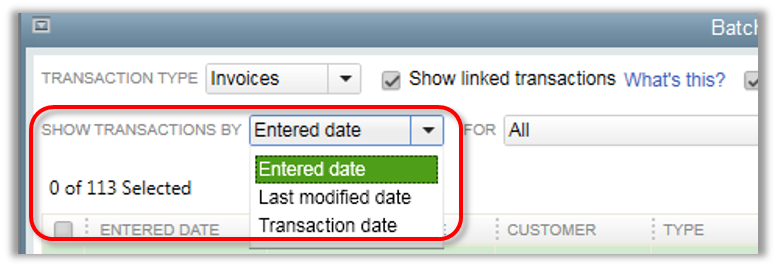
  3. Find and select the checkboxes next to the transactions you want to delete or void.
  4. Select Review & Delete if you want to delete the transactions. If you want to void them, select Review & Void.
  5. Select Back Up & Delete or Back Up & Void. You may also skip the backup and select Delete only or Void only from the dropdowns.User-added image
  6. Select Yes to confirm you want to delete or void the transactions.

Select View Deleted/Voided Transaction Report to print a copy after you delete or void the transactions.

You may batch delete or void transactions by transaction type when you select an option from the TRANSACTION TYPE ▼ dropdown.

Note: The Bills option includes the following transactions:

  • Bill payment checks
  • Bill refunds
  • Bill credits
  • Refund checks
  • Finance charges

User-added image

You may show linked or voided transactions when you select the checkboxes next to Show linked transactions or Show voided transactions.

Note:

  • Select the checkbox next to Show linked transactions to show transactions that are linked to a selected transaction. You’ll see the linked transactions in the LINKED TRNS column.
  • Select the checkbox next to Show voided transactions to show transactions marked as voided. You’ll see them in the Available Transactions list.

User-added image

User-added image

You may use the SHOW TRANSACTIONS BY ▼ dropdown to filter transactions based on the following:

  • Entered date
  • Last modified date
  • Transaction date

You may also use the ALL ▼ dropdown and FROM and TO fields to refine your search.

User-added image

You may sort the columns in the Available Transactions list for easier viewing:

  • Select and drag them depending on how you want them to appear in the list.
  • You may also select any header to sort the list alphabetically, by date, or by numbers.

Was this helpful?

You must sign in to vote, reply, or post
QuickBooks Desktop AccountantQuickBooks Desktop Accountant PlusQuickBooks Enterprise AccountantQuickBooks Enterprise Accountant

Sign in for the best experience

Ask questions, get answers, and join our large community of QuickBooks users.

More like this