Turn on suggestions
Auto-suggest helps you quickly narrow down your search results by suggesting possible matches as you type.
Showing results for
Connect with and learn from others in the QuickBooks Community.
Join nowI am creating the books for my company. We manufacture wind turbines. The legacy system is Microsoft Dynamics NAV. We provide a warranty for items we produce. I understand how to book and account for warranty work performed and received. I would like to know where and how to add a warranty date custom field(s), start and end, so that my service department can see the items purchased by the customer and what the warranty dates are for those items.
Solved! Go to Solution.
Welcome and thank you for posting here on the Community page, @jason6young.
I'm glad to guide you with detailed steps so you'll be able to add the Warranty Date field when creating transactions for your customers.
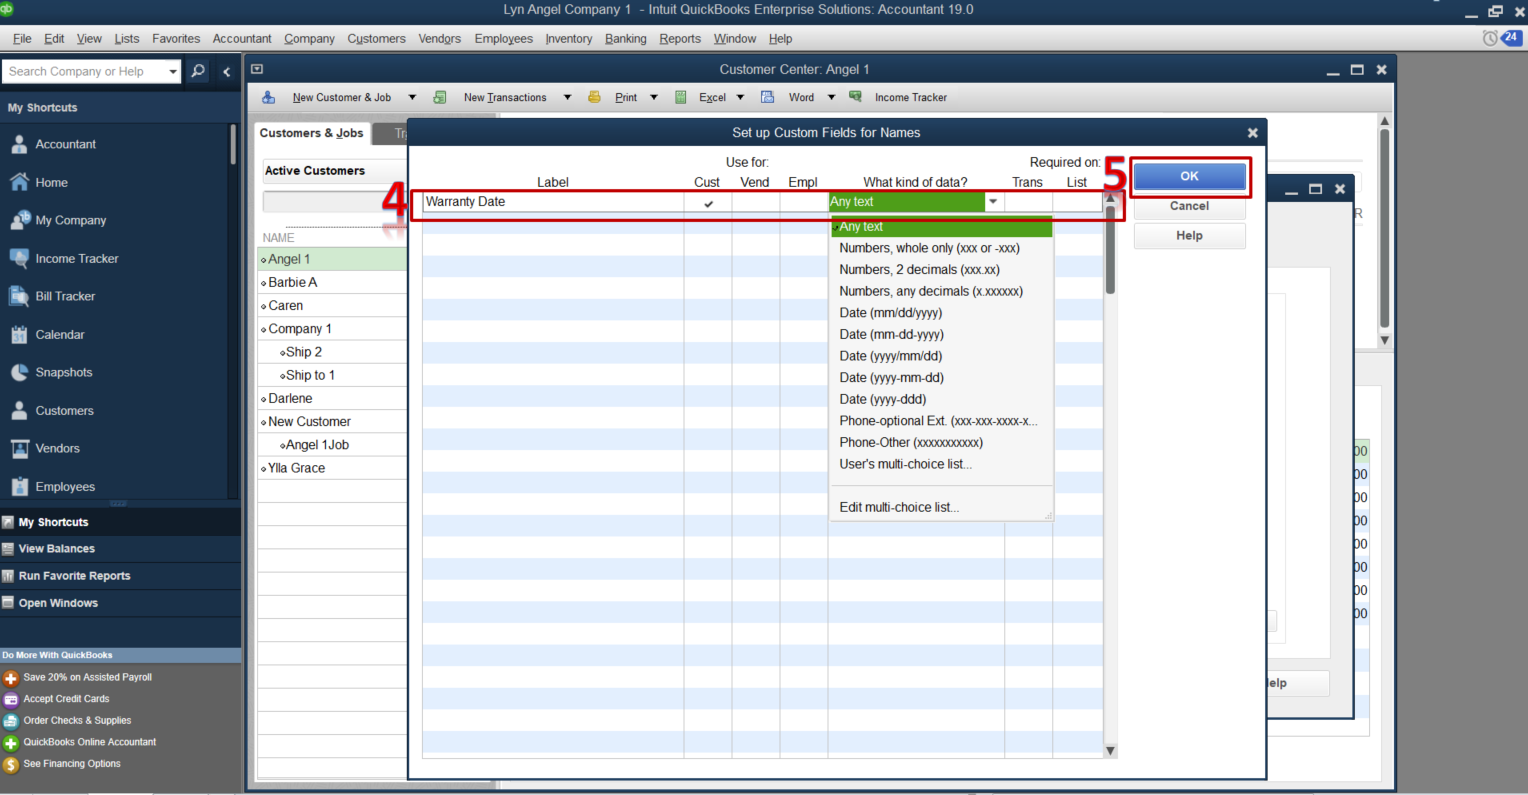
To be able to add the field, you have to create an additional field to any of your customer's information, then add the field created when recording transactions.
To add the field to your customer's information:

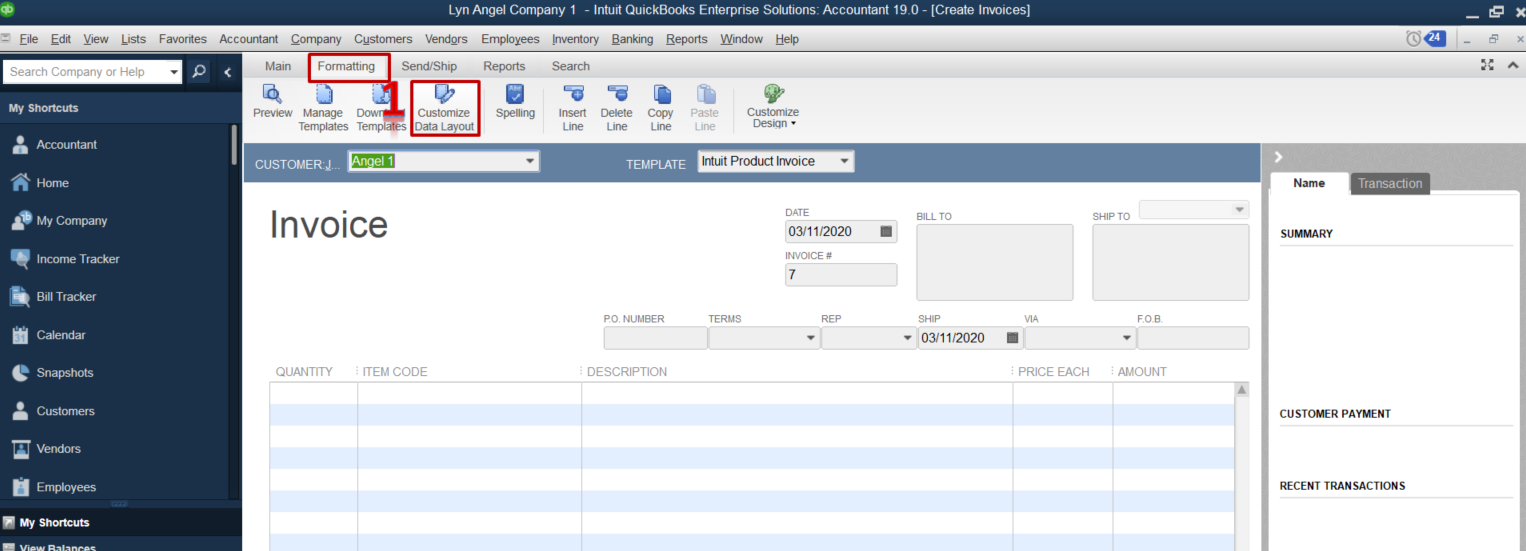
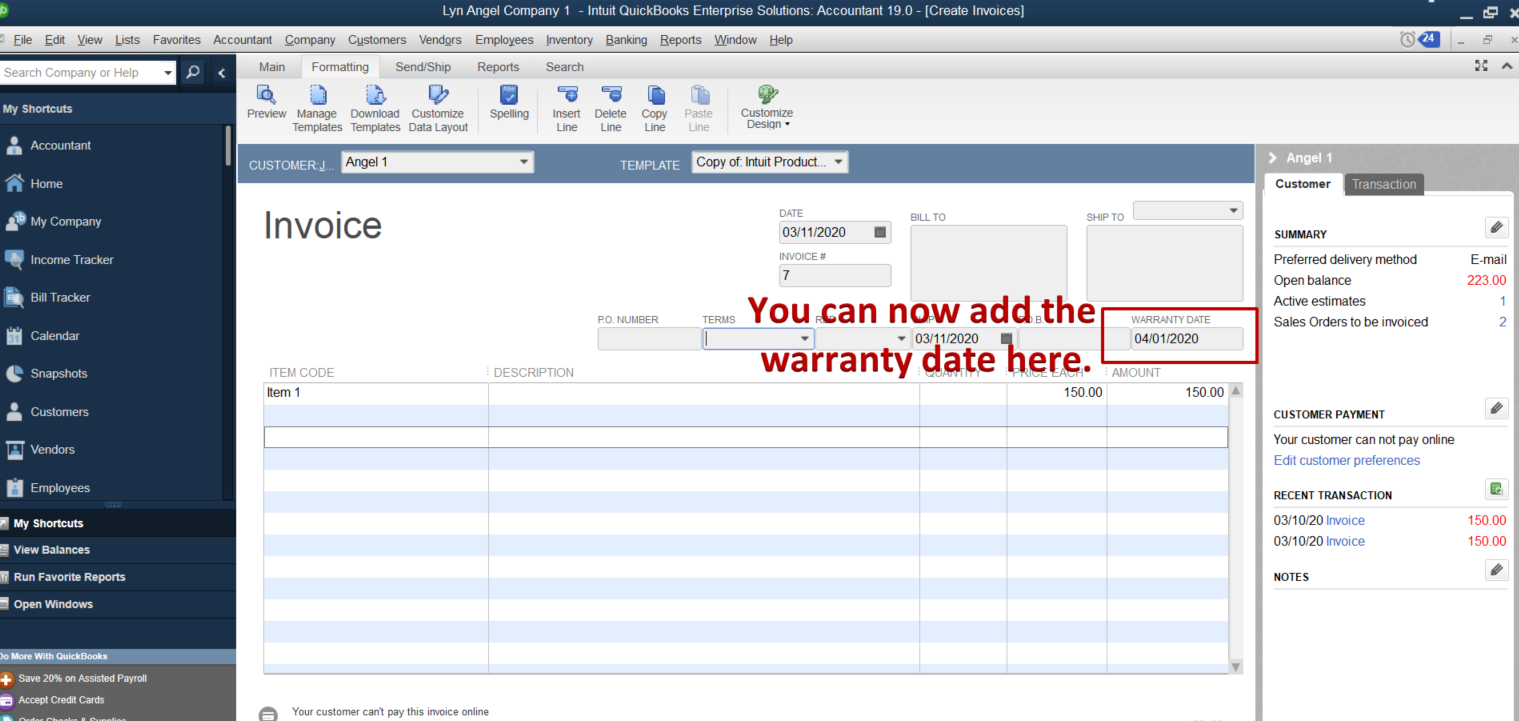
When creating invoices or sales receipts, you can now add the field added by following these steps:

For additional reference about using and customizing form templates in QuickBooks Desktop, read this article.
Get back to me by adding a comment below if you have any other questions. I'm a few clicks away to help. Have a good day!
Welcome and thank you for posting here on the Community page, @jason6young.
I'm glad to guide you with detailed steps so you'll be able to add the Warranty Date field when creating transactions for your customers.
To be able to add the field, you have to create an additional field to any of your customer's information, then add the field created when recording transactions.
To add the field to your customer's information:
When creating invoices or sales receipts, you can now add the field added by following these steps:
For additional reference about using and customizing form templates in QuickBooks Desktop, read this article.
Get back to me by adding a comment below if you have any other questions. I'm a few clicks away to help. Have a good day!
Thank you. That answered my question
Hi: I did all the steps to create the warranty date field in my sales orders. But when I try to run a Sales by Item Detail report to capture which customers bought extended warranty and what their expiration dates are, I can't get any dates to populate in the report. Help!
Hello, kjandoli.
I can definitely help you populate the custom field you've created by customizing your reports.
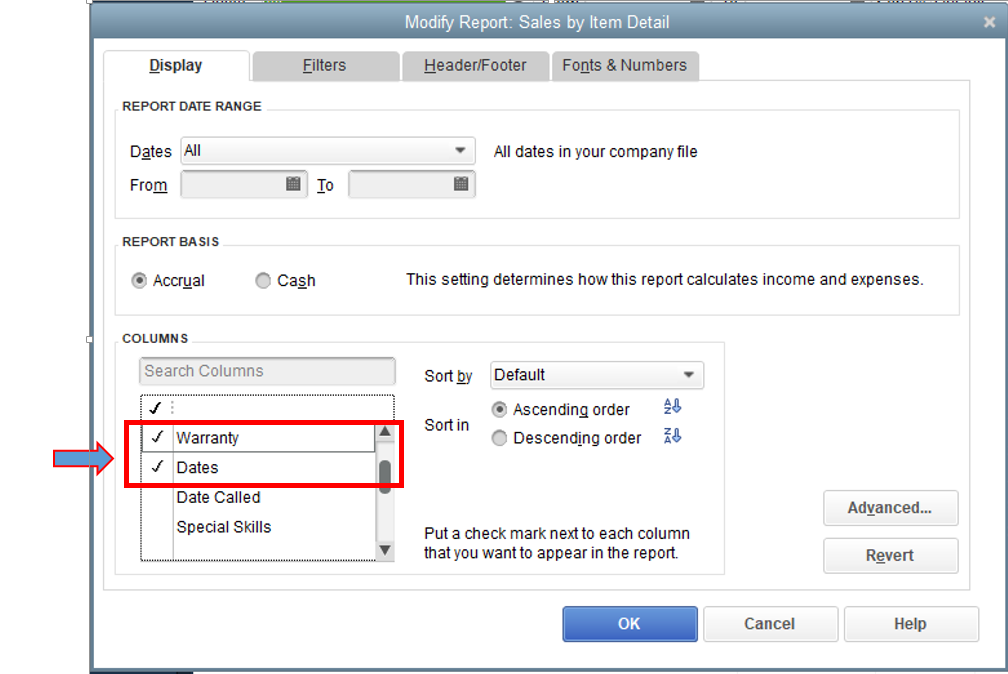
You'll have to add the custom field you've created when running the Sales by Item Detail report. This guarantees that the information will appear on your report.
Here's how:
Please look through this resource to learn more about it: Customize reports in QuickBooks Desktop.
If you want to save the customization options for this report so you can access it whenever you want, click the Memorize button at the top. See this article for more information on how to do it: Memorize report.
You can post again if you need further assistance. We're available 24/7 to help you.


You have clicked a link to a site outside of the QuickBooks or ProFile Communities. By clicking "Continue", you will leave the community and be taken to that site instead.