Learn what to do if you get a subscription error when you install or update your QuickBooks Enterprise Solution.
Don't worry if you get one of these errors when you install or update your product. We're here to help you.
Error: Sorry, we need to verify your subscription before installing QuickBooks Desktop.
Error: Sorry, it looks like you need a subscription to install QuickBooks Desktop.
Error: We are sorry, it looks like you need a subscription to start using QuickBooks Desktop.
If you get this error on a workstation, it could mean there's an issue with a Windows user or a third-party app. They could block processes you need to run Quickbooks. You might also have a problem with the install of the .NET Framework. If the error happens on all computers, contact support. For best results, follow the solutions in the order shown.
Note: Before you do any of the steps below, make sure to:
|
Solution 1: Reset Internet Explorer settings
- Open Internet Explorer.
- Go to the Tools menu, then choose Internet Options.
Note: Press Alt on your keyboard if the menu bar doesn't show. - From the Advanced tab, choose Reset or Restore Defaults.
- Select Apply, and then OK.
Solution 2: Run the QuickBooks Install Diagnostic tool from the Tool Hub
Step 1: Download and install the QuickBooks Tools Hub
The QuickBooks Tools Hub helps fix common errors. QuickBooks needs to be closed to use the tool hub.
The QuickBooks Tool Hub helps fix common errors. You'll need to close QuickBooks to use the tool hub. For the best experience, we recommend you use Tool Hub on Windows 10, 64-bit.
- Close QuickBooks.
- Download the most recent version (1.6.0.3) of the QuickBooks Tool Hub. Save the file somewhere you can easily find it (like your Downloads folder or your Windows desktop). Note: If you've installed Tool Hub before, you can find out which version you have. Select the Home tab. The version will be on the bottom.
- Open the file you downloaded (QuickBooksToolHub.exe).
- Follow the on-screen steps to install and agree to the terms and conditions.
- When the install finishes, double-click the icon on your Windows desktop to open the tool hub.

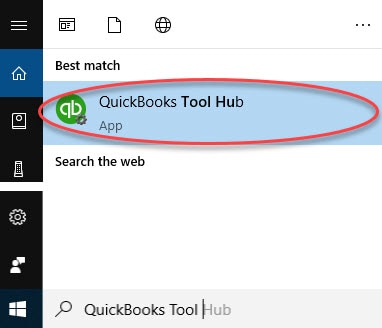
Note: If you can't find the icon, do a search in Windows for QuickBooks Tool Hub and select the program.
Step 2: From the Tools Hub, run the QuickBooks Install Diagnostic tool
- In the QuickBooks Tools Hub, select Installation Issues.
- Select QuickBooks Install Diagnostic Tool.
- Select OK when the Diagnostic Tool completes.
- Start QuickBooks Desktop and open your data file.
If you still see an error, move to Solution 3.
Solution 3: Manually disable the firewall and/or antivirus software
- Disable your firewall.
- Turn off your antivirus software.
Note: You're antivirus may require certain rights to make changes. You might not be able to disable some antivirus software Check out your manufacturer's user guide or website for details on how to temporarily disable and configure your software.- Locate the icon for the third-party antivirus in the system tray at the bottom right of the Desktop screen.
- Right-click on the icon, then select Disable.
- Install QuickBooks Desktop or run the update again.
Solution 4: Create a new Windows Admin user
- Create a Windows user with Administrator rights.
- Install QuickBooks Desktop or run the update again.
Solution 5: Install QuickBooks Desktop in Selective Startup
Follow the steps in Install QuickBooks Desktop in Selective Startup.
Solution 6: Install certificates
Using Google Chrome:
- Go to https://ratable.qbdt.intuit.com
- From the address bar, select the padlock symbol.
- Select View Certificates.
- In the Certification Path tab, select the Symantec Class 3 Secure Server CA – G4 item.
- Select View Certificate and then Install Certificate.
- The Certificate Import wizard opens. Follow the default options to import.
- Once you see the window that shows a successful import, select OK.
- Close the certificate windows, then try to install or update again.
Using Internet Explorer:
Note: Follow the on-screen instructions to complete the install and import.
- Select the Tools menu, then select Internet Options.
- Select Content, and then choose Certificates.
- Select Intermediate Certification Authorities.
- Find and select Symantec Class 3 Server CA - G4.
- Choose View Certificate, and then Install.
- Retry to install or update.
If the above steps don't resolve the issue, go to Fix Common QuickBooks Desktop Installation Errors with the QBInstall Tool. |