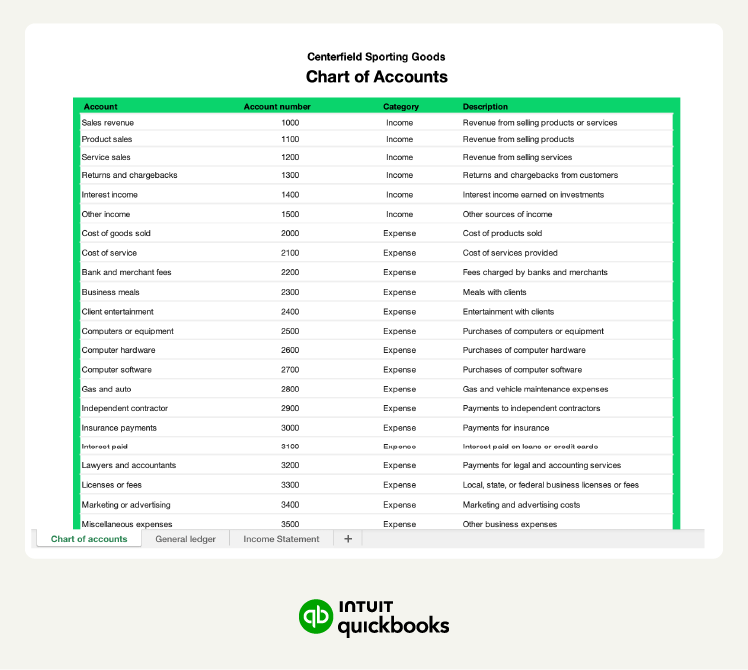
The chart of accounts lists every account, assigns it a number, and lists the account’s description. Income will appear first. Centerfield assigns account numbers in the 1000s for income accounts (for example, #1000 for sales revenue). Expense accounts start at 2000 and go up from there.
Centerfield sells baseball equipment and offers coaching services. They can add, remove, and change accounts as needed. Once you build a chart of accounts in an accounting spreadsheet, the next sheet is where you’ll post journal entries (also referred to as financial transactions).
2. Post journal entries
A journal entry is a record of each accounting transaction listed in chronological order. Bookkeepers post transactions using a journal entry. The journal includes a record of the transaction, including the accounts, dollar amounts, and a description of each entry.
Journal entries document every step of a financial transaction, providing a clear and concise record of every business activity. In the case of single-entry Excel accounting, the journal entries will only include a debit or credit.
For example, the purchase of supplies would be a debit to the supplies expense account. In Centerfield’s case, a $25 purchase on 6/5 would appear as:
- Debit: 6/5 Office Depot - Office supplies $25
Accounting software that uses double-entry bookkeeping requires that each transaction include debit and credit. For example, if Centerfield uses a credit card to pay for the purchase, it would show up in the software as:
- Debit: 6/5 Office Depot - Office supplies $25
- Credit: 6/5 Credit Card - Short-term liability $25
The ledger then summarizes all of the activity from the journal entries, providing the business with a clear picture of its financial status.
3. Manage the general ledger