Fix issues the first time you reconcile an account in QuickBooks Online
by Intuit•16• Updated 2 days ago
If you're reconciling an account for the first time in QuickBooks Online and the beginning balance is incorrect, it’s often due to an incorrect opening balance. This guide walks you through how to review, compare, and correct that balance so you can start reconciling your account for the first time. Correcting the opening balance should also fix your beginning balance issues.
- Get personalised help fixing beginning balance issues with QuickBooks Live.
| Tip: If the account was already reconciled, here’s a different list of things to review. Or, if you're new to the entire process, start with our reconciliation guide. Find out how to undo or remove transactions from reconciliations and more. |
Prerequisites
Double-check the opening balance for the account you're reconciling. Sometimes, the opening balance doesn't include transactions that were still pending when you created the account. The opening balance is the balance of your bank account on the day you choose to start tracking transactions.
Note: If you recently entered older transactions dated before your opening balance, here's how to reconcile them. Then continue with these steps.
Step 1: Review the opening balance in QuickBooks
Follow this link to complete the steps in product
- If you recently entered older transactions dated before your opening balance, here's how to reconcile them. Then continue with these steps.
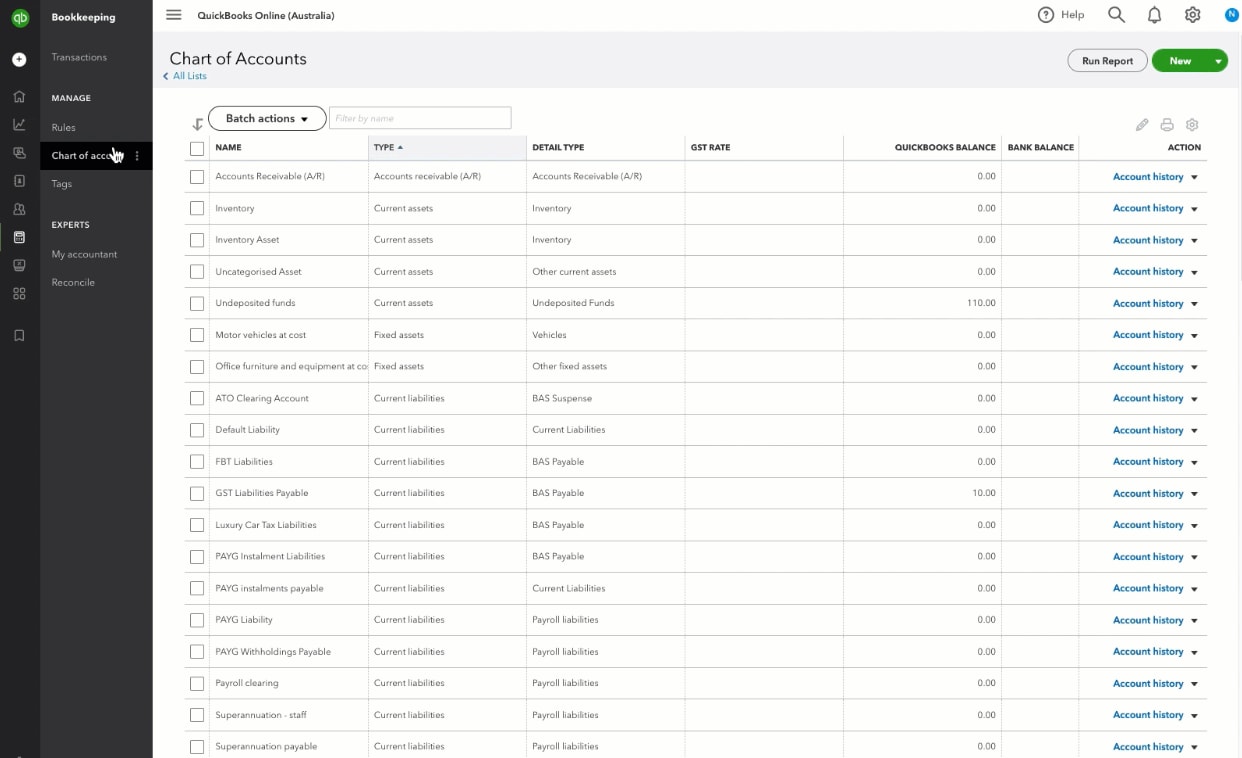
- Find the account on the list.
- Select Account history.
- Search for the opening balance entry. It should have "Opening Balance" in the Memo column.
- Take note of the date and balance.
Note: If you forgot to enter an opening balance, here's how to manually enter an opening balance later.
Step 2: Compare the opening balance with your real-life account
Now you know the date and amount of the opening balance in QuickBooks. Check it against your bank records:
- Sign in to your bank's website, or find your bank statement.
- Check the account's balance for the same day as the opening balance in QuickBooks.
- Compare the two balances.
- If the balances match
- You entered the opening balance correctly. Move on to Step 3.
- If your balance doesn't match your bank records, correct it:
- In QuickBooks, select the opening balance entry to expand the view.
- In the Deposit column, edit the balance so it matches your bank records.
- Select Save.
- In QuickBooks, select the opening balance entry to expand the view.
- In the Deposit column, edit the balance so it matches your bank records.
- Select Save.
Step 3: Review your account history
When you reconcile an account for the first time, the opening balance is the only entry that is reconciled. No other transactions should be reconciled. To check:
Follow this link to complete the steps in product
- Find the account on the list.
- Select Account history to get more details.
- Search for the opening balance entry. It should have "Opening Balance" in the Memo column.
- Review the tick column. There should have an R in the box.
- Check the rest of the transactions on the list. There should be a C or blank box in the tick column.
- If there's an R on any other transactions, select the transaction to expand the view.
- Select box in the tick column. Keep selecting it until the box is blank. Then select Save.
Next steps: Start reconciling the account
Once you know your opening balance is correct, you can start reconciling. If you see a message about an incorrect beginning balance when you start, here are other things you can review.
If you’ve followed everything in our reconciliation guide but still have questions, connect with your bookkeeper.
| Have any other questions for our team? If any of your questions were left unanswered, we'd love to hear them! Pop over to our QuickBooks Community's discussion on bookkeeping processes where you can ask your questions, have them answered by qualified QuickBooks Online experts, and hopefully help others with the same questions out in the process. |
More like this
