T1 and T2 carry forward from TaxCycle to Pro Tax
by Intuit• Updated 2 months ago
Pro Tax customers can now carry forward T1 and T2 TaxCycle returns to Pro Tax. In just a few steps, you can import data, map clients, and start filing returns.
In this article, you'll learn how to:
Table of contents:
| ‣ Know what to do before you begin |
| ‣ Carry forward returns |
| ‣ Use Pro Tax automatic match |
| ‣ Use Pro Tax manual match |
| ‣ Add a new client |
| ‣ Subscribe to Pro Tax |
Before you begin
Note: customers can carry forward a maximum of 200 returns per session.
Note that users can carry forward a maximum of 200 returns per session.
Ensure the following before carrying forward any T2 returns:
- The tax year-end is on or after December 31, 2016
- Include the client’s name and email prior to upload
- Remove all passwords from the return prior to upload
Ensure the following before carrying forward any T1 returns:
- The tax year-end is after 2021
- Include the client’s name and email prior to upload
- Remove all passwords from the return prior to upload

Carry forward returns
- Login to the QuickBooks Online Accountant company.
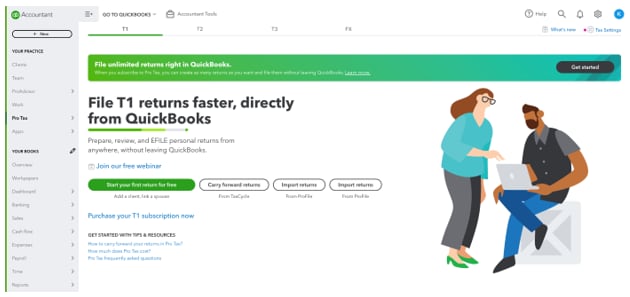
- Select the Pro Tax option from the left-side menu.
- From a new account select Carry forward returns (from TaxCycle):
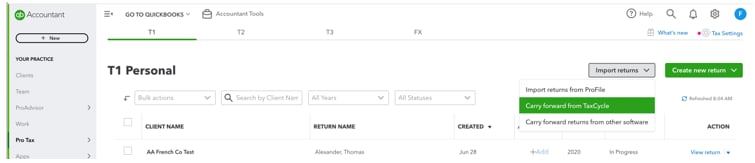
- From an existing account select Import returns, then select Carry forward from TaxCycle:
The Carry forward returns window will display
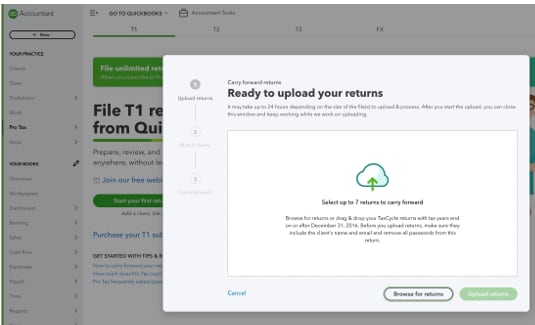
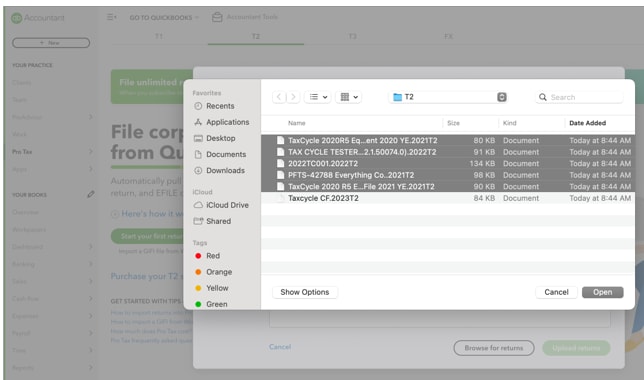
- Select Browse for returns. The Explorer window will display.
- Navigate to the folder containing the returns to carry forward. Select the returns to carry forward and then select OK.
Alternatively, open TaxCycle and drag-and-drop any returns to carry forward into the Carry forward returns window in QuickBooks.
Note: After you make your selections, you’ll see a list of returns and an estimate of how long it will take to upload and process them.
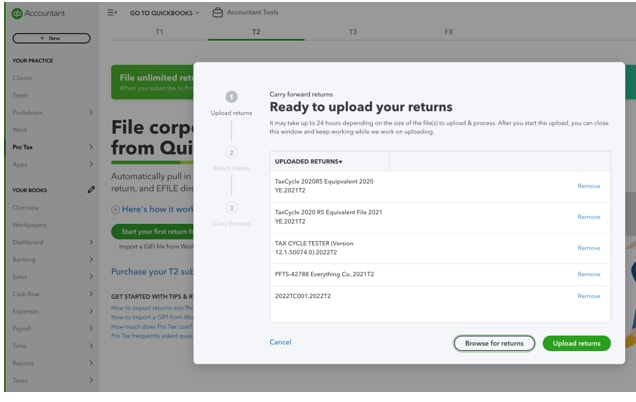
- Select Upload returns. The upload process will begin.
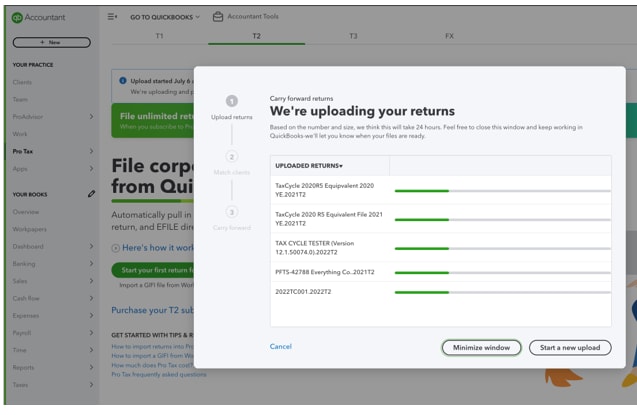
Note: Each return shows a green bar, so you can view upload progress. Upload times depend on file size.
- You may choose to Minimize window and work on Pro Tax on other tasks. If you wish to retrieve the uploading window, select View details:
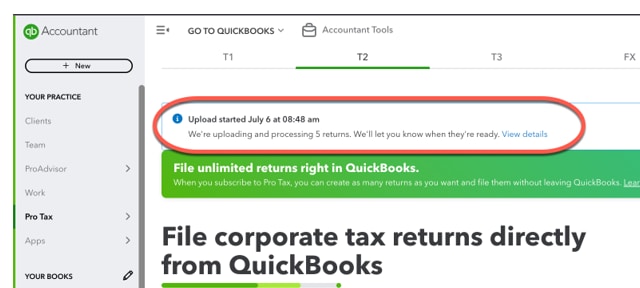
Note: You may cancel uploads at any time using the Cancel upload. You will also receive emails notifying you of the status of your uploads.
Use Pro Tax automatic match
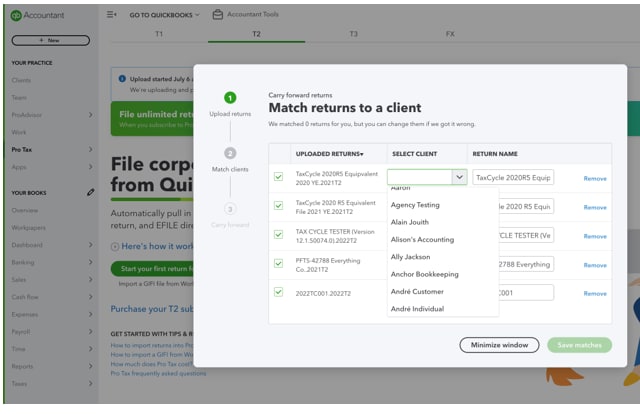
The Pro Tax “matching screen” displays when uploads are complete.
Pro Tax will automatically match the returns.
Review the matches and save if the matches are accurate.
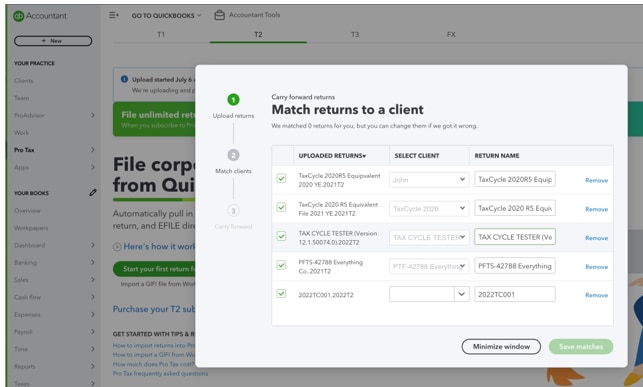
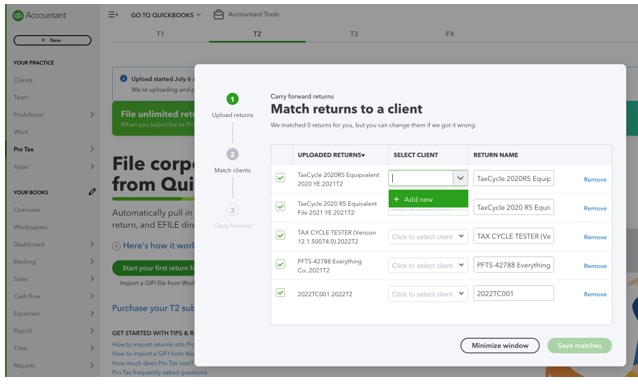
Use Pro Tax manual match
You can also manually match the returns once the uploads are done.
Select the client name associated with the filed return.
Review the matched returns, and select Save matches to manually save them.
Add a new client
Add your client if they're not in QuickBooks.
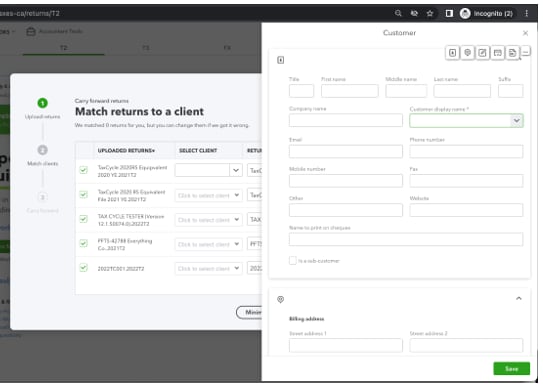
- Select Add New. Provide the client's name and email address when prompted.
- In the Customer window, complete the Customer display name. All other fields are optional.
Note: This screen scrolls, so you can add more customer info.
- Select Save Matches once the clients are selected.
Note: you can minimize the carry forward screen and work on other tasks.
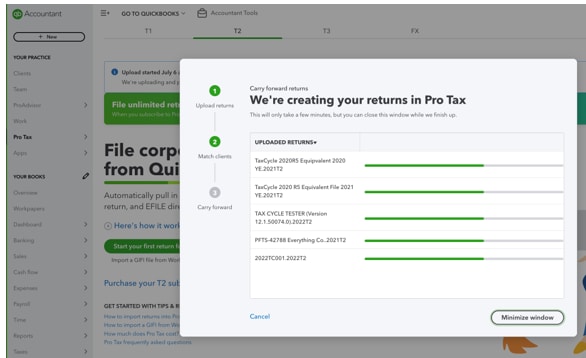
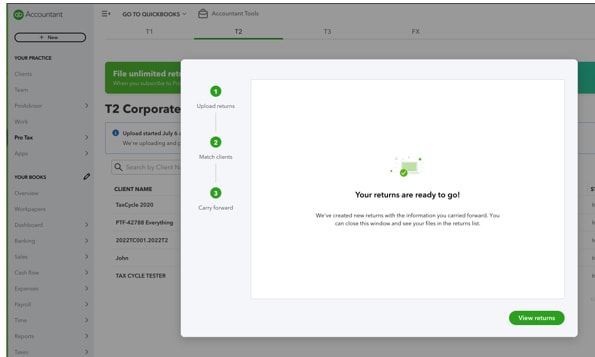
A congratulatory screen displays when the returns have completed carry forward and are ready to use.
Subscribe to Pro Tax
Users may be asked to subscribe to Pro Tax if they have not already or entered billing details.
Select the Subscribe to Pro Tax link and follow the sign-up prompts to subscribe.
More like this
- Carry forward files from other software suppliers into Pro Taxby QuickBooks
- QuickBooks Online Accountant Pro Tax carry forwardby QuickBooks
- QuickBooks Online Accountant Pro Tax Billing FAQby QuickBooks
- Pro Tax release notesby QuickBooks