Use custom fields in reports in QuickBooks Online Advanced
by Intuit•1• Updated 6 days ago
Learn how to use custom fields in your reports in QuickBooks Online Advanced.
In QuickBooks Online Advanced, you can create custom fields and use them in various ways to track what matters most to you. In this article, we’ll show you how to use custom fields in reports so you can get a clear picture of how your business is doing.
In this article, you'll learn about:
- What you can do with custom fields in reports
- How to get started
- How to add custom fields as columns to a report
- How to sort items in a report by a custom field
- How to group items in a report by a custom field
- How to filter items in a report by custom fields
- Reports you can use custom fields with
Note: Not all reports support custom fields or all features of custom fields. See below for details.
What you can do with custom fields in reports
Ready to get a deeper understanding of your business? Here’s what you can do with custom fields in reports:
- Add custom fields as columns so you can see key details about each transaction or line item.
- Sort items by a custom field so you can organize and scan the report easily.
- Group items by a custom field so you can see the activity and totals for the same type of item in one place.
- Filter items by custom fields so you can see just the data you’re interested in.
How to get started
First, go to Reports (Take me there). Then browse or search for a report you’re interested in.
Once you have the report you want, follow these steps to take advantage of custom fields.
Add custom fields as columns to a report
- Find and open the report you want to run.
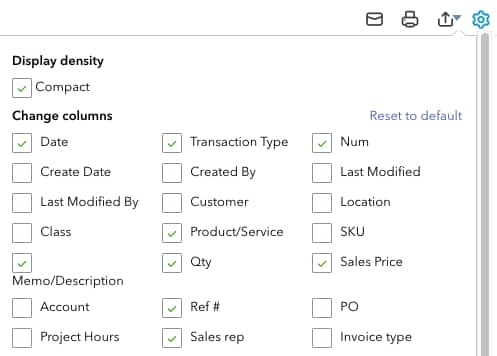
- Select the gear icon at the top right of the report.

- Under Change columns, select the checkbox for each custom field you want to add.
- Select anywhere outside the settings panel to close it. QuickBooks adds the columns to the right side of the report. To reorder the columns, select the gear icon again, then select Reorder columns.
Sort items in a report by a custom field
- Find and open the report you want to run.
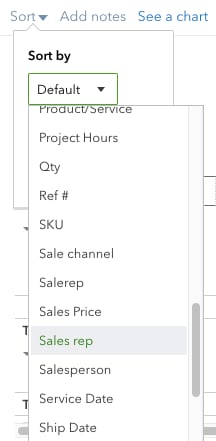
- Select Sort at the top left of the report.
- In the Sort by dropdown list, select the custom field you want to sort the report by.

- Under Sort in, select between Ascending order or Descending order. The sort takes effect instantly.
Group items in a report by a custom field
- Find and open the report you want to run.
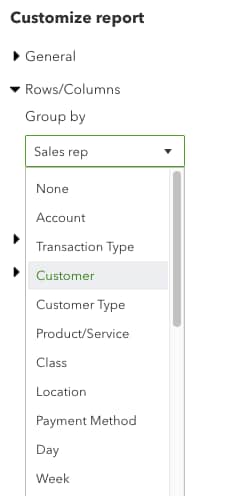
- Select Customize at the top of the report screen.
- In the Customize report panel, select Rows/Columns to expand the section (if needed).
- In the Group by dropdown list, select the custom field you want to group the report items by.

- Select Run report.
Filter items in a report by custom fields
- Find and open the report you want to run.
- Select Customize at the top of the report screen.
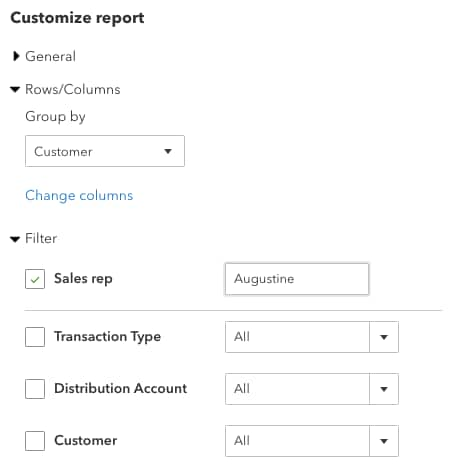
- In the Customize report panel, select Filter to expand the section. (You may need to scroll down the panel to see it.)
- Select the checkbox for each field you want to use as a filter. Then enter or select the specific values for each field.

- Select Run report.
Reports you can use custom fields with
The tables below show all of the reports in QuickBooks and which ones support features of custom fields. We’re working to make additional reports supporting custom fields, so check back here regularly.
Sign in now for personalized help
See articles customized for your product and join our large community of QuickBooks users.
More like this
- Everything you need to know: QuickBooks Online Advanced and revised usage limitsby QuickBooks
- Filter, search, and sort with custom fields in QuickBooks Online Advancedby QuickBooks
- Create and edit custom fields in QuickBooks Online Advancedby QuickBooks
- Use custom fields for suppliers and expenses in QuickBooks Online Advancedby QuickBooks