Managing licences in QuickBooks Online Accountant
by Intuit• Updated 2 years ago
If you use QuickBooks Online Accountant, you know that client licences are an important part of the service. But where do you find them? And once you've found them, how do you manage them?
In this article, we'll show you how to access and rename each licence, how to setup and invite clients to the licence, and how to give your team members access to the licences. Finally, we'll show you how to add additional licences.
Access your QuickBooks Online licences
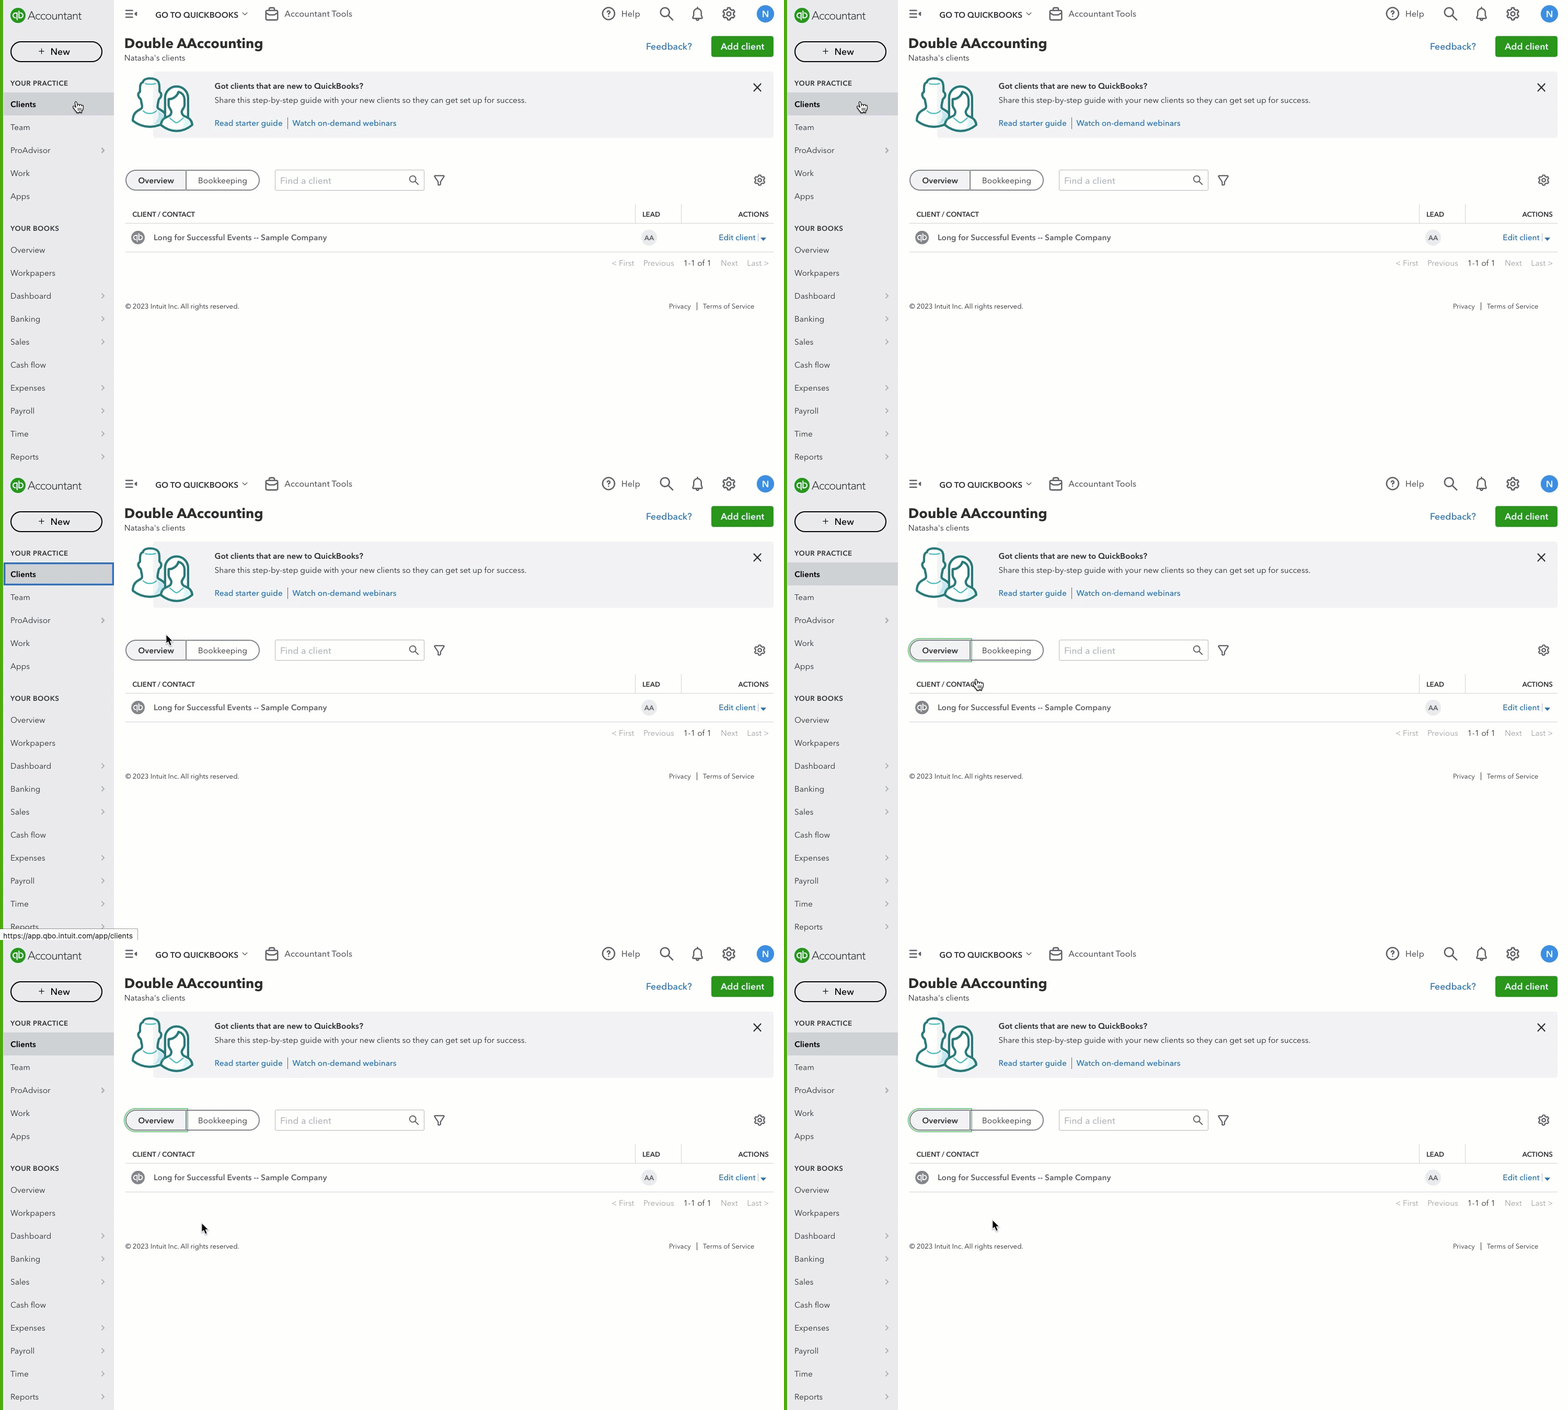
- Sign in to QuickBooks Online Accountant.
- Select Clients.
- Select the Overview tab. You can see all of the client licences associated with your account.
From here, you can see all of the details about each licence, including when it expires and how many users are currently assigned to it. You can also add new users to a licence or invite clients to access their licence from this page–we'll cover this later.
Rename a QuickBooks licence
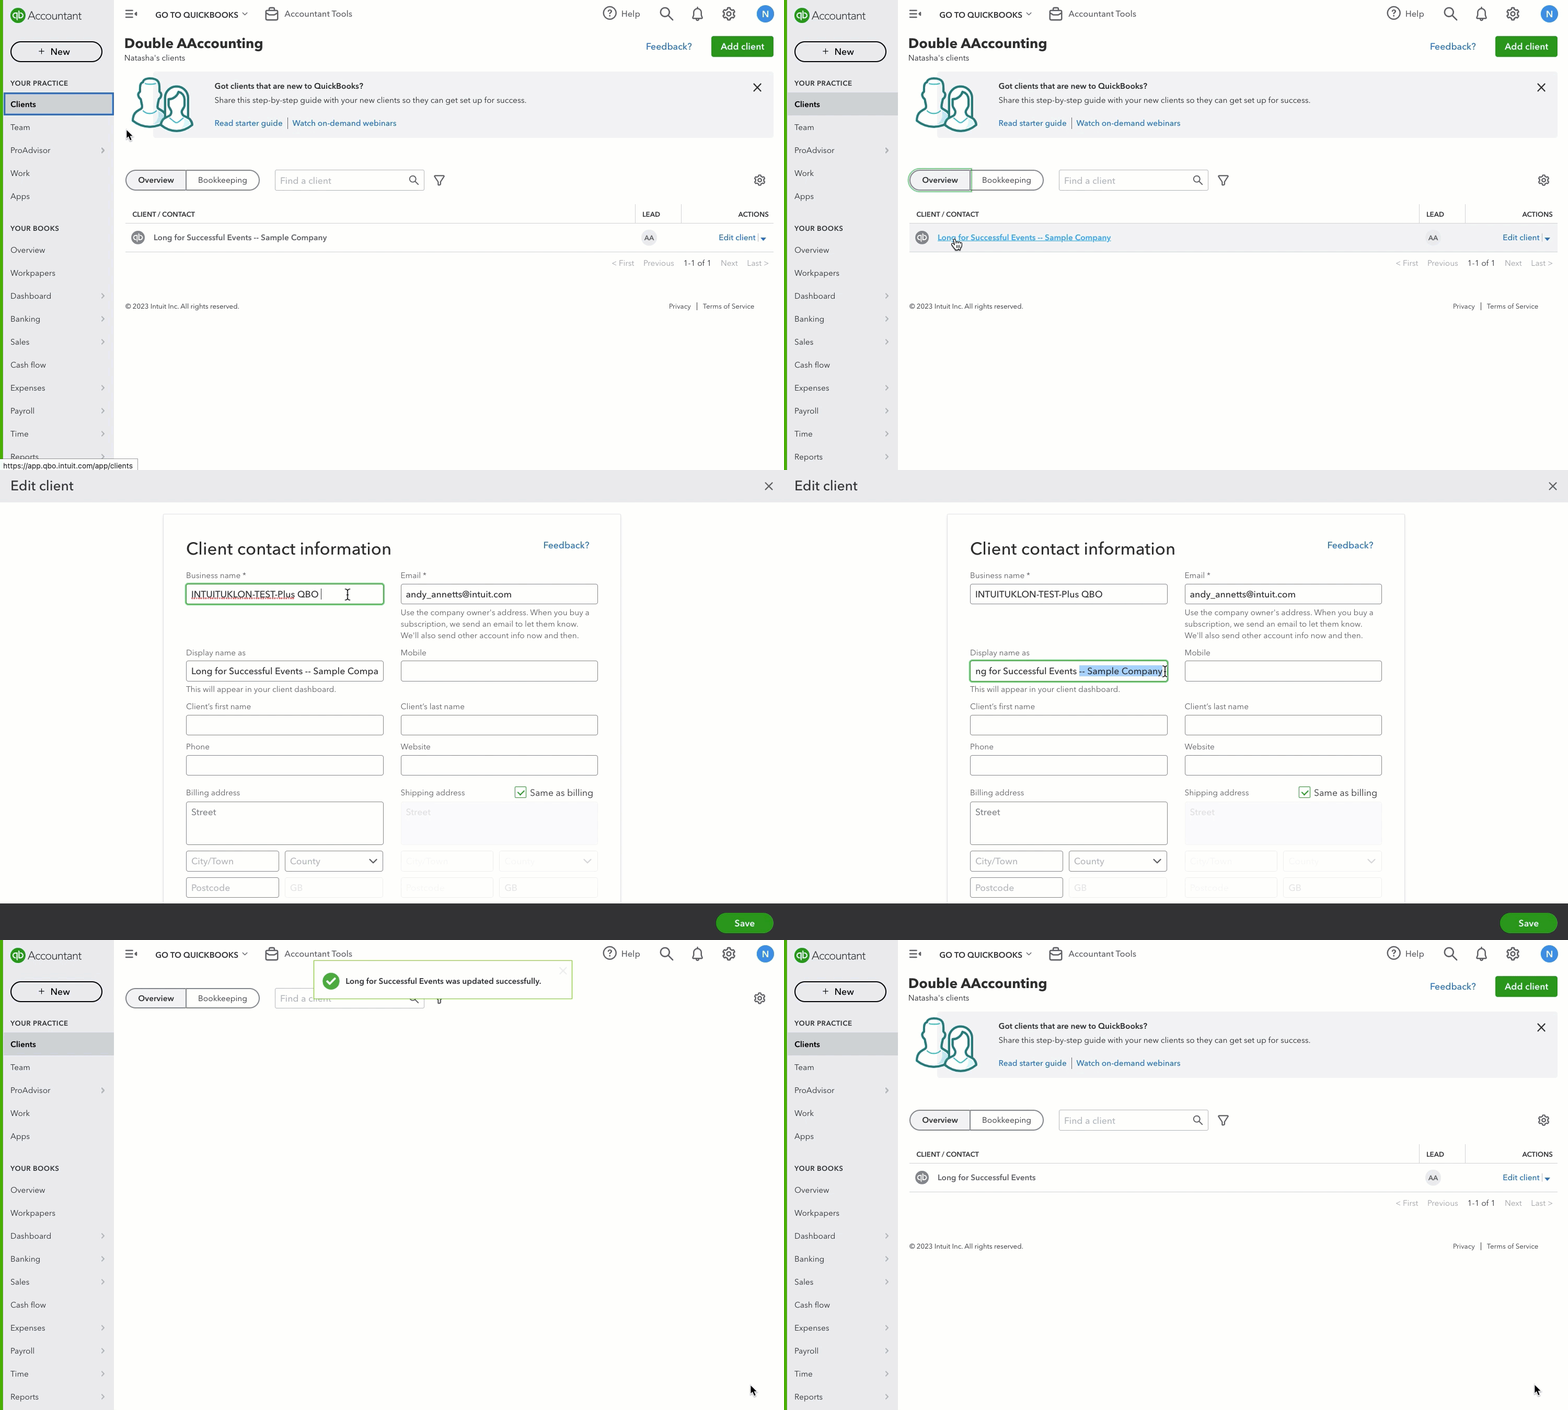
- Go to Clients.
- Select the Overview tab.
- Look for the licence you want to rename and select Edit client.
- In the Business name field, enter the new company name. This is the name that will appear on transactions you send to your clients, like invoices.
Note: If you need to change the name of the company file itself, you can do this in your Account and settings. - In the Display name field, give the licence a display name. This will appear in your client dashboard, reports and will only be visible to your firm.
- Make sure that the email address is correct so you can access the licence info and receive emails from QuickBooks Online.
- If you need to, you can enter/edit your client's information.
- Select Save.
Grant team members access to a QuickBooks licence
Before your team member can access a client's licence, make sure that everyone in your firm can access QuickBooks. Here's how to add and manage team members.
Does a team member need access to a specific client? Do they need to take on more admin tasks? You can change your team's access permissions at any time.
Assign a QuickBooks Online account to your client
Setting up your client's QuickBooks Online account doesn't have to be complicated. By following a few simple steps, you can have your client's account up and running in no time. We'll walk you through everything you need to do to set up your client's QuickBooks Online account, from preparing your licence to inviting your client.
Set up a QuickBooks Online account for your client:
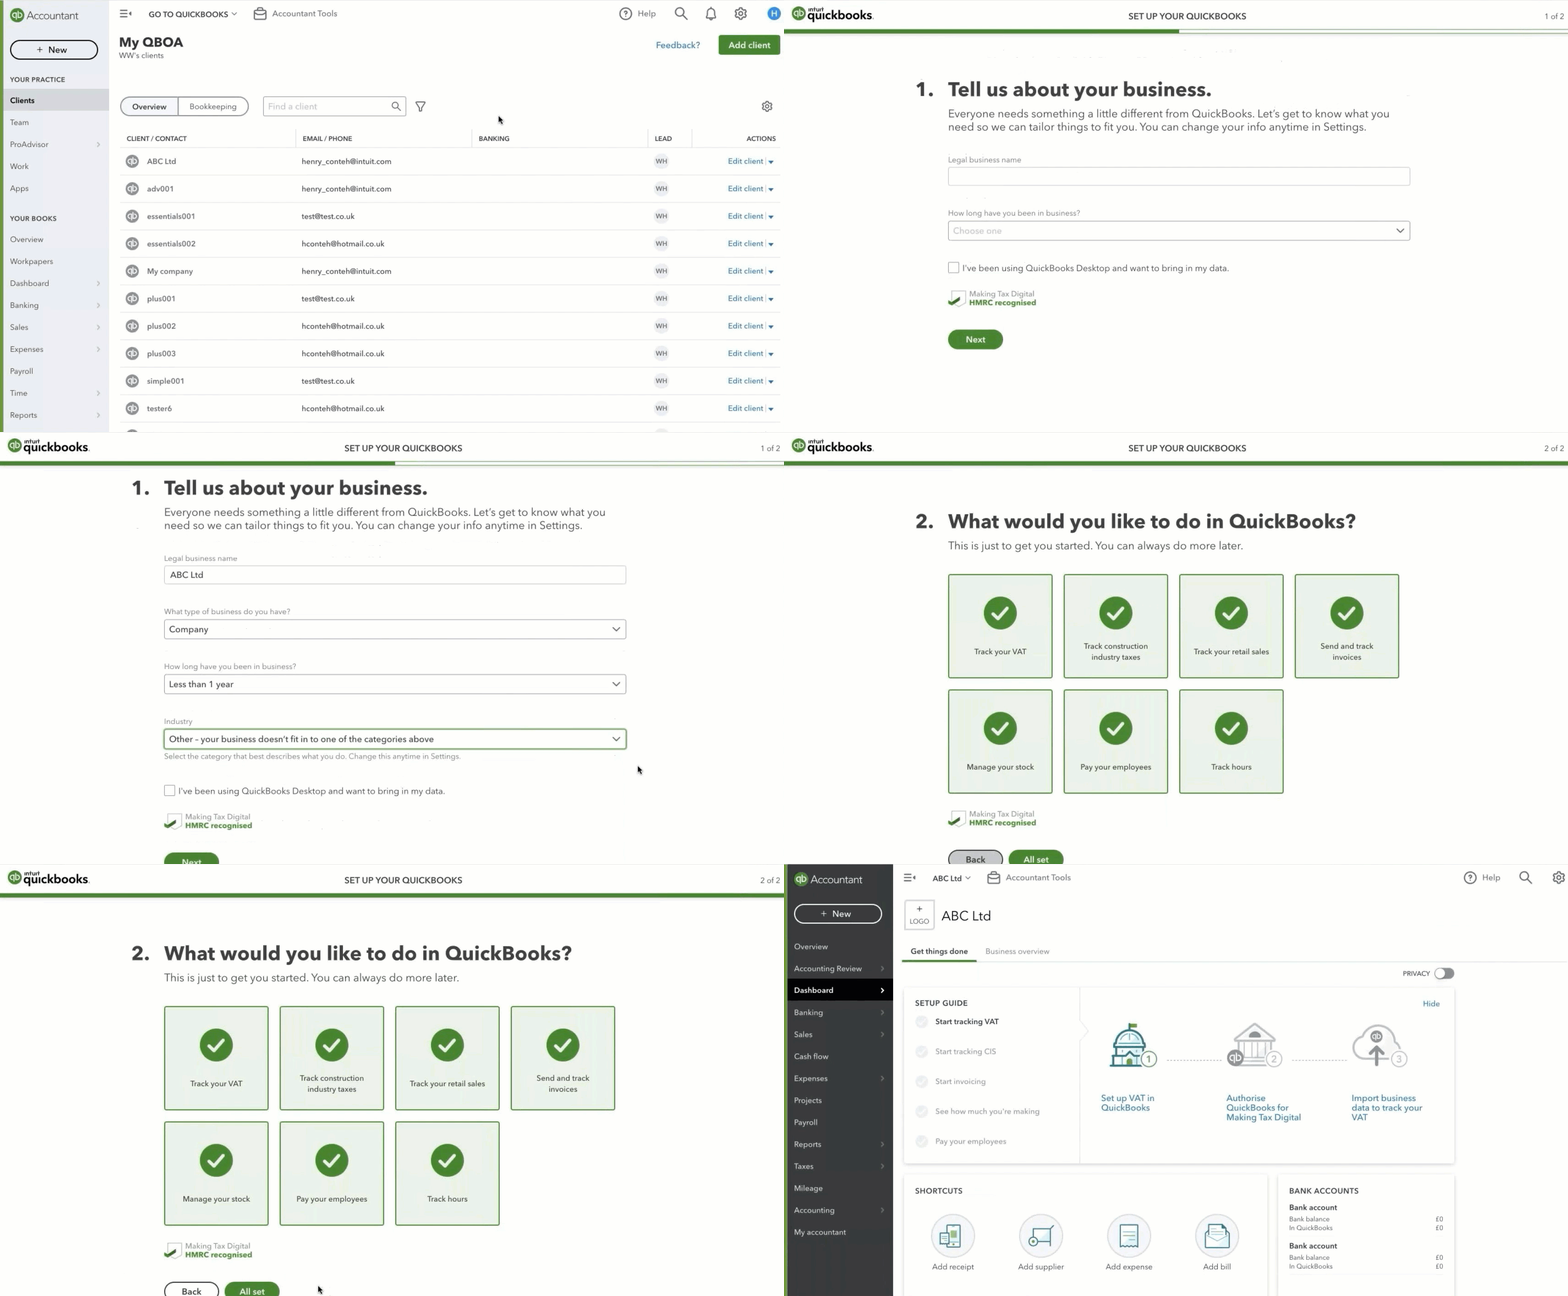
- Go to Clients.
- Select the QuickBooks icon next to the licence you'd like to setup.
Tip: Hover over the QuickBooks icon to see what the subscription level is for the licence. - Enter your client's company info.
- Select what type of business your client has – this will help us set up their chart of accounts and the different options that will be available to them in QuickBooks.
- Select Next.
- Choose what you'd like to do in QuickBooks.
- When you're ready, select All set.
You will be taken to your client's QuickBooks.
Invite a client to use their QuickBooks Online account:
When you're happy with the state of your licence and how it's set up, you can invite your client to QuickBooks Online. To do this:
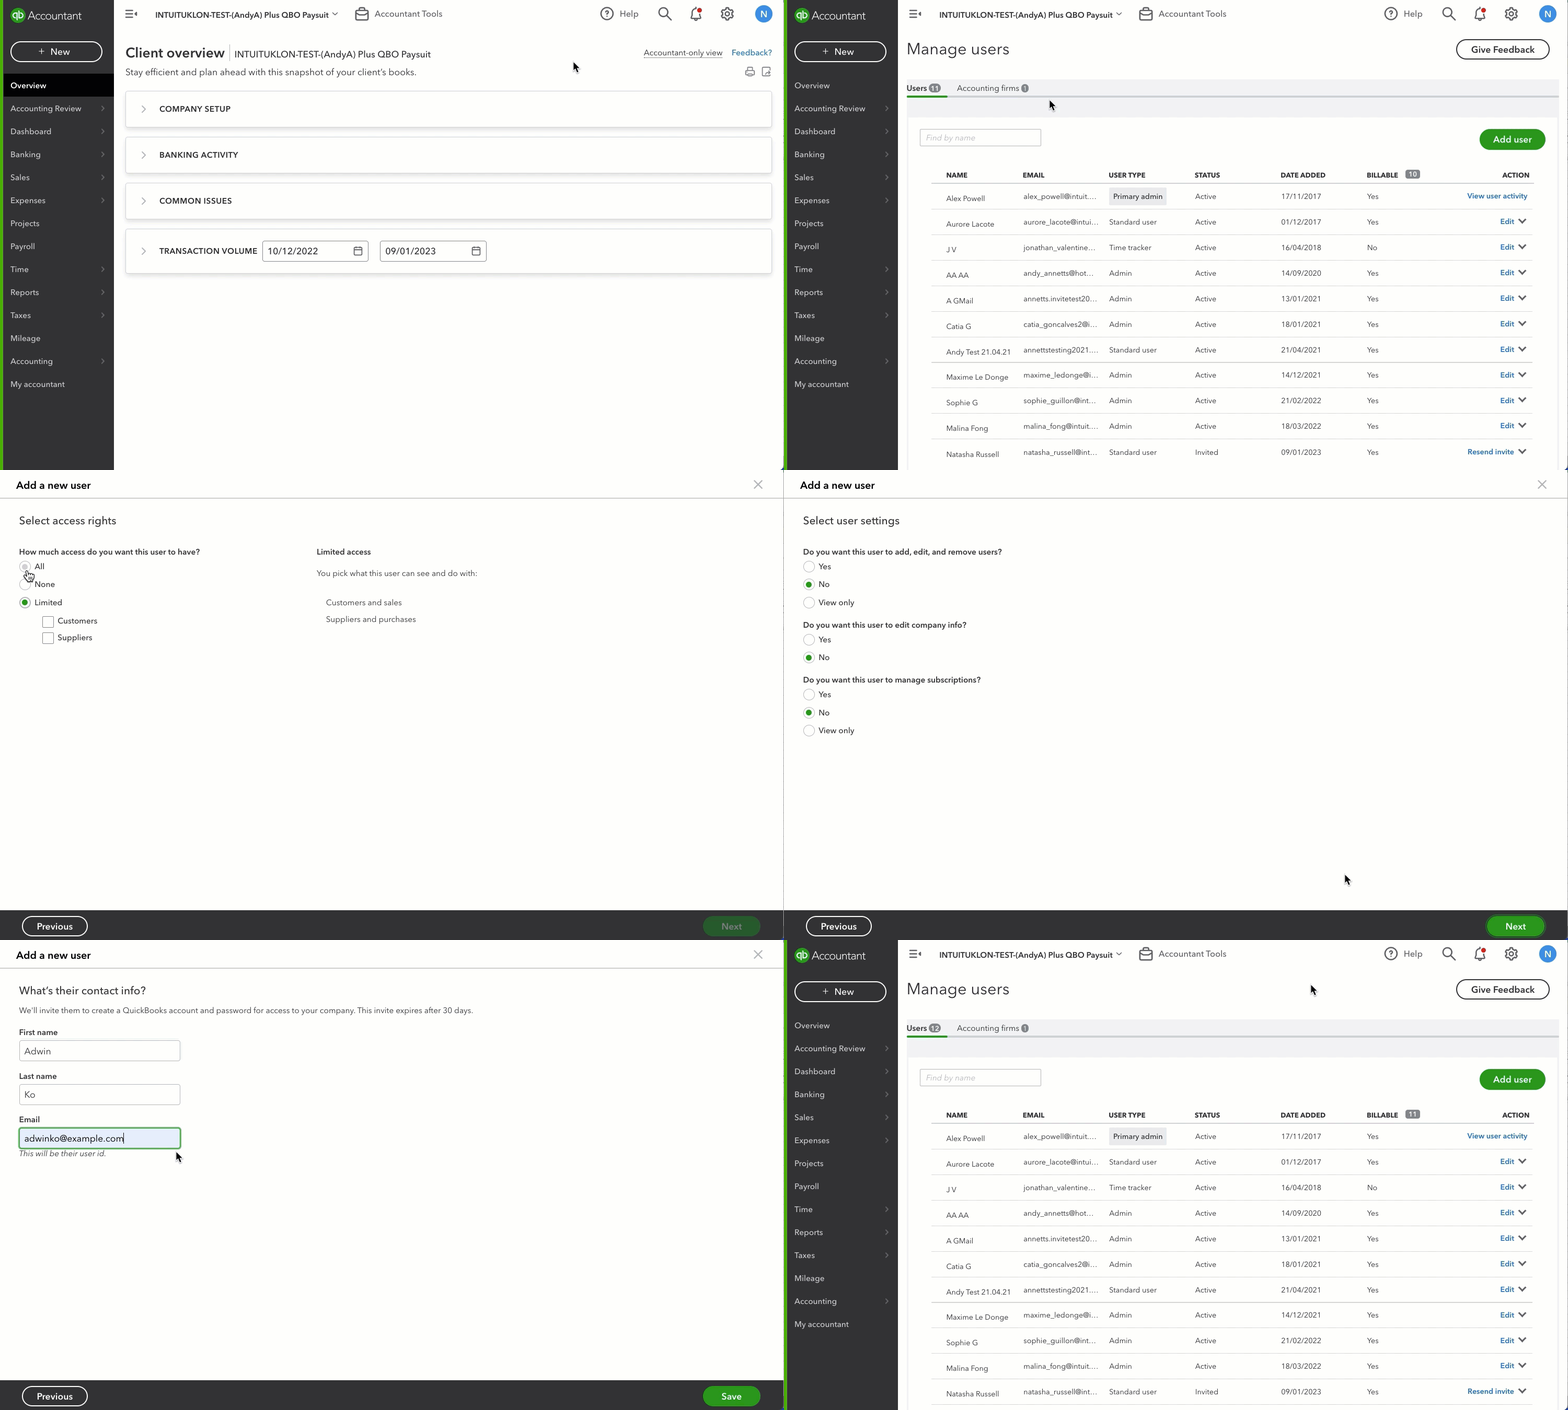
- Select the Gear icon ⚙.
- Select Manage users.
- Select the Users tab.
- Select Add user.
- Select the type of user you want to add (for example, Standard User, Company Administrator, and so on).
- Choose how much access you want the user to have, then select Next.
- Select the appropriate user settings, then select Next to continue.
- Enter the client's name and email address.
- Select Save.
Your client will receive an email from QuickBooks Online asking them to create an account. Once they've done this, they'll be able to access QuickBooks Online and start using it according to the permissions you have set for them.
Add a new QuickBooks licence
Let's say, you've used up all your licences and your clients are all on QuickBooks, and you need to add a new client. You have the option to add a new licence to your practice from within QuickBooks Online Accountant.
To do this, you need to go back to your Accountant dashboard first before following these steps:
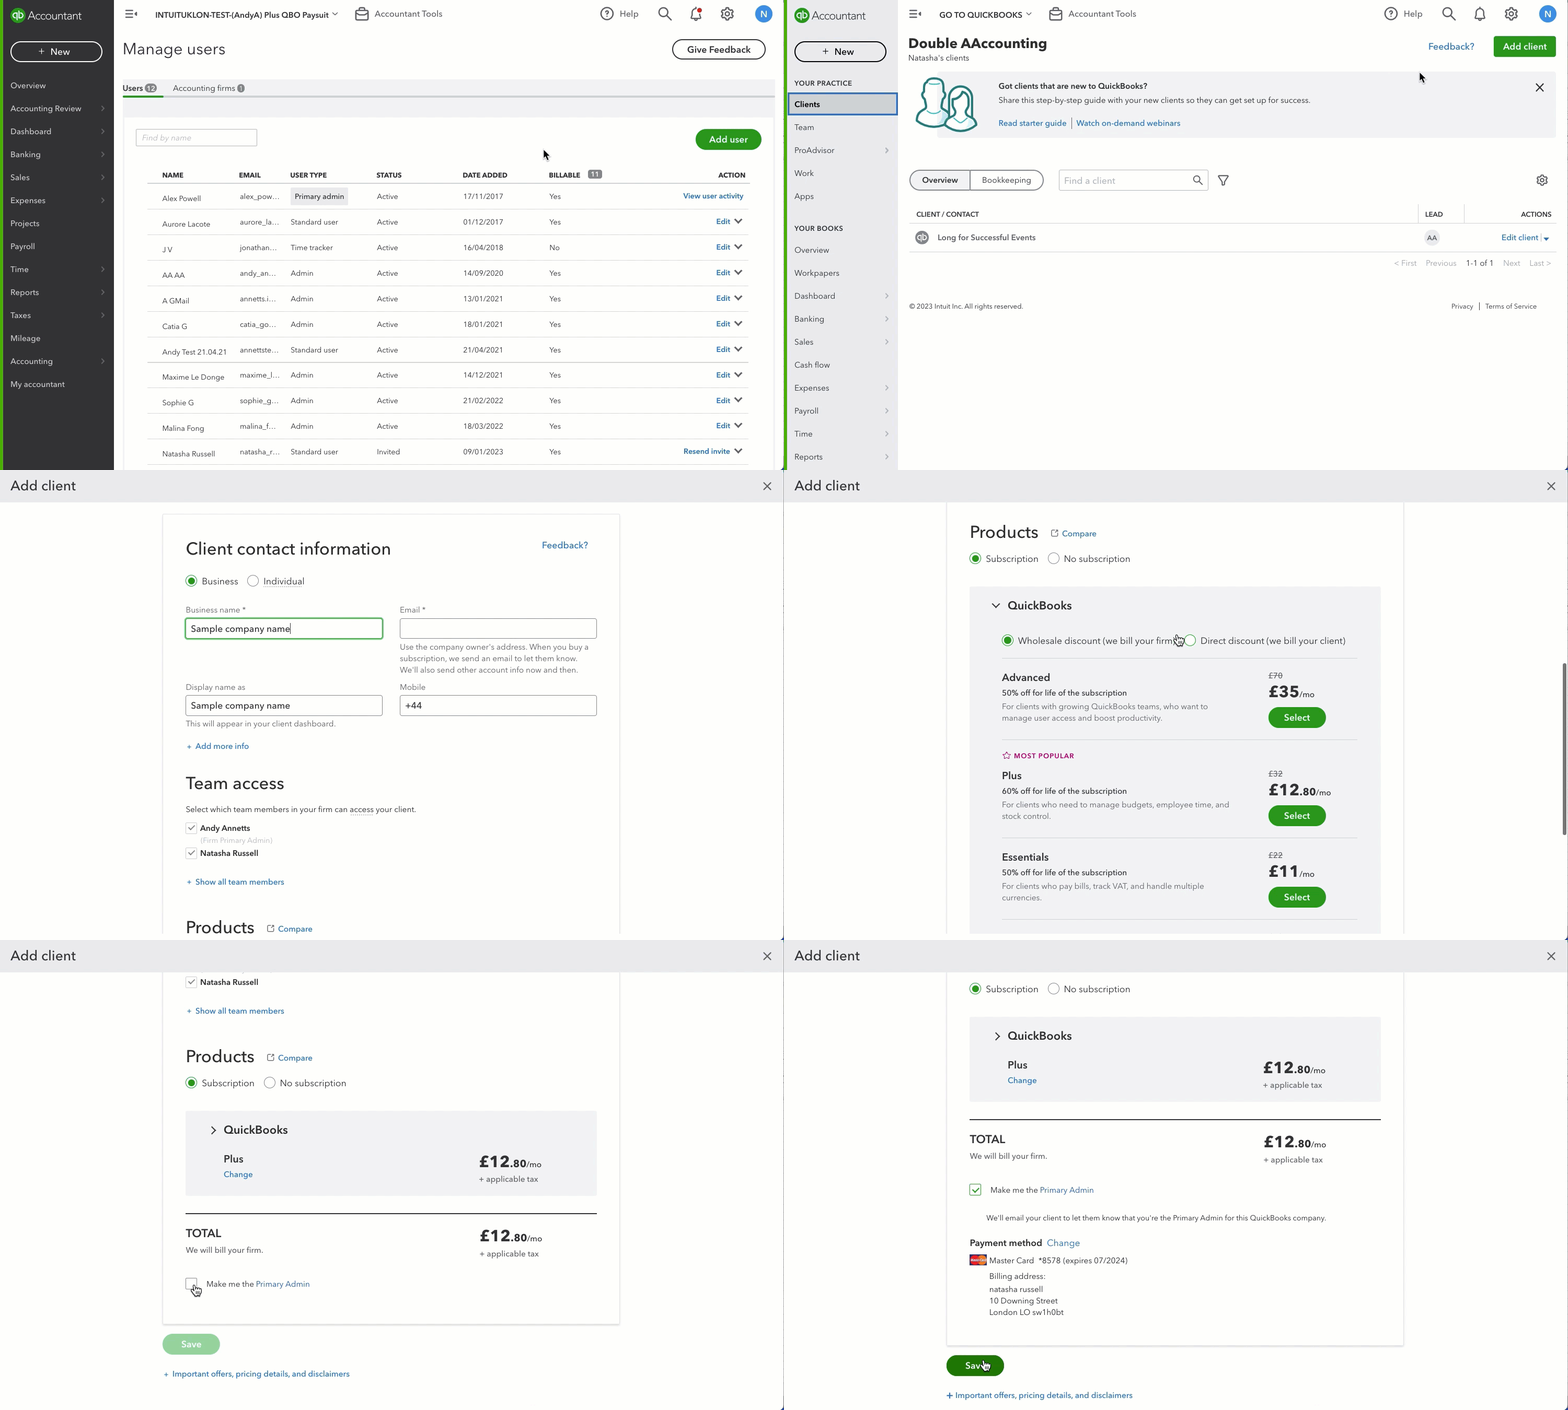
- Select the QuickBooks Accountant icon in the navigation menu.
- Go to Clients.
- Select Add client.
- Enter your client's information.
- Select the QuickBooks product subscription type.
Tip: Check out our product comparison page to help you decide. - If you want to be made the primary admin for this licence, tick the Make me the Primary Admin checkbox.
- Select Save.
Can I downgrade my client's QuickBooks subscription?
You can downgrade your client’s QuickBooks subscription at any time. However, you'll need to make your client the primary admin before downgrading from Essentials to Simple Start.
Sign in now for personalized help
See articles customized for your product and join our large community of QuickBooks users.