Prepare your annual accounts using Workpapers in QuickBooks Online Accountant
by Intuit• Updated 1 year ago
Are you struggling to keep your annual accounts up to date? QuickBooks Online Accountant Workpapers can help. In this article, we'll take you step-by-step through the process of preparing and submitting your annual accounts to Companies House. Let's get started!
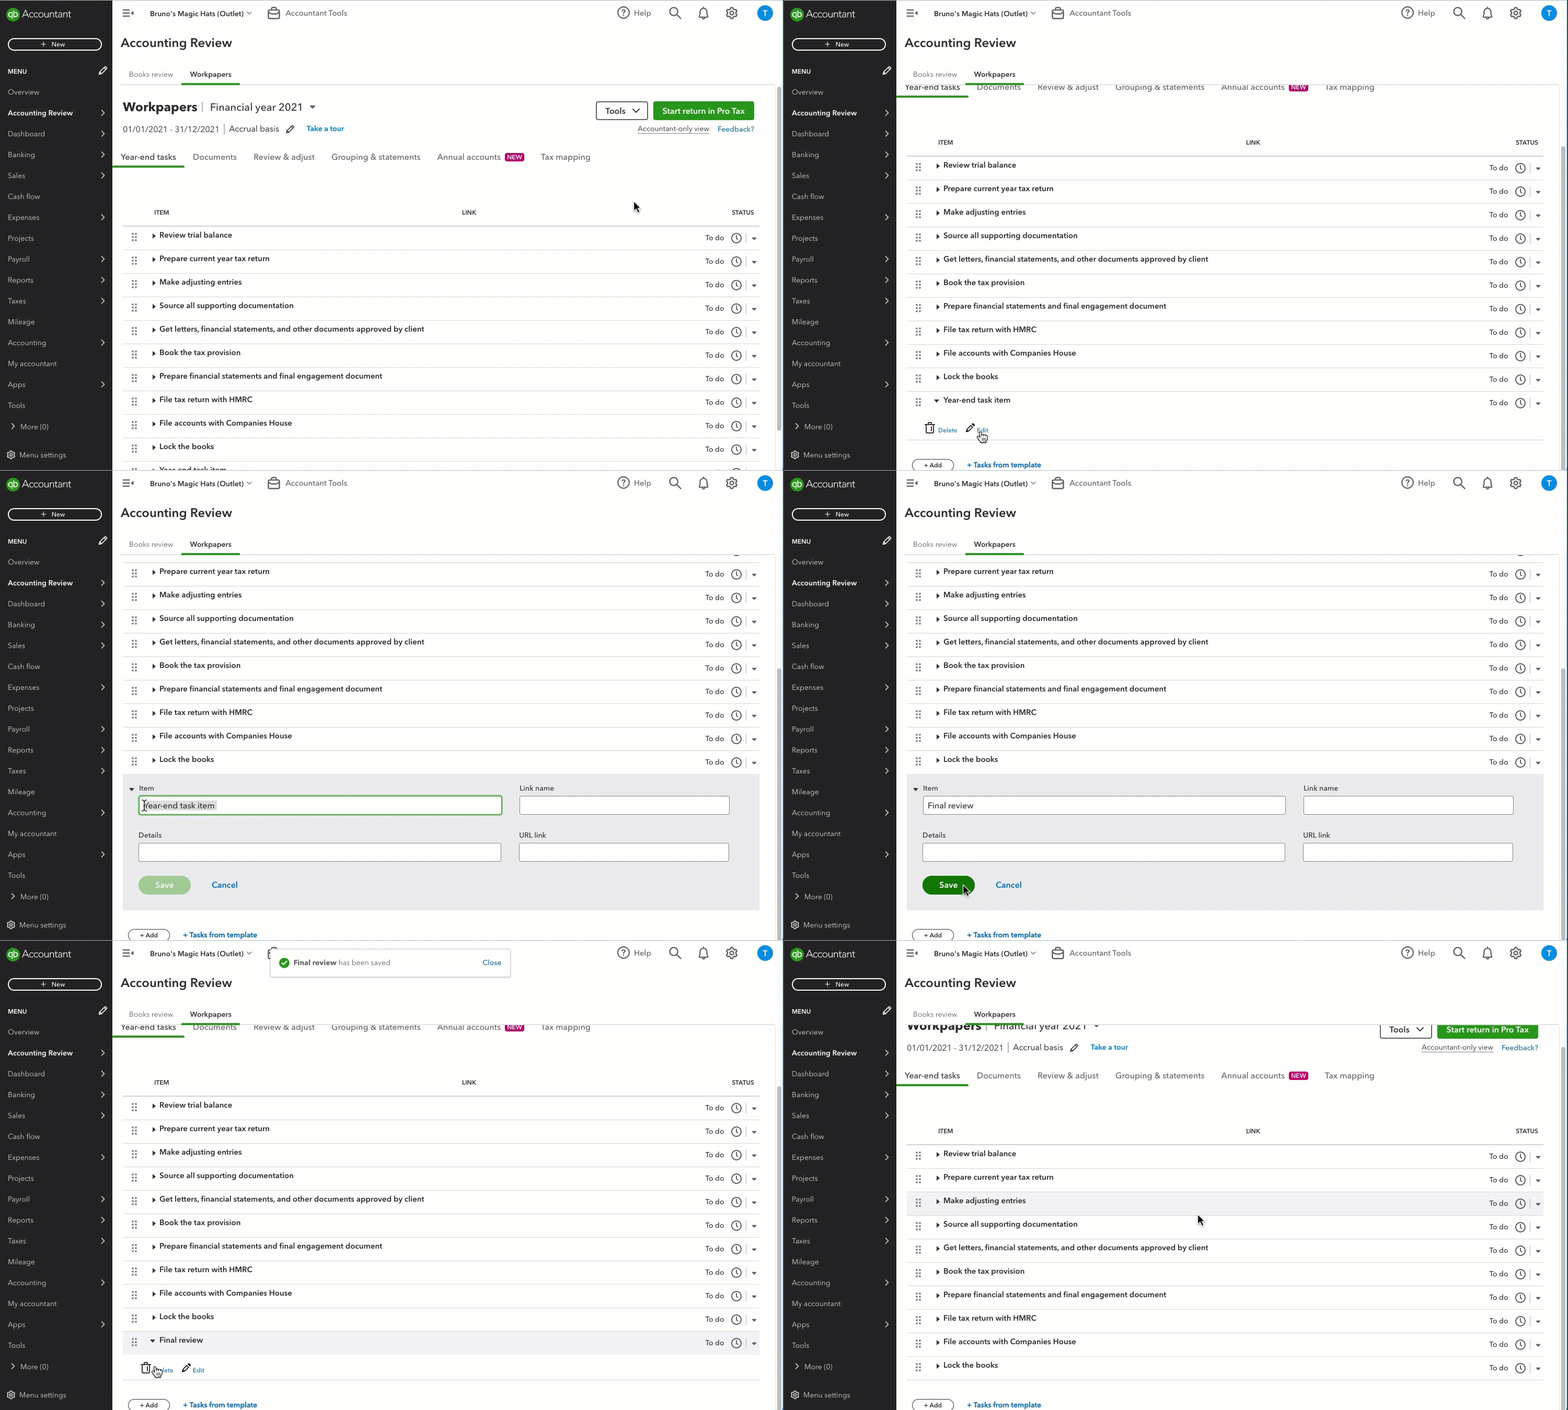
Step 1: Review your year-end tasks
The Year-end tasks feature in Workpapers provides a task list that lets multiple firm members to work collaboratively and monitor progress. As the end of the year approaches, it’s important to stay organised and make sure all of your accounting tasks are taken care of.
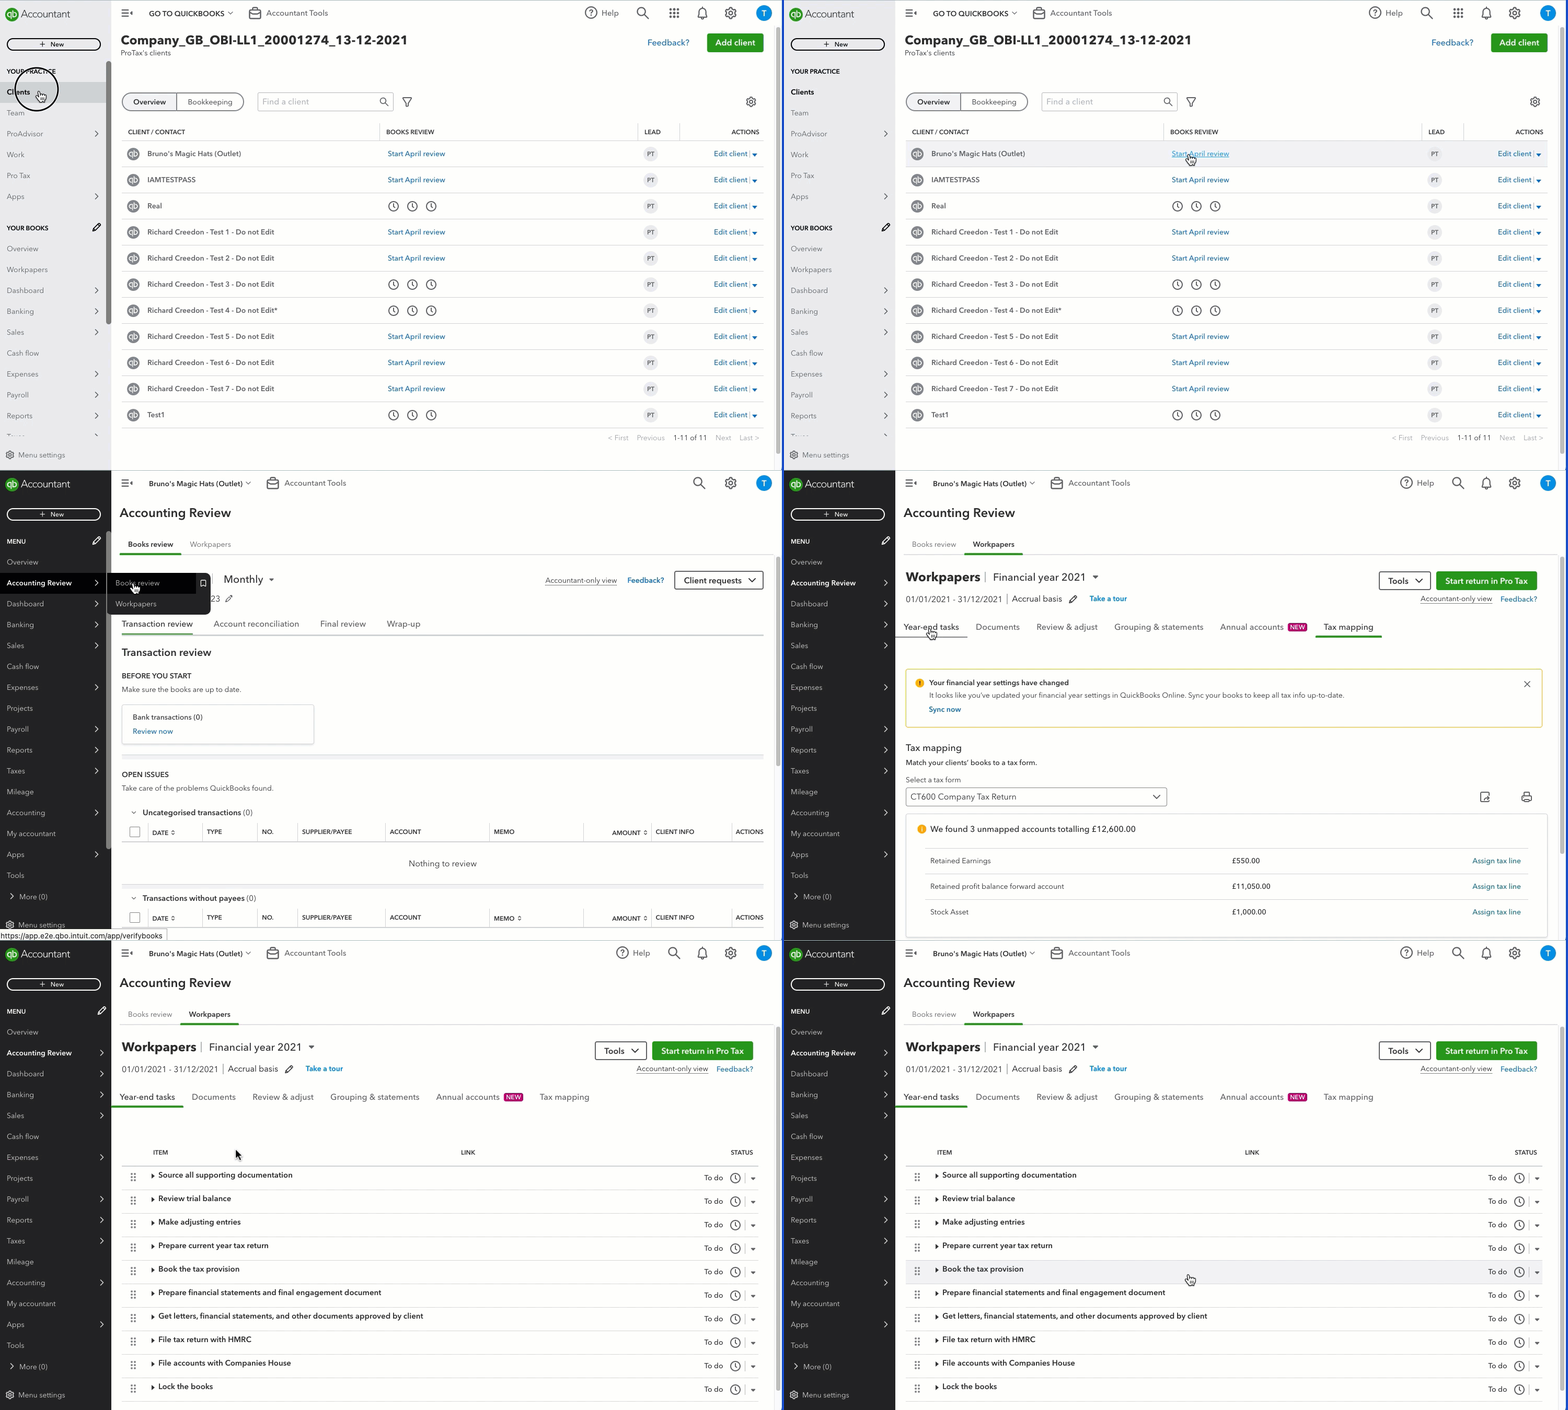
- Go to Clients.
- Select the client file you wish to work on from the client dashboard.
- Go to Accounting review or Bookkeeping, depending on your view.
- Select Workpapers.
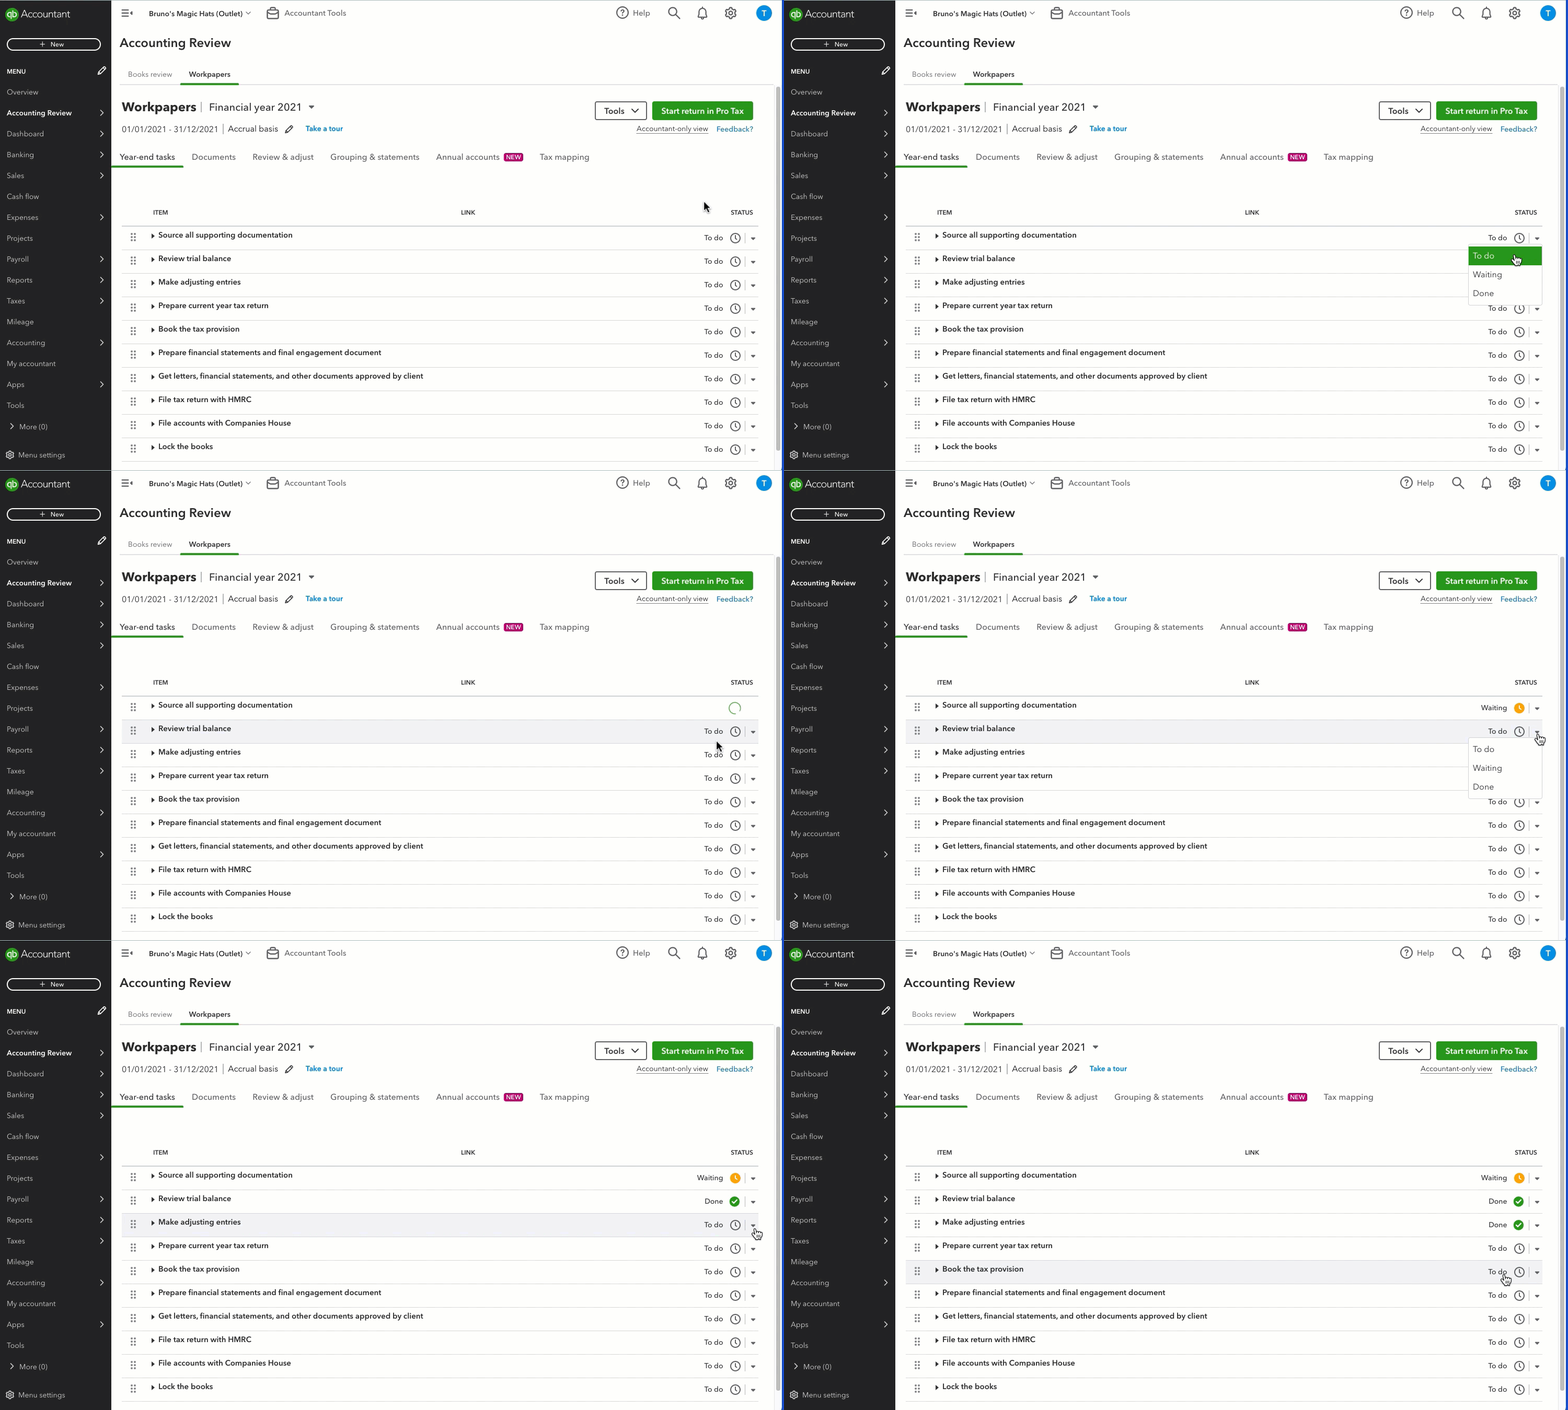
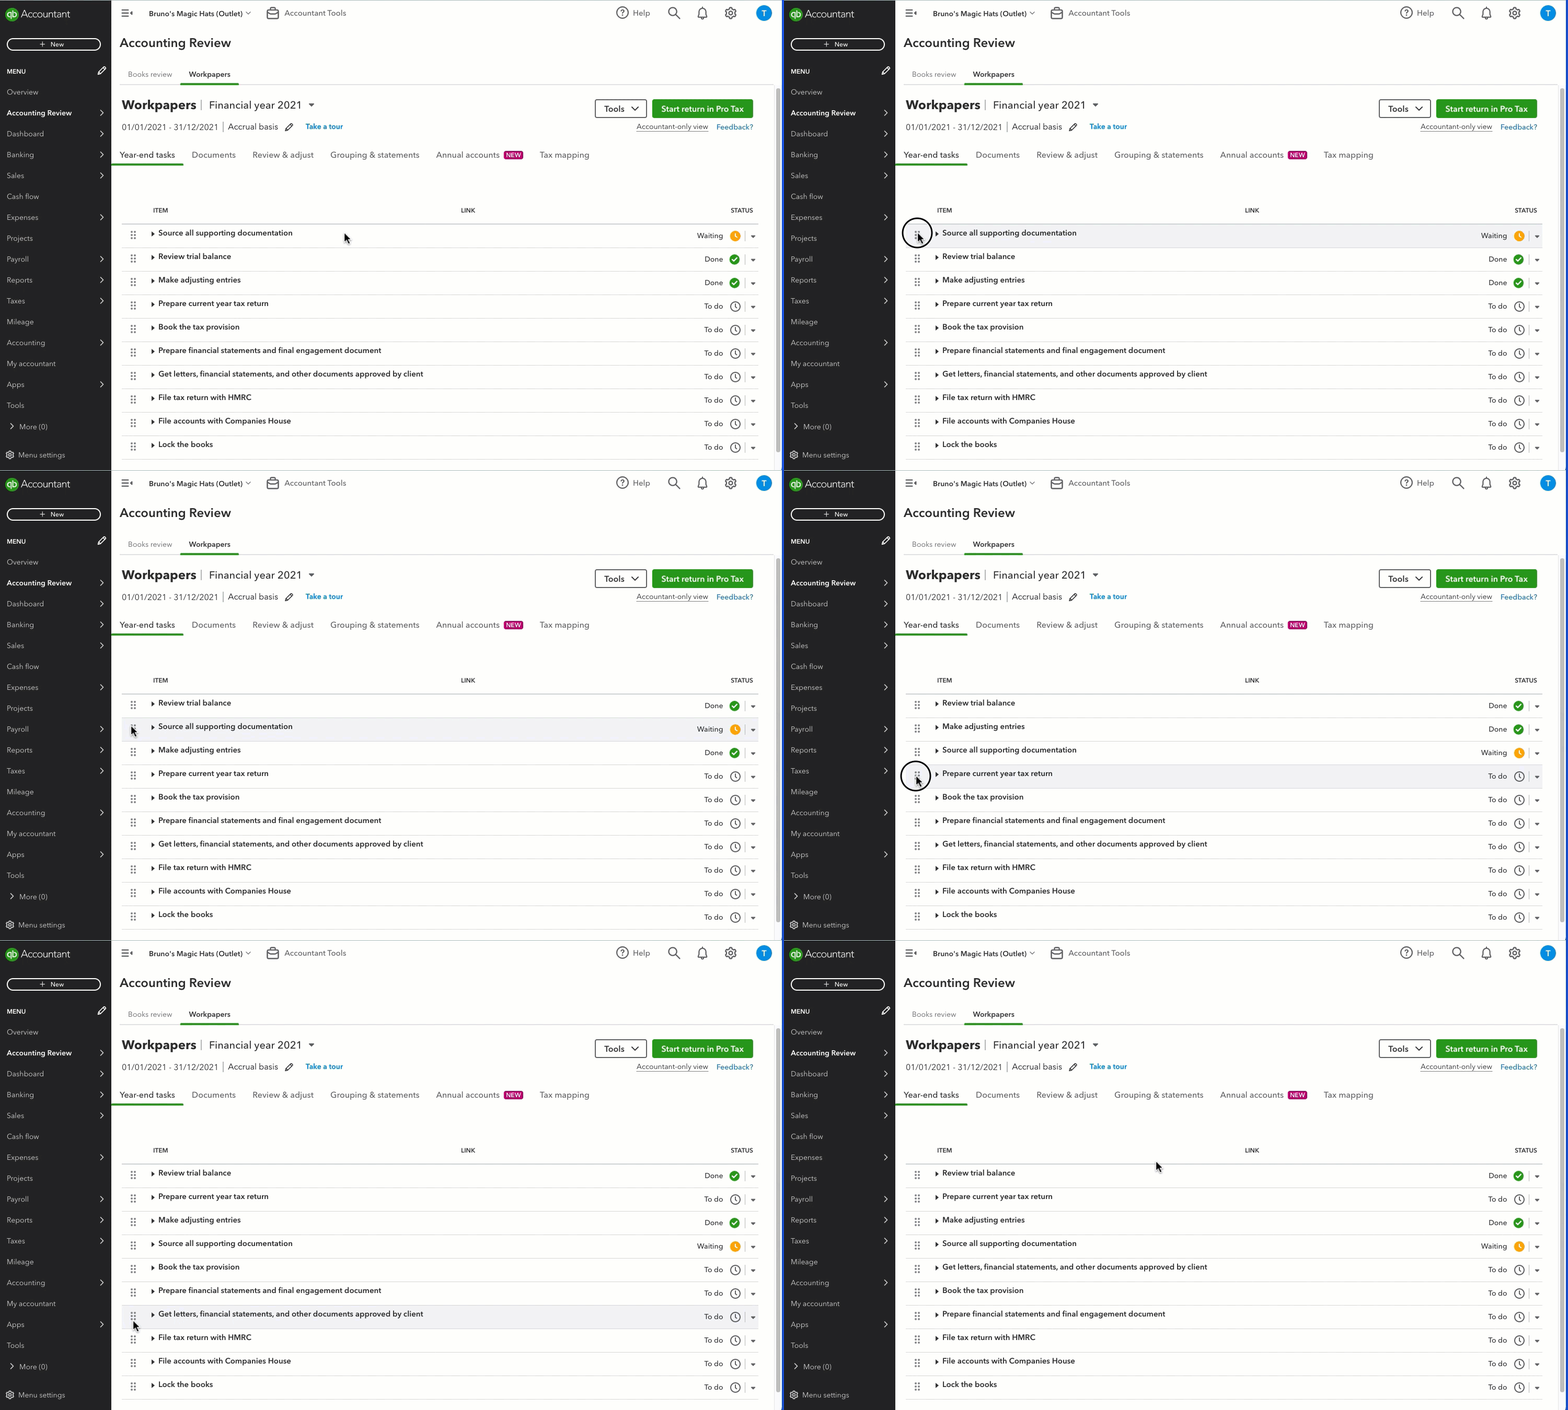
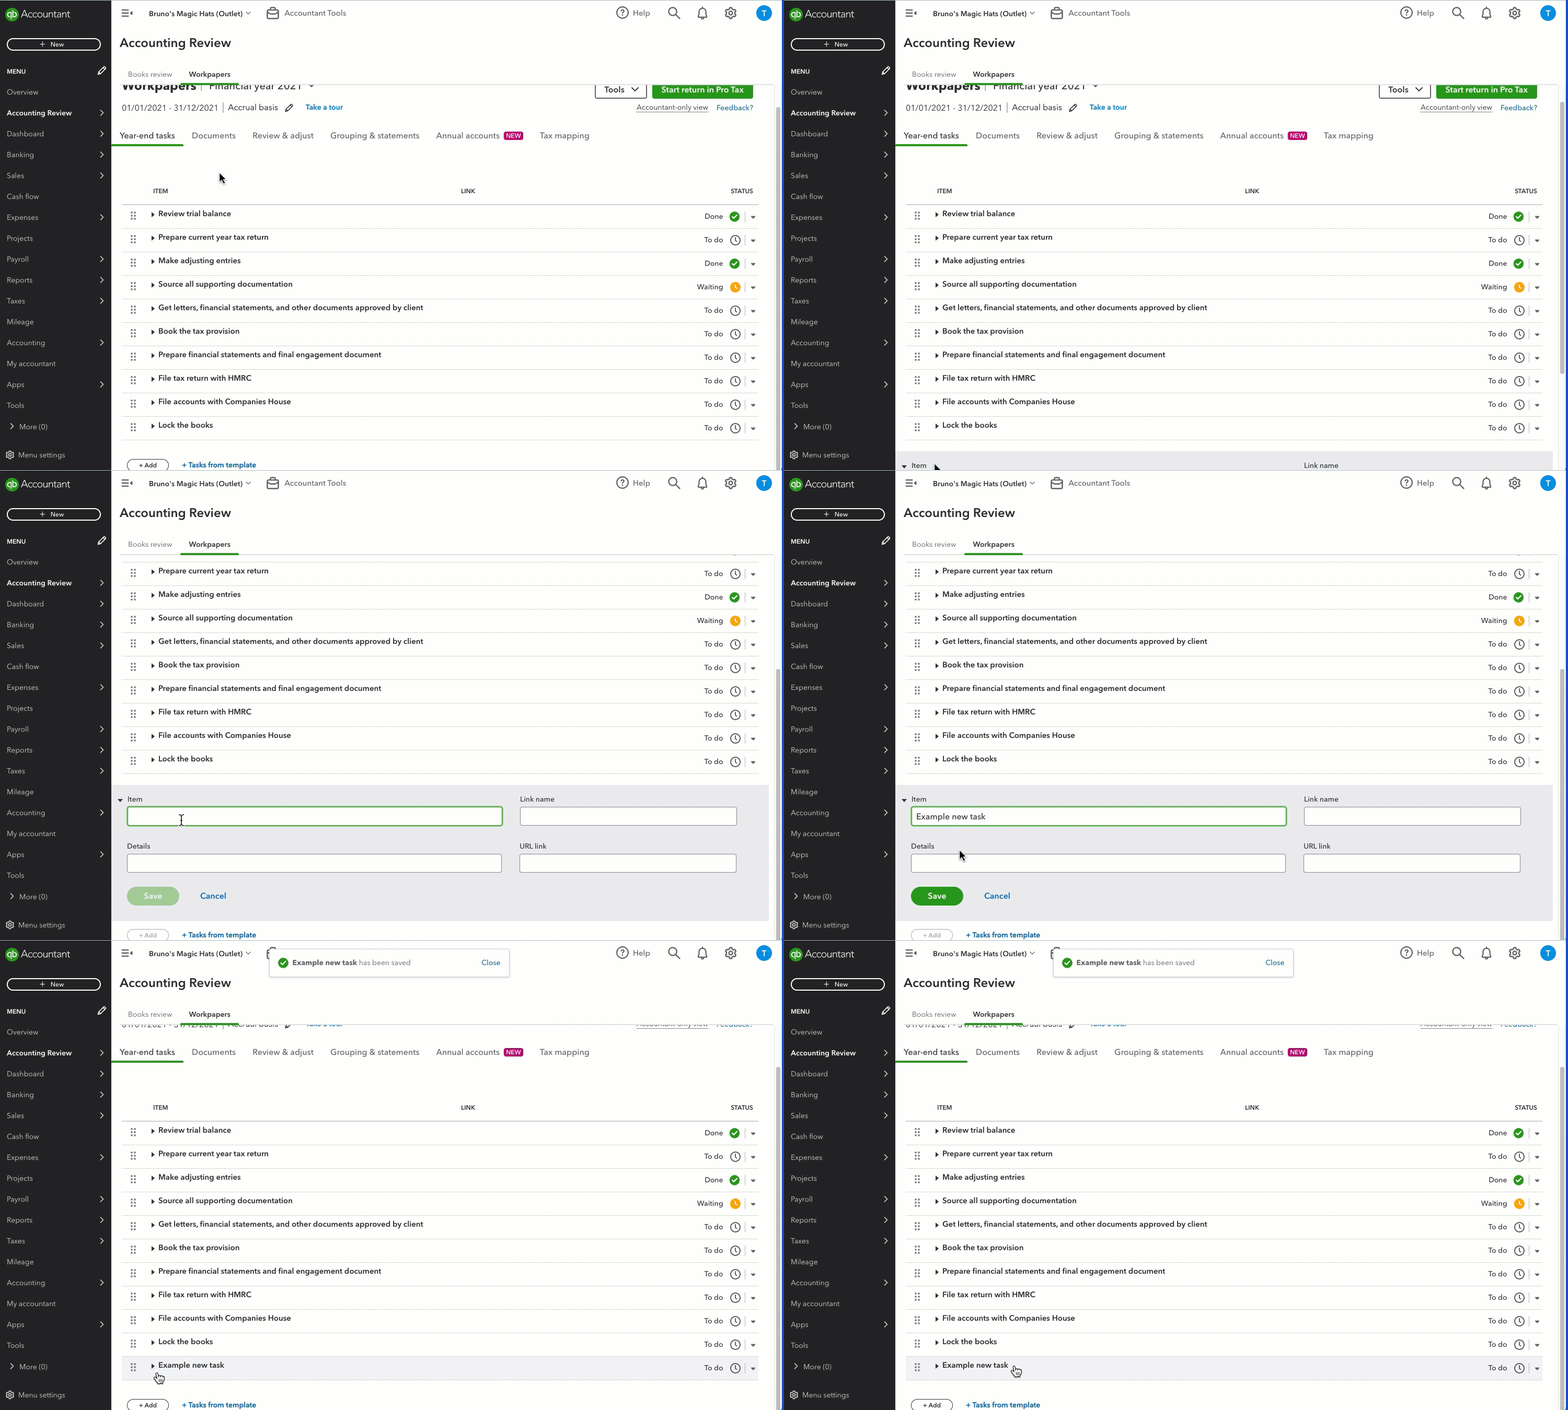
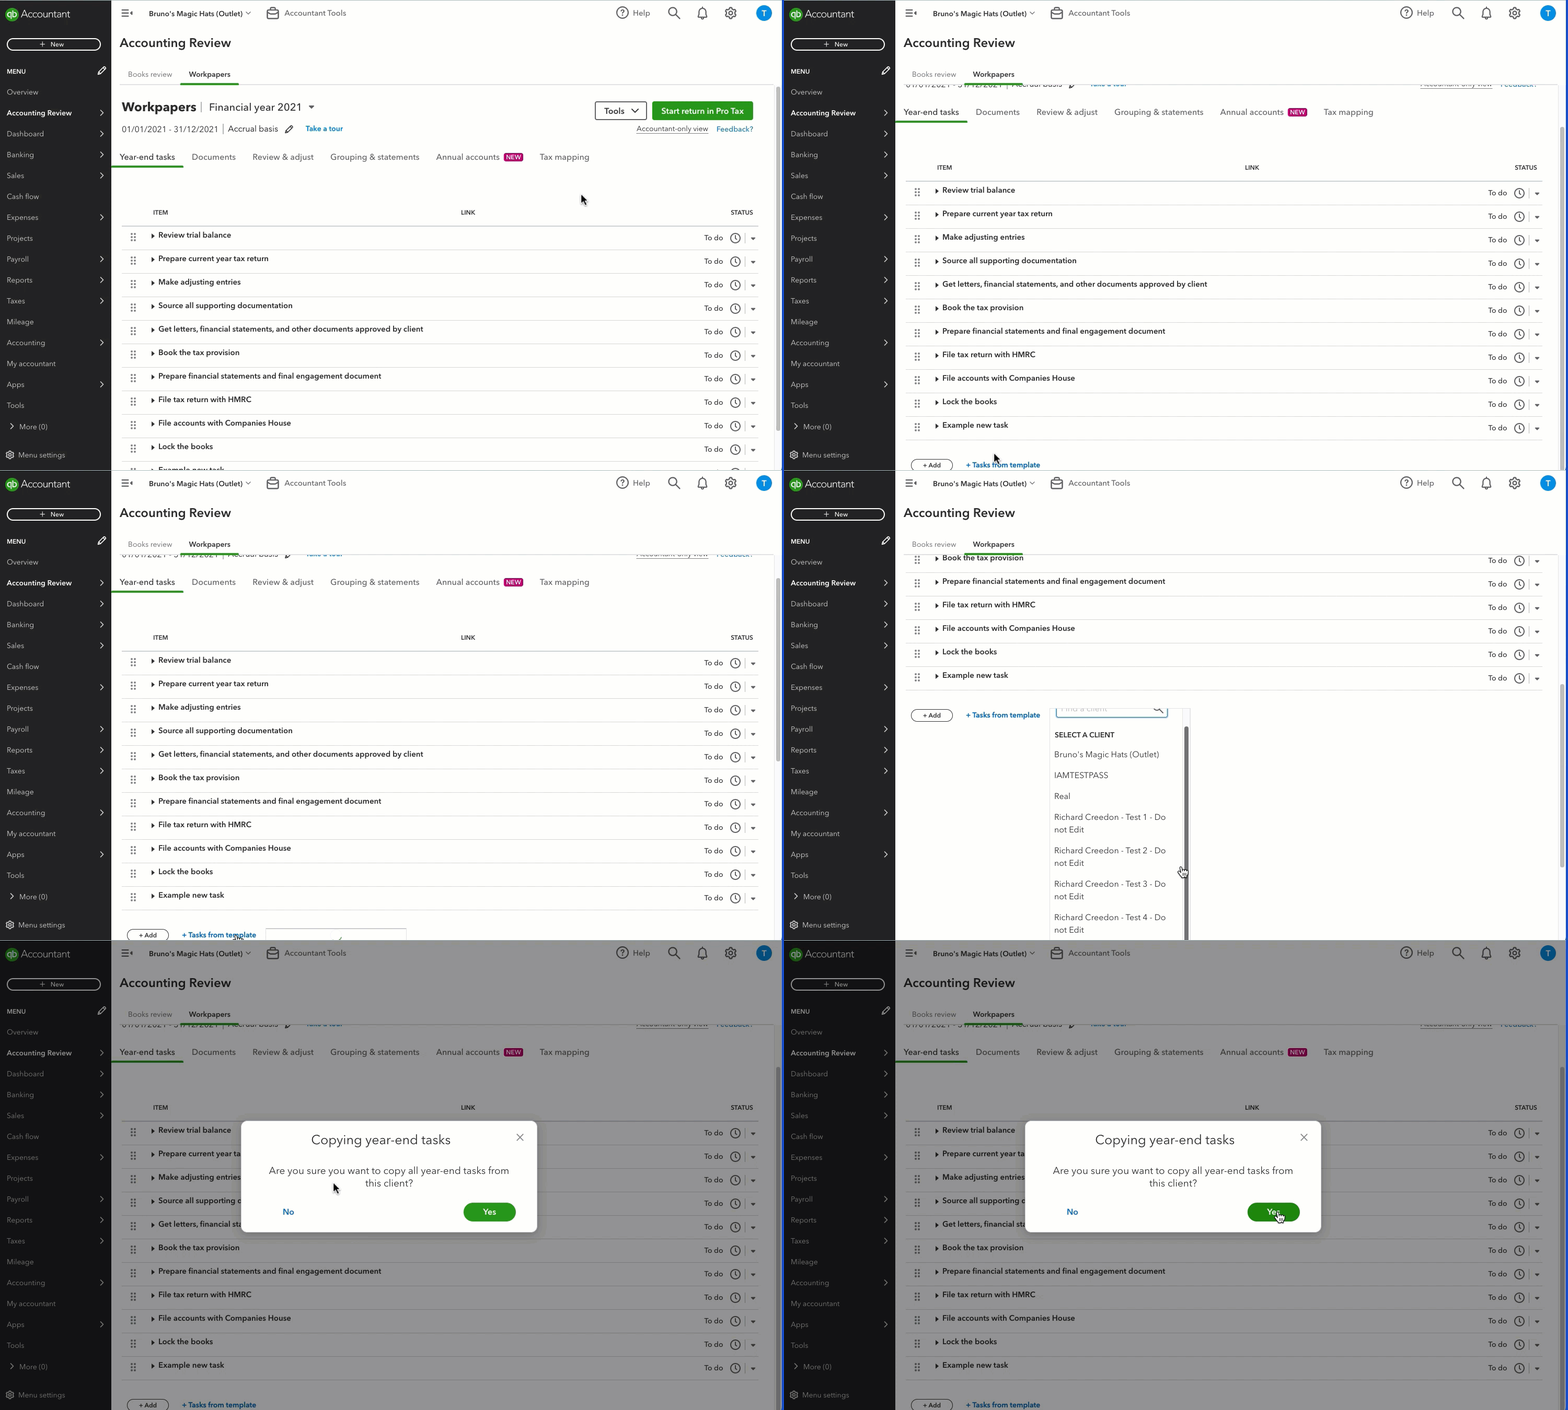
- Select the Year-end taks tab. A list of all your year-end tasks will show, along with status updates.
- Review the tasks and action items needed, and mark them as complete.
Step 2: Attach supporting documents
Remember to attach any support documents for the financial year that show your client’s finances, like bank statements, letters, notes, and agreements.
Learn how to use the Documents Manager in Workpapers.
Step 3: Review your client accounts
As an accountant, you know how important it is to review your client’s accounts regularly. In the review and adjust section, you can compare your client’s Balance Sheet and Profit and Loss Report to see if the data matches up.
You can also see last year’s totals, and account differences, as well as any adjusting entries you’ve made to Workpapers.
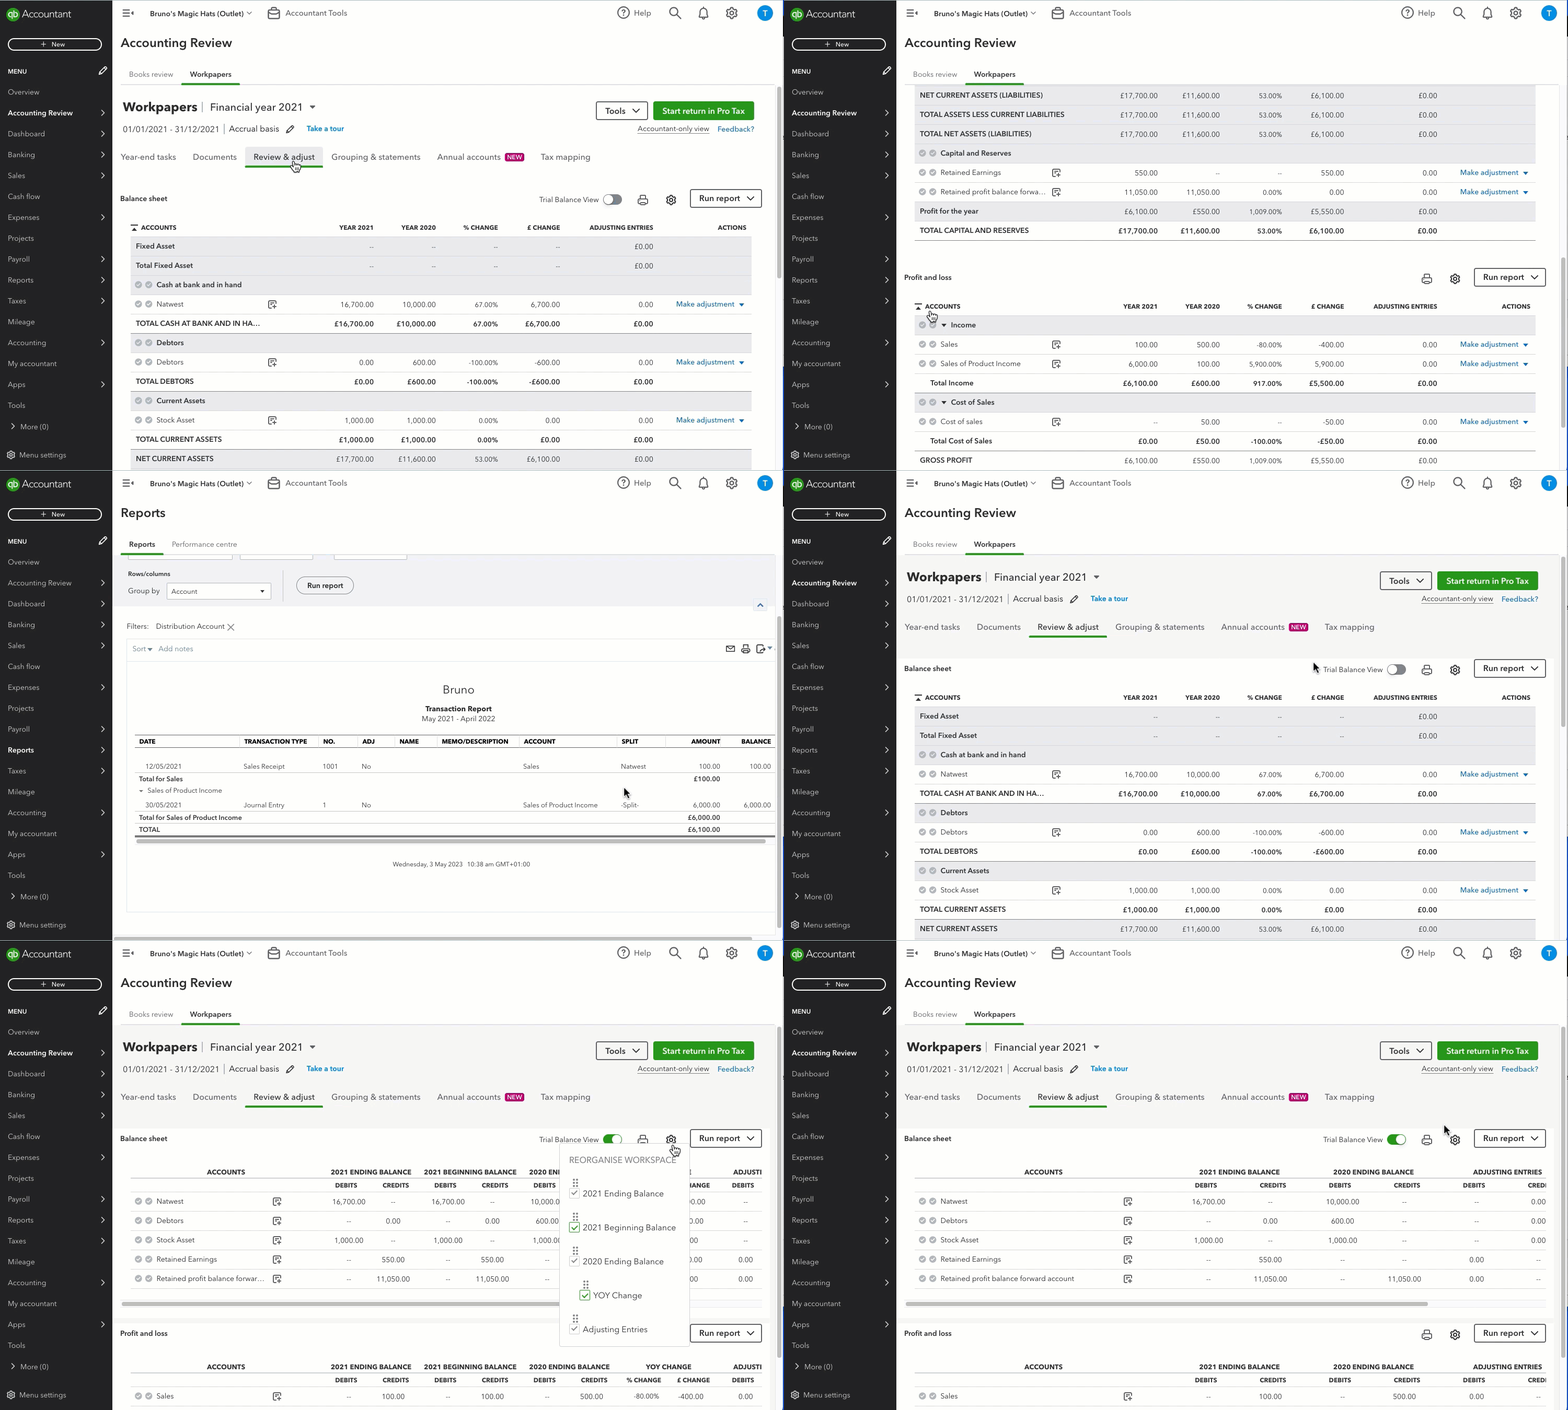
- Select the Review and adjust tab.
- Next to Accounts, select the ▼dropdown arrow to expand the list of accounts.
- Select the account total for the current year to get a full list of transactions.
Switch to Trial Balance View to see debits, credits, percentage changes, and amount changes to the account over the tax year. To reorganise your workspace, select the gear icon.
Step 4: Review the change list
Every time someone makes a change in Workpapers or in QuickBooks Online for this period, it’s logged on this list. The change list acts like an audit log. This will show up in your Workpapers dashboard, regardless of which tab you’re in.
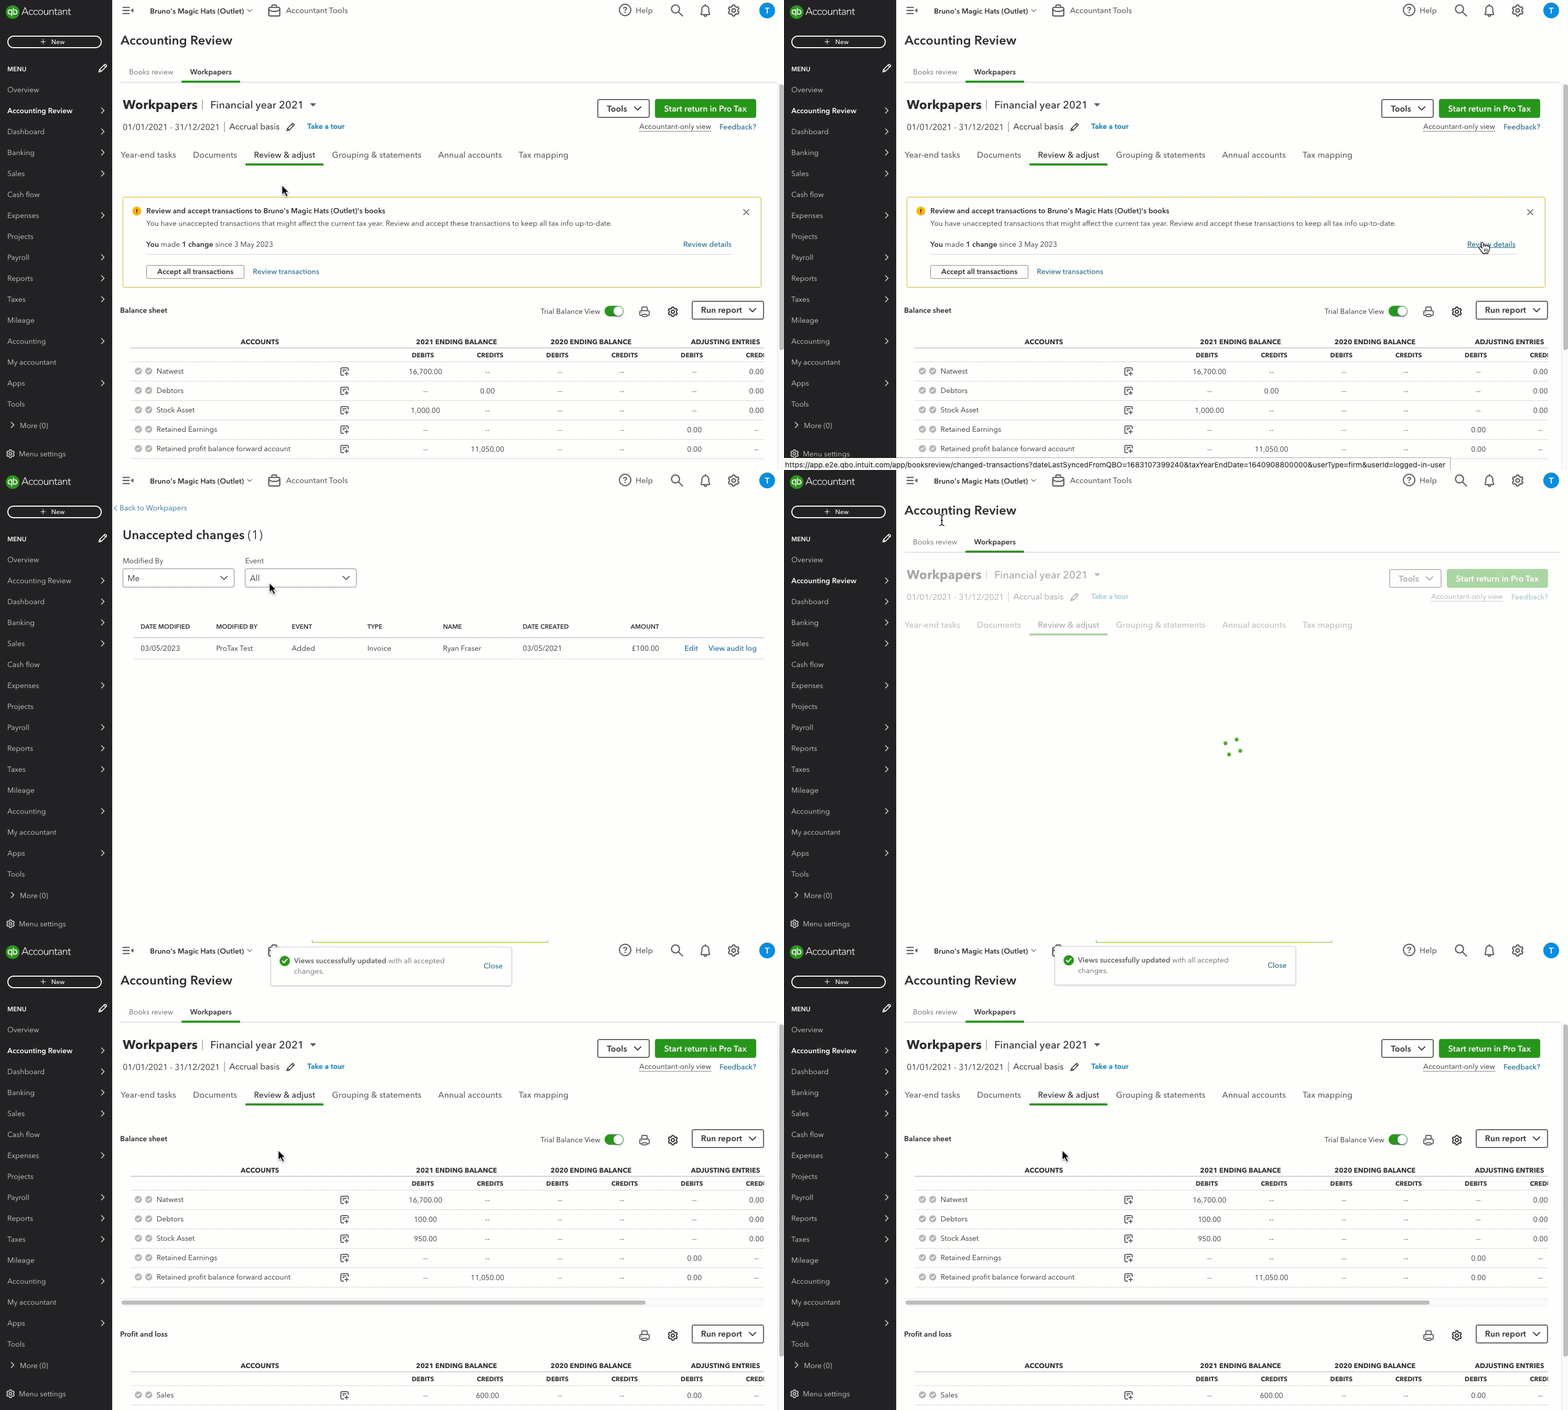
For these changes to go through, review and accept them. Changes that you accept from the change list will automatically be put into your annual accounts.
Step 5: Review your annual accounts
When it comes to filing your corporation tax return, make sure you review your annual accounts help to reduce the risk of any errors or mistakes. By reviewing your annual accounts thoroughly, you can check that all the details are up-to-date and accurate–from your company’s name and address to its directors’ names and contact details.
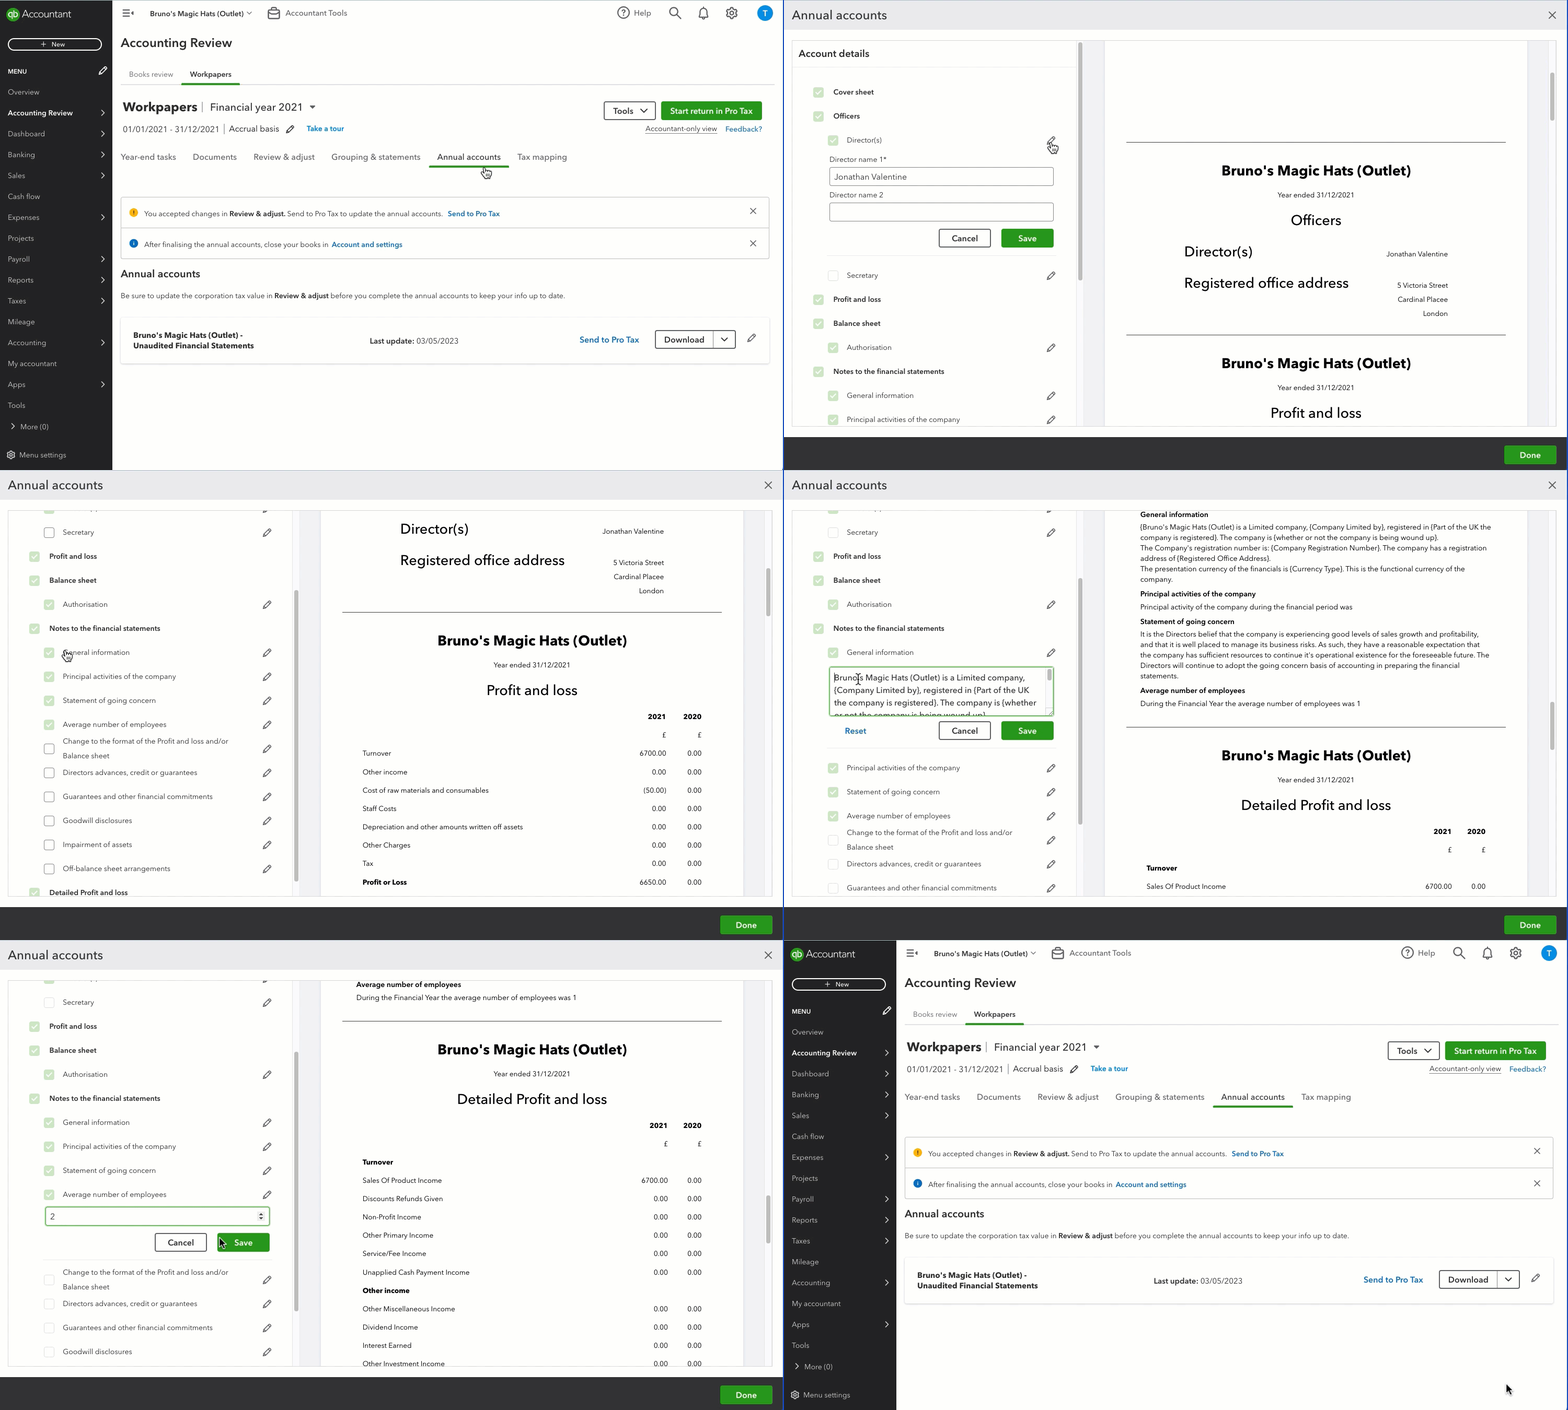
- Select the Annual accounts tab.
- Next to the annual account for the current tax year, select the ✏️pencil icon. This will open a form where you can review and edit the account details.
- Review each line individually for accuracy. Note, preselected items are mandatory fields.
- Select ✏️ Edit to make changes to the following:
- Directors
- Authorisation
- General information
- Principal activities of the company
- Statement of going concern
- Average number of employees
- Select Save. Any changes you make will show in the preview field.
- Once you’re happy with everything, select Done.
Step 6: Download your client's annual accounts
Download your client’s annual accounts in a PDF or iXBRL format if you want to submit to Companies House or just have them for your records.
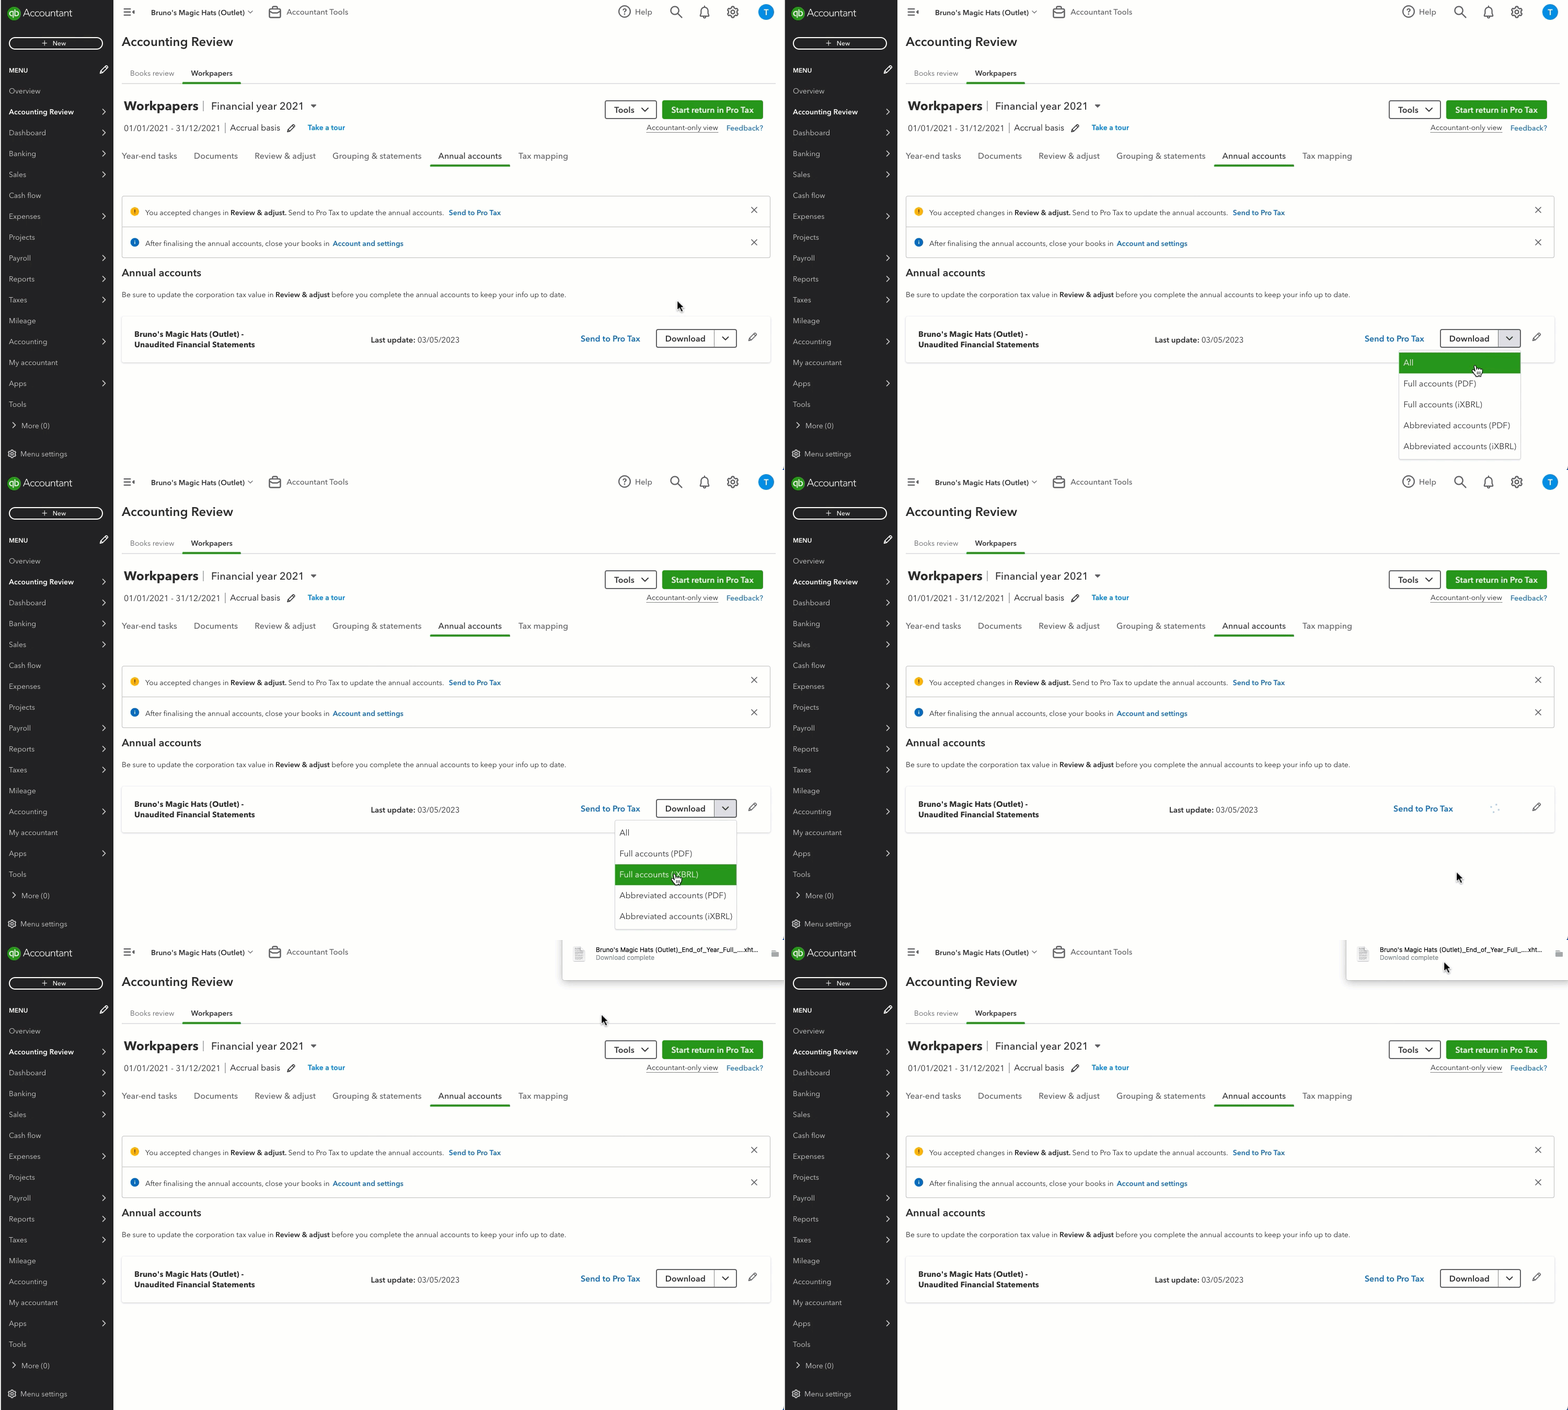
- Select the Download button.
- Select the file format you wish to download it as. This will save a file to your computer.
Step 7: Map accounts to tax lines
After carefully reviewing your client’s accounts, you’ll be able to assign them to specific lines on the tax form. To do so:
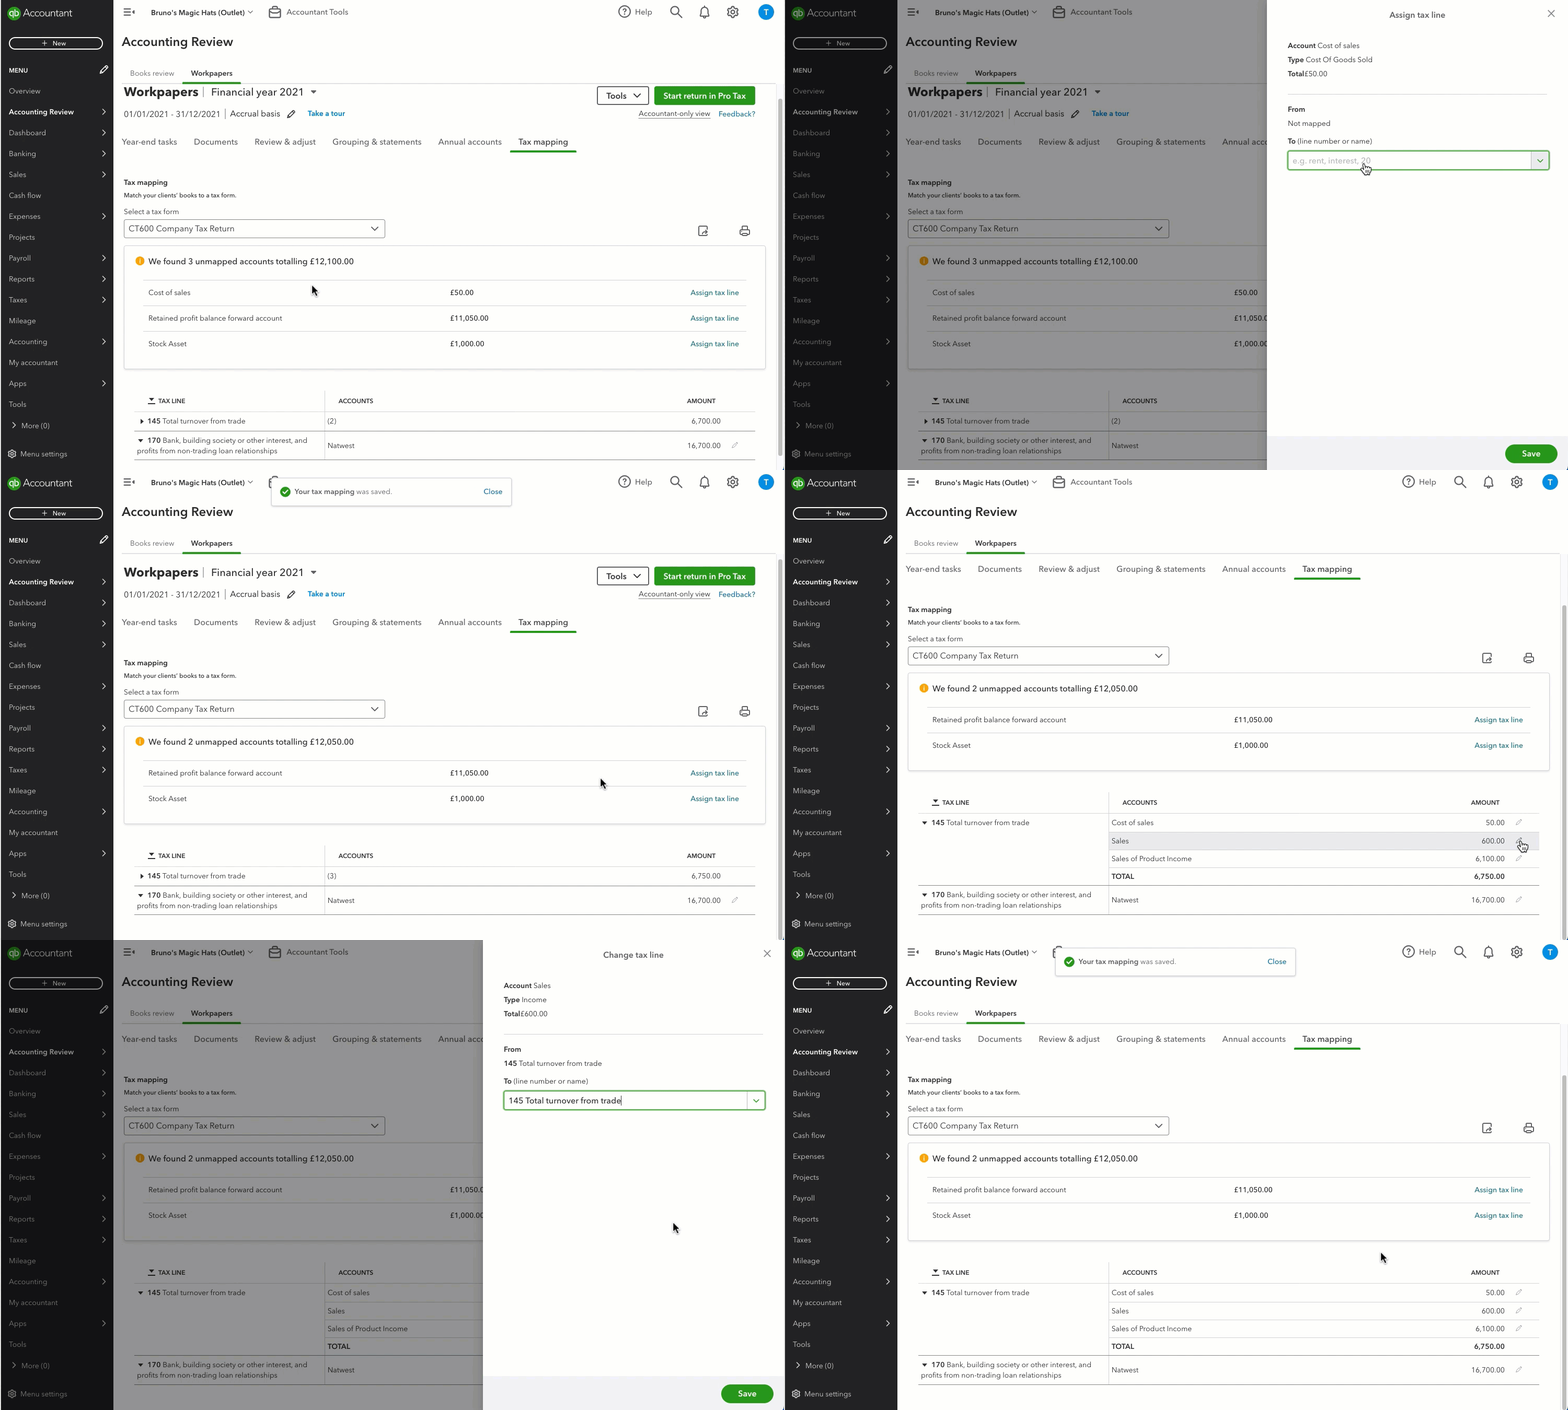
- Go to the Tax mapping tab.
- Check each tax line for accuracy.
- If you have any unmapped accounts, select Assign tax line.
- In the To (line number or name) field, choose the correct tax line for the account.
- Select Save.
Do a final review of each tax line to make sure it’s accurate and there aren’t any mistakes. If you need to make changes, select the ✏️pencil icon next to the tax line and make the changes.
Step 8: Prepare a return in Pro Tax
Now that your annual accounts are ready, it's time to prepare your tax return. You can import this data into Pro Tax. The Pro Tax feature helps you prepare, review and file your CT600 tax return to HMRC.
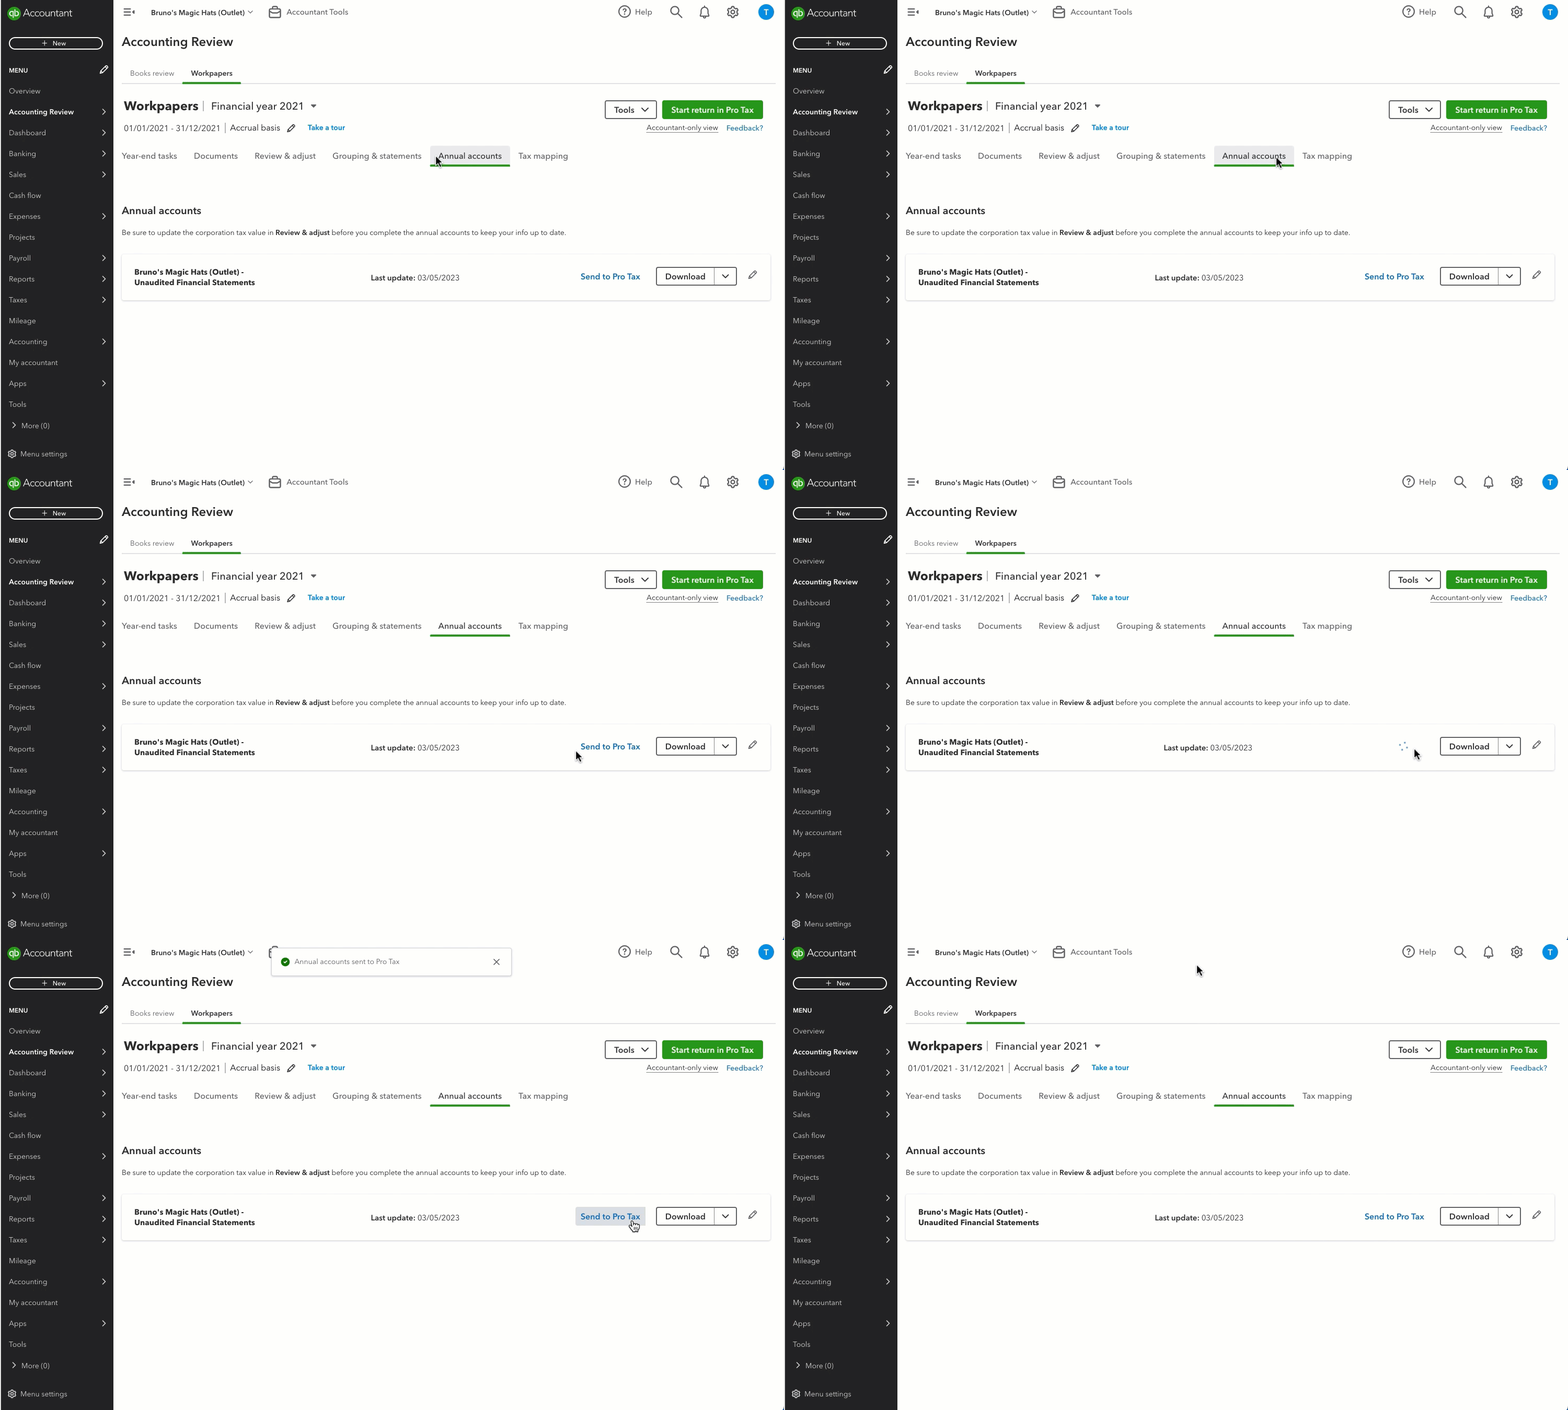
- Go to the Annual accounts tab.
- Next to the annual account, select Send to Pro Tax.
- Then, follow this helpful article to file your Corporation Tax return (CT600 form).
More help
Looking to fix your submissions issues? Try these tips.
Sign in now for personalized help
See articles customized for your product and join our large community of QuickBooks users.
More like this
- Add accountant users in QuickBooks Onlineby QuickBooks•382•Updated May 28, 2024
- Make adjusting journal entries in QuickBooks Online Accountantby QuickBooks•180•Updated June 04, 2024
- Add clients to QuickBooks Online Accountantby QuickBooks•66•Updated 4 hours ago
- Write off invoices in QuickBooks Online Accountantby QuickBooks•39•Updated 4 weeks ago
